
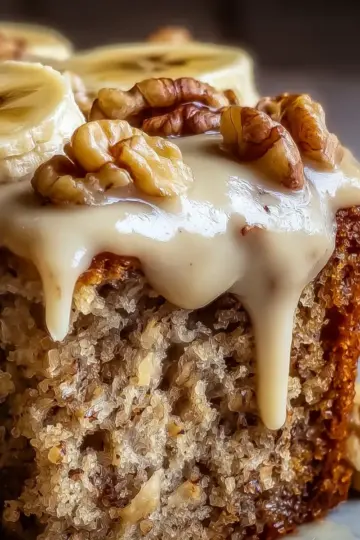
Introduction to Mini Cannoli Cups
Imagine coming home after a long day at work, craving something sweet yet sophisticated. That’s where mini cannoli cups come to the rescue. These delightful little treats pack all the creamy, dreamy goodness of traditional cannoli without the fuss. Picture crispy pastry cups filled with a luscious blend of ricotta and cream cheese, dotted with mini chocolate chips. They’re bite-sized, making them perfect for a quick indulgence or a charming dessert at your next gathering.
For young professionals juggling busy schedules, mini cannoli cups offer the ideal combination of convenience and indulgence. They can be whipped up quickly and stored in the fridge, making them a great snack option whether you're tackling deadlines or unwinding after a hectic day. Additionally, they’re a fantastic choice for casual dinner parties, allowing you to impress friends with something homemade without spending all day in the kitchen.
Plus, their mini size means you can savor a delectable bite without overdoing it—perfect for the health-conscious sweet tooth! Curious about how to make these delightful morsels? Let’s dive into the recipe and get started on your new favorite dessert!

Ingredients for Mini Cannoli Cups
Creating delightful mini cannoli cups is a simple yet rewarding process. Here's a breakdown of what you'll need for each component:
Filling Ingredients
To achieve that rich, creamy filling, gather the following:
- 8 oz ricotta cheese: The main ingredient for that authentic flavor.
- 4 oz cream cheese: Softened to add smoothness.
- 1 cup powdered sugar: For sweetness; ensure it’s well whisked to avoid lumps.
- 1 teaspoon vanilla extract: For a hint of warmth.
- ½ teaspoon lemon zest: Adds a fresh, zesty kick.
- 2 teaspoon fresh lemon juice: Brightens the flavor profile.
- ½ cup mini chocolate chips: Because who can resist chocolate?
Cup Ingredients
For the crunchy crust, you'll need:
- 2 store-bought pie crusts: Quick and convenient.
- 1 large egg: Beaten, for a golden glaze.
- 2 tablespoon granulated sugar: Sweetness for crust topping.
- 1 teaspoon ground cinnamon: Adds a warm, aromatic twist.
Garnish Ingredients
Finally, to make your mini cannoli cups visually stunning, you can use:
- Additional mini chocolate chips: For that extra chocolaty goodness.
- Powdered sugar for dusting: A touch of sweetness and a beautiful finish.
Now that you have all the ingredients lined up, you're just a few steps away from serving up these delicious bites! Happy baking!
Preparing Mini Cannoli Cups
Making mini cannoli cups is a delightful way to bring a taste of Italy into your home kitchen without all the fuss. These bite-sized treats not only satisfy your sweet tooth but are also incredibly easy to prepare. Let’s dive into the steps!
Step 1: Prepare the Filling
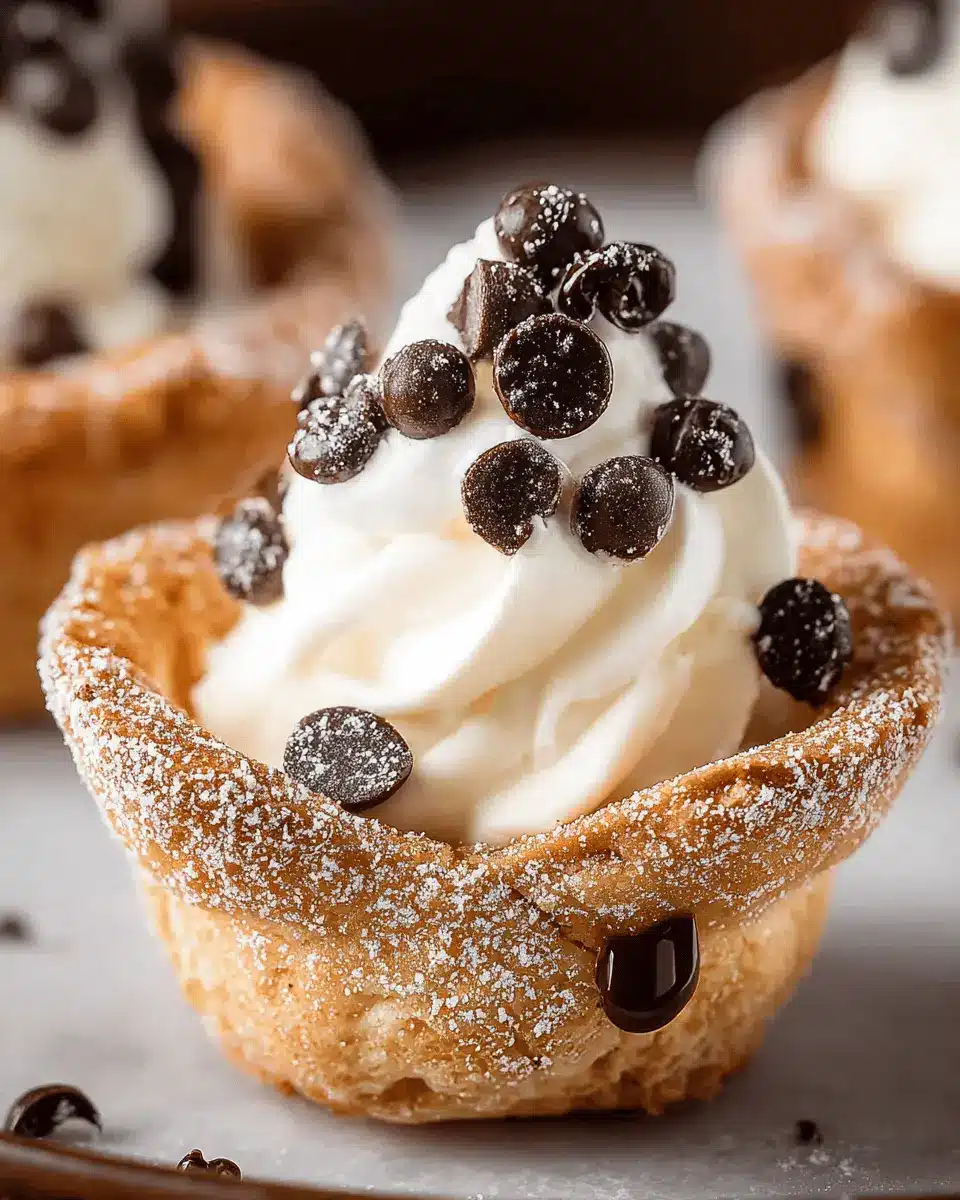
The filling is where the magic happens! Start by draining 8 oz of ricotta cheese using a cheesecloth or fine mesh sieve. This step ensures your filling is creamy without being watery. Once drained, combine the ricotta with 4 oz of softened cream cheese, 1 cup of powdered sugar, 1 teaspoon of vanilla extract, ½ teaspoon of lemon zest, and 2 teaspoon of fresh lemon juice in a mixing bowl. You want to use a hand mixer to blend these together until smooth. Finally, gently fold in ½ cup of mini chocolate chips for that classic cannoli taste. Cover the mixture and let it chill in the refrigerator while you work on the crusts—this step enhances the flavor!
Step 2: Make the Pie Crust Cups
Next, it’s time to create the cups that will hold your delicious filling. Roll out two store-bought pie crusts on a lightly floured surface. Using a 2-inch round cutter (like a biscuit cutter or even a glass), cut out circles from the pie crust. Gently press each circle into your greased mini muffin pan, shaping them into little cups that are ready for baking.
Brush the insides of these cups with a beaten large egg to give them a beautiful golden color while baking. For an extra layer of flavor, sprinkle a mix of 2 tablespoon of granulated sugar and 1 teaspoon of ground cinnamon over the cups. This aromatic touch is what sets your mini cannoli cups apart!
Step 3: Bake the Crust Cups
Now that your cups are formed and flavored, pop them into the preheated oven at 375°F. Bake them for about 10-12 minutes, or until they turn a delicious golden brown. When ready, remove them from the oven and let them cool completely in the pan. This cooling step is crucial, as it helps the crusts firm up.
Step 4: Assemble the Mini Cannoli Cups
Once your crusts are cool, it’s time to fill them with that wonderful ricotta mixture you prepared earlier. You can use a piping bag for a clean and professional look, but a small spoon works just fine if that’s what you have. Aim to fill each cup generously but without overfilling to avoid spills.
Step 5: Garnish and Serve
To make your mini cannoli cups even more irresistible, top each one with a few extra mini chocolate chips. A light dusting of powdered sugar right before serving adds a beautiful finish. These treats are perfect for sharing at gatherings, or keeping all to yourself—no judgment here!
And just like that, you’ve crafted delightful mini cannoli cups that are sure to impress. For more dessert inspiration, check out this article on Italian pastries to fuel your sweet tooth!
Variations on Mini Cannoli Cups
Mini cannoli cups are incredibly versatile, allowing you to get creative with different flavors. Here are some delicious variations you can try:
Chocolate Hazelnut Filling
For a rich twist, swap out the traditional filling for chocolate hazelnut spread. Simply combine 8 oz of ricotta with 4 oz of the spread, mix in a touch of powdered sugar, and fold in some crushed hazelnuts. This filling brings a decadently creamy texture that pairs beautifully with the crispness of the cups.
Seasonal Fruit Filling Options
Take advantage of seasonal fruits to lighten your mini cannoli cups! In spring, try fresh strawberries or raspberries blended into the ricotta. In fall, consider adding diced apples with a hint of cinnamon. This not only enhances the flavor but also adds a colorful touch to your dessert.
These variations can keep your mini cannoli cups exciting for any event!
Baking Notes for Mini Cannoli Cups
Tips for Perfect Crusts
Achieving that golden, crispy crust is essential for your mini cannoli cups. When rolling out your store-bought pie crusts, make sure to keep the thickness even. An extra sprinkle of flour can prevent sticking, ensuring a smooth cut with your round cutter. After pressing them into the muffin pans, remember to brush the insides with egg wash—this helps achieve that beautiful golden color and adds flavor.
Ensuring a Creamy Filling
For a silky smooth filling, it's crucial to drain the ricotta cheese well. Excess moisture can lead to a runny consistency. If you’re looking for an extra creamy touch, try adding a dash of whipped cream to your filling. Take your time while mixing to get that luscious texture; a hand mixer works wonders here!

Serving Suggestions for Mini Cannoli Cups
Pairing with Coffee or Tea
Mini cannoli cups are delightful on their own, but pairing them with a warm cup of coffee or a soothing herbal tea can elevate your dessert experience. Consider a rich espresso or a creamy cappuccino to complement the sweet, creamy filling. If you prefer tea, a fragrant chamomile or a zesty lemon ginger blends perfectly, enhancing the lemon notes in your cannoli.
Creative Serving Ideas
Looking to wow your guests? Try these fun serving suggestions:
- Mini Dessert Platters: Arrange your mini cannoli cups alongside other bite-sized treats for a visually appealing dessert table.
- Fresh Fruit Garnish: Serve with a side of fresh berries or citrus slices to balance the richness.
- Themed Decor: Use festive platters or seasonal decorations to make your dessert table pop!
Mix and match these ideas to create a delicious and inviting presentation for any occasion. Happy indulging!
Tips for Making Perfect Mini Cannoli Cups
Avoiding Soggy Crusts
To keep your mini cannoli cups crispy, it's essential to manage moisture effectively. After baking, let the cups cool completely in the pan before filling them. This step prevents steam buildup, which can make the crust soggy. Additionally, ensure that your ricotta is well-drained to avoid excess liquid. The drier the filling, the better the crust will hold up!
Storing Leftover Cups
If you have some mini cannoli cups left over (which is a rare feat!), it’s best to store the filling and crust separately to maintain freshness. Keep the cups in an airtight container at room temperature for 1-2 days, and refrigerate the filling for up to a week. When you’re ready to serve, simply assemble them for a delightful treat that tastes as good as freshly made!
For more enjoyable tip-filled baking sessions, check out this baking guide for essential techniques and advice!
Time details for Mini Cannoli Cups
Preparation Time
The mini cannoli cups require about 35 minutes of preparation. This includes measuring out your ingredients, mixing the filling, and forming the pie crust cups. Taking the time to prepare ensures that every bite is rich and flavorful.
Cooking Time
You'll need approximately 10 minutes for baking the cups in the oven. Keep an eye on them as they bake to achieve that perfect golden-brown color!
Total Time
In total, you should set aside 45 minutes to make these delightful treats from start to finish. With such a quick turnaround, these mini cannoli cups are perfect for spontaneous gatherings or sweet cravings!
For more inspiration on Italian desserts, consider checking out resources from the Italian Culinary Institute. Enjoy your mini cannoli cups!
Nutritional Information for Mini Cannoli Cups
If you're curious about the nutritional content of these delightful mini cannoli cups, you've come to the right place! Each mini treat is a perfect balance of flavor and indulgence.
Calories
Each mini cannoli cup contains approximately 79 calories, making them a sweet yet manageable treat for dessert lovers.
Protein
With 2 grams of protein per cup, these delicious morsels can add a bit of sustenance alongside the sweetness.
Carbohydrates
The mini cannoli cups have about 9 grams of carbohydrates, making them easy to enjoy without straying too far from your dietary goals.
To learn more about the nutritional benefits of cannoli or other dessert options, consider checking out resources like the USDA FoodData Central for comprehensive nutritional information.
FAQs about Mini Cannoli Cups
How long can I store mini cannoli cups?
You can store your mini cannoli cups in the refrigerator for up to 3 days. Just be sure to keep them sealed tightly in an airtight container to maintain their freshness. Keep in mind that the crust may lose some of its crispiness over time, so it's best to enjoy them shortly after assembling!
Can I use homemade crust instead of store-bought?
Absolutely! While store-bought pie crusts are convenient, using a homemade crust can elevate your mini cannoli cups to a whole new level. Just roll out your favorite pastry recipe, cut it to size, and follow the same baking instructions.
What can I substitute for ricotta cheese?
If you're looking for alternatives to ricotta cheese, you might consider using mascarpone or cottage cheese. Just ensure to drain any excess moisture to keep the filling creamy. Vegan options like cashew cream can also work well, offering a delicious twist for those avoiding dairy.
For more tips on filling substitutions, check out this guide on cheese alternatives for even more options!
Conclusion on Mini Cannoli Cups
These delightful mini cannoli cups are the perfect blend of creamy filling and crispy crust, making them an irresistible treat for any occasion. With their bite-sized charm and easy preparation, you’ll find yourself sharing these indulgent desserts with friends and family, or simply enjoying them all for yourself! Explore more sweet ideas here.

Mini Cannoli Cups
Equipment
- mini muffin pans
- mixing bowl
- hand mixer
- pastry brush
- cheesecloth or fine mesh sieve
Ingredients
Filling
- 8 oz ricotta cheese
- 4 oz cream cheese softened to room temperature
- 1 cup powdered sugar whisked to remove any lumps
- 1 teaspoon vanilla extract
- 0.5 teaspoon lemon zest
- 2 teaspoon lemon juice fresh is best
- 0.5 cup mini chocolate chips
Cups
- 2 store-bought pie crusts
- 1 large egg beaten
- 2 tablespoon granulated sugar
- 1 teaspoon ground cinnamon
Garnish
- additional mini chocolate chips
- additional powdered sugar for dusting
Instructions
Prepare
- Preheat oven to 375°F. Lightly spray two 24 cup mini muffin pans with cooking spray and set aside.
Drain ricotta
- Add 8 oz ricotta cheese to a cheesecloth (or a fine mesh sieve), and squeeze out the excess water. For a sieve, gently press down with a rubber spatula to remove the water.
Make filling
- To a mixing bowl, add the drained ricotta, 4 oz cream cheese, 1 cup powdered sugar, 1 teaspoon vanilla extract, ½ teaspoon lemon zest, and 2 teaspoon lemon juice.
- Use a hand mixer to beat until combined and creamy. Then use a rubber spatula to fold in ½ cup mini chocolate chips.
- Cover and refrigerate.
Make cups
- On a lightly floured surface, roll out 2 store-bought pie crusts. Use a 2 inch round cutter (like a cookie cutter or biscuit cutter - or even the rim of a drinking glass), to cut out circles from the crust.
- Gently press each circle into the muffin pan, forming a cup shape.
- Use a pastry brush to coat the insides of the cups with 1 large egg that's been beaten with a fork.
- Combine 2 tablespoon granulated sugar and 1 teaspoon ground cinnamon and sprinkle over the cups.
- Bake in preheated oven for 10-12 minutes, until golden brown and crispy.
- Remove from oven and let cool completely in the pan before removing.
Assemble
- Once the pie crusts are cooled, fill each cup with the ricotta filling (by using a piping bag or small spoon).
Garnish and serve
- Add a few extra chocolate chips to each cannoli cup and dust with powdered sugar. Serve and enjoy!
Leave a Reply