
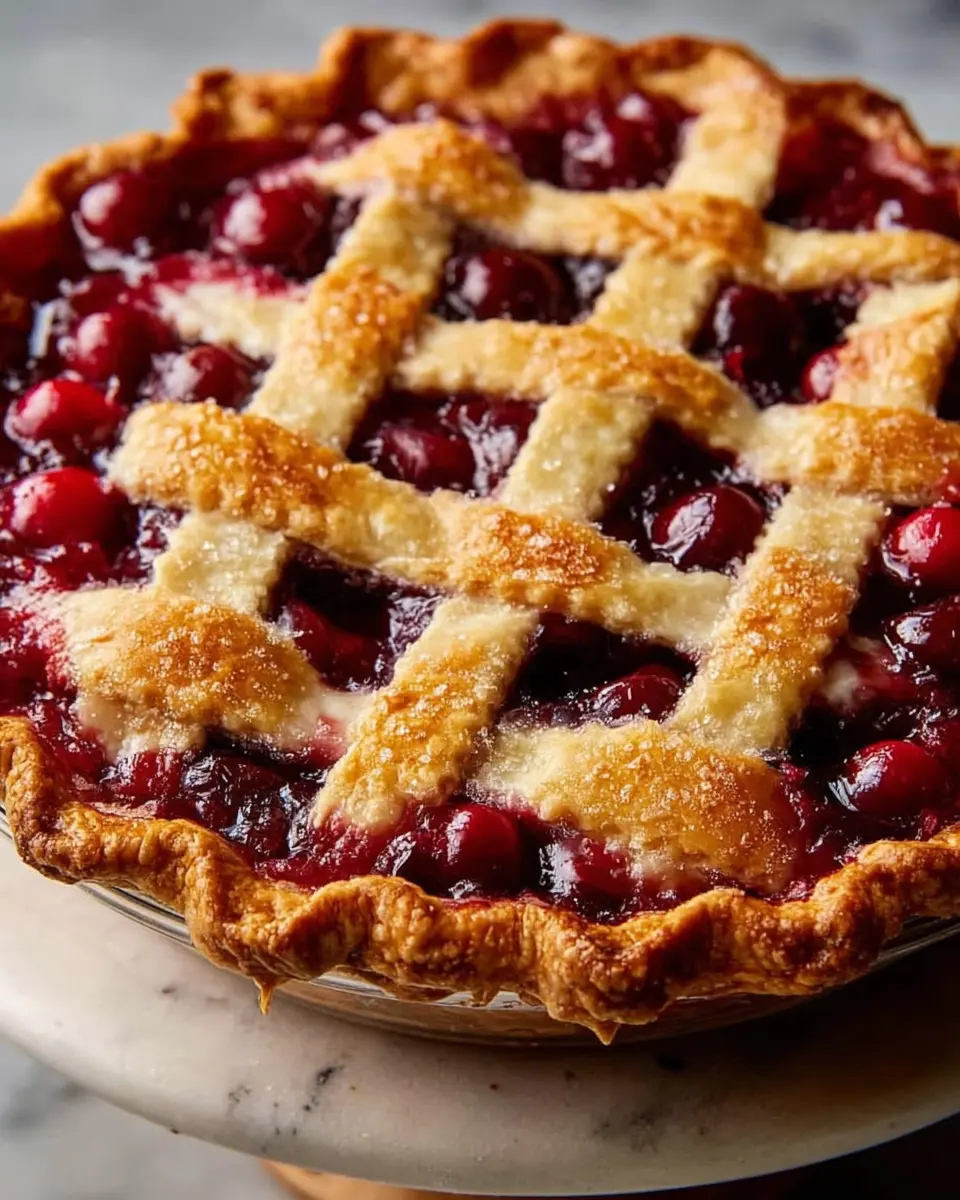
Introduction to Baked Fresh Cherry Pie
Why is homemade cherry pie a timeless favorite?
There's something undeniably enchanting about a homemade cherry pie. Perhaps it's the nostalgic aroma wafting through the kitchen as the pie bakes, evoking warm memories of family gatherings and summer picnics. The beauty of a Baked Fresh Cherry Pie Recipe lies not just in the deliciously sweet and tart filling but also in the love and care that goes into making it.
Cherry season brings a bounty of juicy, fresh fruit, and using them in your pie elevates the dessert from ordinary to extraordinary. According to the US Department of Agriculture, cherries are packed with antioxidants and vitamins, making this dessert just a little more rewarding!
Homemade cherry pie offers the perfect blend of crispy crust and luscious, bubbling filling. Unlike store-bought varieties, making it from scratch allows you to control the sweetness and flavor intensity, leaving you with a pie that's tailored to your taste. Plus, there's nothing quite like slicing into a freshly baked pie, the filling oozing out, as you share it among friends and family—each slice a piece of your heart and home. So, grab those cherries, and let’s dive into this delightful culinary adventure together!
Ingredients for Baked Fresh Cherry Pie
Pie Crust
The foundation of any great pie starts with a well-crafted crust. For this Baked Fresh Cherry Pie Recipe, you'll need:
- 1 recipe pastry for a 9-inch double crust (bottom)
- 1 recipe pastry for a 9-inch double crust (top)
Whether you opt for a homemade crust or a store-bought one, aim for a flaky texture that complements the cherry filling beautifully. If you're short on time, consider using pre-made pie dough, which can save you some hassle without sacrificing flavor.
Filling
The filling is where the magic happens! Here’s what you’ll need for a delicious cherry concoction:
- 4 tablespoons quick-cooking tapioca: This thickens the filling perfectly.
- ⅛ teaspoon salt: Just a pinch enhances the flavors.
- 1 cup white sugar: Balance the tartness of the cherries.
- 4 cups pitted cherries: Fresh cherries are key; sweet and tart varieties work great.
- ¼ teaspoon almond extract: Adds a lovely nutty flavor.
- ½ teaspoon vanilla extract: A classic that elevates the pie.
- 1 ½ tablespoons butter: For richness and depth.
Each ingredient plays a role in creating that nostalgic cherry pie experience. Fresh, seasonal cherries truly shine in this recipe. For some tips on choosing the best cherries, check out this guide to ensure you get the freshest fruit available!
Step-by-step preparation of Baked Fresh Cherry Pie
Creating the perfect Baked Fresh Cherry Pie is a delightful culinary adventure, and I’m here to guide you through each step. Whether you’re a novice baker or an experienced home cook, follow this simple guide to make a cherry pie that will impress your friends and family.
Preheat your oven
Begin by preheating your oven to 400 degrees Fahrenheit (205 degrees Celsius). This ensures that your pie bakes evenly and reaches that beautiful golden brown color everyone loves. While the oven heats up, place your bottom pie crust in a 9-inch pie pan. It’s essential to keep the top crust covered with a clean kitchen towel or plastic wrap to prevent it from drying out while you prepare the cherry filling. A proper temperature is key for a successful pie, so don’t skip this step!
Prepare the cherry filling
Now onto the star of the show—the cherries! In a large mixing bowl, combine 4 tablespoons of quick-cooking tapioca, ⅛ teaspoon of salt, 1 cup of white sugar, and 4 cups of pitted cherries. Don't forget to add ¼ teaspoon of almond extract and ½ teaspoon of vanilla extract, as they bring a wonderful depth to the flavor. Stir everything together and let it sit for about 15 minutes. This resting period allows the tapioca to soak up the cherry juices and helps to thicken the filling as it bakes—a little trick that ensures you’ll avoid a runny pie!
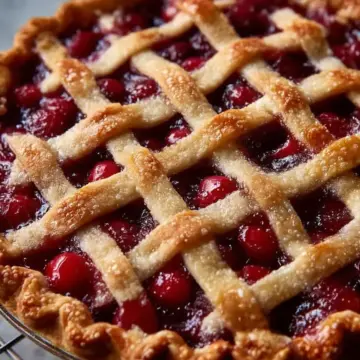
Assemble the pie crust
Once your cherries are ready, it’s time to fill the pie crust. Pour the cherry mixture evenly into the prepared bottom crust. To elevate the flavor, dot the filling with small pieces of 1 ½ tablespoons of butter. This extra richness makes a world of difference. Cover the pie with the top crust, sealing and fluting the edges to create a beautiful border. Remember to cut some vents into the top crust to allow steam to escape—this is a vital step to prevent a soggy bottom and ensures an even bake.
Make the top crust
With the cherry filling nestled snugly in the bottom crust, it’s important to create a well-done top crust that not only looks good but also adds to the flavor. Use a knife or kitchen scissors to cut decorative slits in the top crust. This not only allows steam to escape but also gives your pie a charming, rustic appearance.
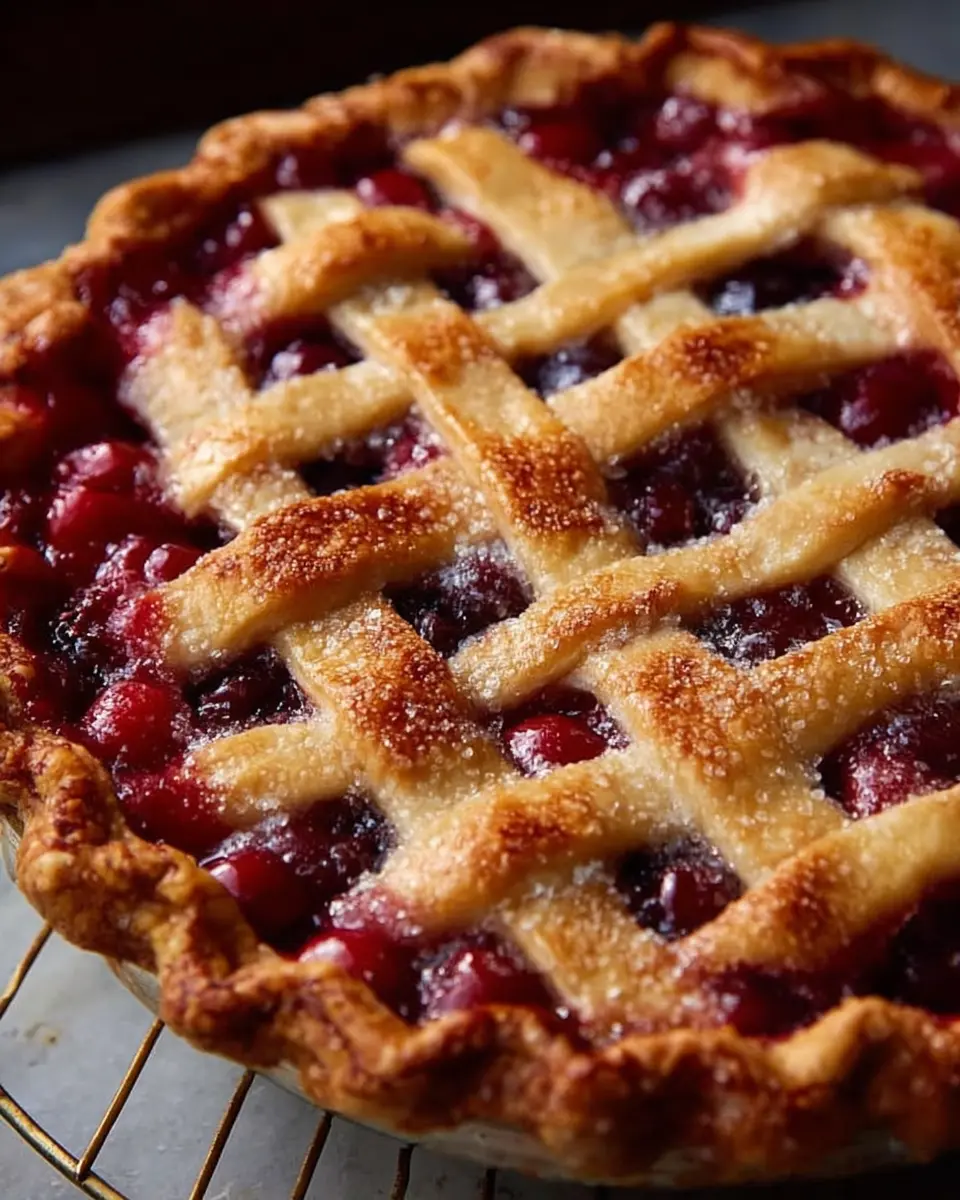
Bake the pie
Finally, place the filled pie on a foil-lined cookie sheet to catch any drips while baking—no one enjoys scrubbing their oven! Bake in the preheated oven for about 50 minutes. You’ll know it’s ready when the crust turns golden brown and the filling starts bubbling. Be patient and let your pie cool for several hours before slicing—it’s worth the wait to achieve neat, perfect slices!
By following these steps, you'll master the art of making a classic Baked Fresh Cherry Pie. This dessert is sure to bring smiles around the dinner table, and who knows, it might just become a family favorite! Consider pairing this pie with a scoop of vanilla ice cream or homemade whipped cream for the ultimate dessert experience. Happy baking!
Variations on Baked Fresh Cherry Pie
Cherry Pie with Almond Flavoring
Adding an almond twist to your Baked Fresh Cherry Pie Recipe enhances its nutty sweetness, creating a unique flavor profile. Simply include an extra ¼ teaspoon of pure almond extract in the cherry filling, and watch how it delights your taste buds. This variation complements the tartness of the cherries beautifully, making it a memorable dessert for gatherings.
Cherry Pie with a Crumble Topping
If you’re craving a crunchy contrast, a crumble topping is a delightful addition to the traditional pie crust. Mix ¾ cup of flour, ½ cup of brown sugar, and ½ cup of cold butter until crumbly, then sprinkle it over the cherry filling before baking. This topping not only adds texture but also a pleasant sweetness, making your pie irresistible. For more tips on variations, check out sources like King Arthur Baking.
Cooking tips and notes for Baked Fresh Cherry Pie
Critical steps for the perfect crust
To achieve a flaky, golden crust for your Baked Fresh Cherry Pie, start with cold ingredients. Cold butter and water help create those lovely layers. When rolling out the dough, work quickly to prevent it from warming up. Remember to cut steam vents in the top crust for even baking and to keep it from getting soggy. For added flavor, you can brush the crust with a bit of milk or egg wash before baking, giving it an appealing shine.
Importance of cooling time
Don't rush the cooling process! After baking, allow your cherry pie to sit for several hours. This crucial resting time lets the filling set properly, preventing those disappointingly runny slices. If you're eager to dig in, consider whipping up some homemade ice cream to pair with it, as the warm pie and cool ice cream is a match made in heaven! For tips on making ice cream, you can check out this guide on homemade ice cream.
Enjoy your baking adventure!

Serving suggestions for Baked Fresh Cherry Pie
Pairing with ice cream
There's something simply delightful about a slice of Baked Fresh Cherry Pie with a scoop of vanilla ice cream. The cold, creamy texture of the ice cream compliments the warm, juicy cherries, creating a perfect balance. You can even explore different flavors, like almond or cinnamon, to elevate the dessert experience. Don't forget to drizzle some cherry syrup over the top for an extra touch!
Serving with whipped cream
For a lighter touch, consider topping your Baked Fresh Cherry Pie with a generous dollop of freshly whipped cream. The smooth, airy texture enhances the pie’s tartness, making every bite feel indulgent yet fresh. You can flavor the whipped cream with a hint of vanilla or even a sprinkle of powdered sugar to add a little sweetness. It's an elegant and simple way to elevate this classic dessert!
Experimenting with these toppings can transform your cherry pie into an impressive treat that’s sure to impress at any gathering!
Time Breakdown for Baked Fresh Cherry Pie
Preparation Time
The prep time for this scrumptious Baked Fresh Cherry Pie is about 20 minutes. This includes gathering all your ingredients and preparing the cherry filling.
Baking Time
Once your pie is filled and sealed, it's time to pop it in the oven! The baking time is approximately 50 minutes until the crust turns a beautiful golden brown.
Total Time
In total, you should set aside around 3 hours and 10 minutes for this delightful dessert. This allows for cooling time, ensuring the filling sets perfectly before slicing.
Need more baking tips or tricks? Check out this article on pie baking basics for all the essentials!
Nutritional Facts for Baked Fresh Cherry Pie
Calories
A single slice of this delightful Baked Fresh Cherry Pie Recipe typically contains around 250 calories. This makes it a satisfying yet indulgent choice for those sweet cravings while still being relatively manageable in terms of caloric intake.
Sugar Content
With about 18 grams of sugar per slice, this cherry pie captures the essence of sweet summer cherries. The balance of sweetness complements the tartness of the fruit, providing a delicious harmony that makes each bite irresistible.
Fiber Content
Each slice offers approximately 2 grams of dietary fiber, thanks to the cherries and pie crust. Fiber is essential for digestion and can help you feel fuller longer, making this pie not just a treat, but part of a balanced diet when enjoyed in moderation.
For more insights on the nutritional benefits of cherries, check out the USDA's FoodData Central. Understanding what’s in your dessert can help you appreciate it even more!
FAQ about Baked Fresh Cherry Pie
Can I use frozen cherries for this recipe?
Absolutely! If fresh cherries aren’t available, frozen cherries can be a great alternative for your Baked Fresh Cherry Pie Recipe. Just remember to thaw and drain them well before mixing with the other ingredients. This will help prevent excess moisture from making your filling too runny.
How do I prevent a soggy crust?
A soggy crust is a common concern when baking pies, but there are simple tricks to avoid it. Firstly, make sure to cut steam vents in your top crust, allowing steam to escape during baking. Additionally, pre-baking your crust for about 10 minutes before adding the filling can create a barrier, minimizing moisture absorption. You might also want to sprinkle a little cornstarch on the bottom crust before adding your cherry filling.
What can I substitute for tapioca?
If you don't have quick-cooking tapioca on hand, you can use cornstarch or all-purpose flour as a thickener in your cherry filling. Both options will work well, just be mindful of the quantities: typically, you’ll need about two tablespoons of cornstarch or flour for every four tablespoons of tapioca.
For more tips on thickening pie fillings, check out this comprehensive guide on cooking methods.
Conclusion on Baked Fresh Cherry Pie
In conclusion, this Baked Fresh Cherry Pie Recipe is a delightful way to celebrate the sweet and tart flavors of summer cherries. With a flaky crust and a luscious filling, it promises to be the star of your dessert table. Serve it warm with ice cream or enjoy it cold—either way, you can't go wrong! Don't miss the chance to impress your friends and family with this delicious classic. Happy baking!
For more dessert inspiration, check out AllRecipes or Taste of Home.
Baked Fresh Cherry Pie Recipe
Equipment
- 9-inch pie pan
- mixing bowl
- cookie sheet
Ingredients
Pie Crust
- 1 recipe pastry for a 9-inch double crust pie (bottom)
- 1 recipe pastry for a 9-inch double crust pie (top)
Filling
- 4 tablespoons quick-cooking tapioca
- ⅛ teaspoon salt
- 1 cup white sugar
- 4 cups pitted cherries
- ¼ teaspoon almond extract
- ½ teaspoon vanilla extract
- 1 ½ tablespoons butter
Instructions
Preparation
- Preheat your oven to 400 degrees Fahrenheit (205 degrees Celsius). Place the bottom pie crust in a 9-inch pie pan and keep the top crust covered to prevent it from drying out.
- In a large mixing bowl, combine the quick-cooking tapioca, salt, white sugar, pitted cherries, almond extract, and vanilla extract. Stir well and let the mixture stand for 15 minutes to allow the tapioca to absorb the cherry juices.
- Pour the cherry mixture evenly into the prepared bottom crust. Dot the top of the filling with small pieces of butter for added richness and flavor.
- Cover the pie with the top crust. Seal and flute the edges to secure the crust. Cut vents into the top crust to allow steam to escape during baking, which helps prevent sogginess.
- Place the filled pie on a foil-lined cookie sheet to catch any drips and keep your oven clean.
- Bake the pie in the preheated oven for approximately 50 minutes or until the crust turns a beautiful golden brown color and the filling is bubbling.
- Remove the pie from the oven and let it cool for several hours before slicing. This resting time allows the filling to set properly, making it easier to serve neat slices.


Leave a Reply