
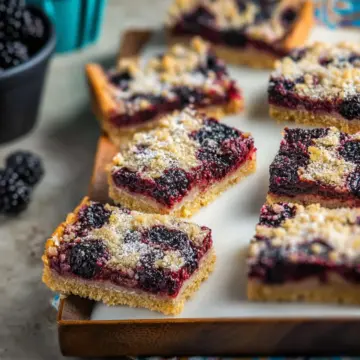
Introduction to Blackberry Pie Bars
What are Blackberry Pie Bars and why you'll love them?
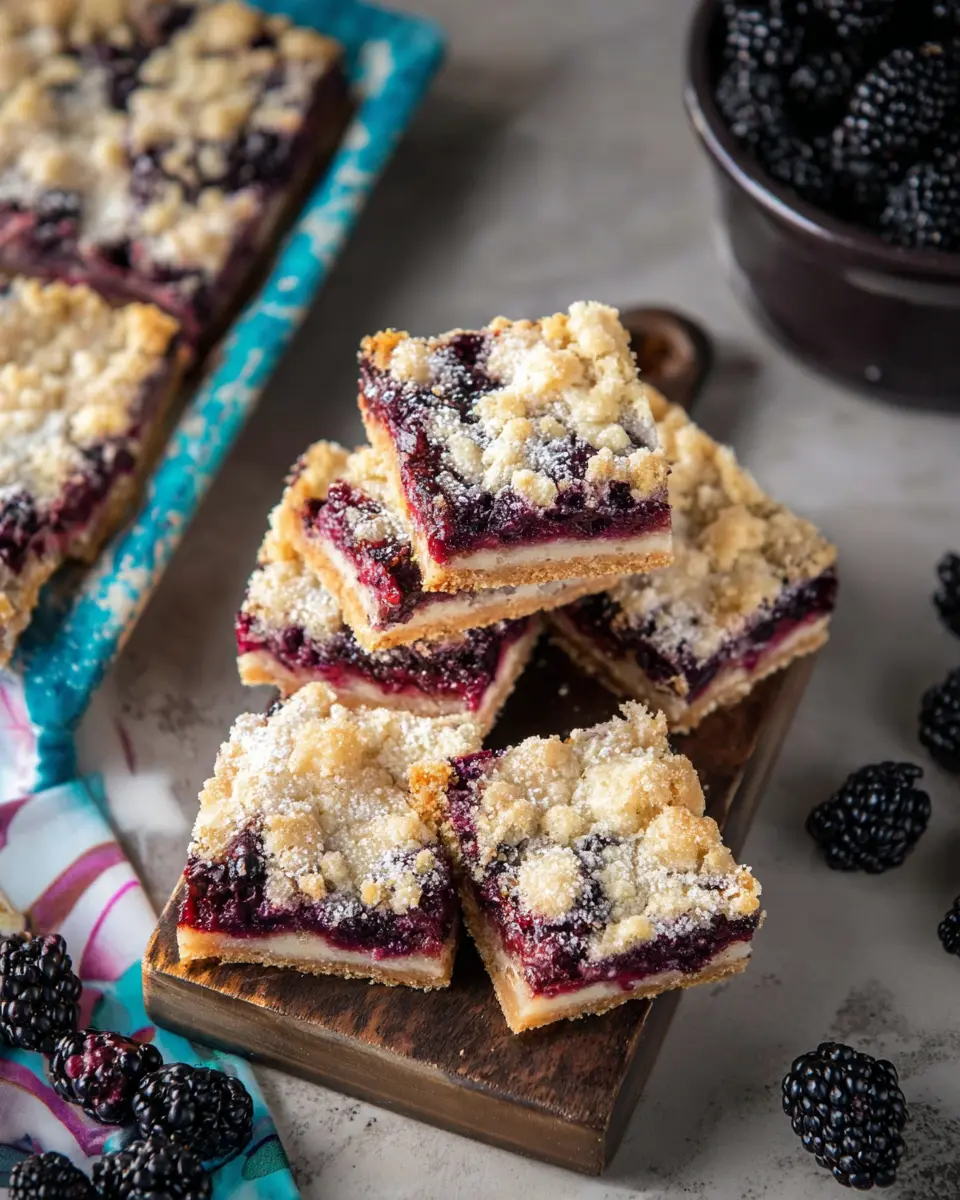
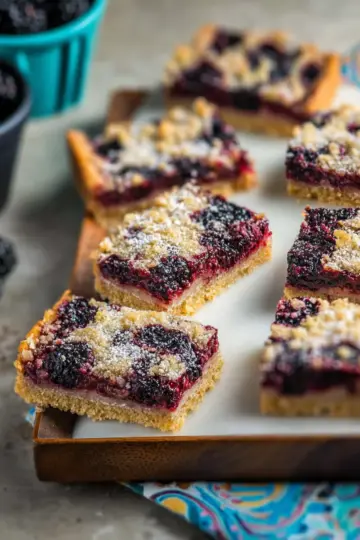
Blackberry Pie Bars are the perfect delicious blend of tart blackberries and sweet buttery crust, all condensed into a convenient bar form. If you’ve ever craved a slice of blackberry pie but dreaded the hassle of making a whole pie, these bars are your answer! They're super easy to whip up, taking just about 10 minutes to prepare and an hour of baking time, making them a delightful treat for any occasion.
What’s great about Blackberry Pie Bars is their versatility. You can enjoy them warm with a scoop of vanilla ice cream or let them cool and pack them for brunch or a picnic. You might even find yourself making a double batch since they disappear quickly!
One of the best things about these bars is how well they incorporate fresh blackberries, which are not only delicious but also packed with antioxidants and vitamins. Plus, making desserts from seasonal fruits is a fantastic way to support local farmers. If you're on the hunt for something easy yet impressive, look no further—these bars will surely become a staple in your baking repertoire!
Check out more about the health benefits of blackberries here.
Ingredients for Blackberry Pie Bars
When it comes to whipping up a delightful treat like Blackberry Pie Bars, understanding the right ingredients can make all the difference. Let’s dive into what you’ll need for both the crust and the filling!
Essential ingredients for the crust
Creating a rich, buttery crust sets the foundation for your dessert. Here’s what you need:
- 2 cups all-purpose flour: This gives the crust its structure.
- 1 cup granulated sugar: Adds sweetness that balances the tartness of the blackberries.
- ¼ teaspoon salt: Just a pinch to enhance flavors.
- 1 cup unsalted butter: Cold and cubed, it's the key to achieving that flaky texture loved in pie crusts.
Take a moment to consider sourcing high-quality butter; it can elevate your Blackberry Pie Bars to the next level.
Key ingredients for the filling
The filling is where the magic happens! Here are the main components:
- 2 large eggs: They help bind everything together.
- ¾ cup granulated sugar: Essential for that sweet, inviting taste.
- ⅔ cup sour cream: This adds creaminess and depth to the flavor.
- ½ cup all-purpose flour: Thickens the filling perfectly.
- 1 ½ tablespoons lime juice & zest: These brighten up the flavors beautifully.
- 4 cups fresh blackberries: The star of your dessert! Opt for ripe, juicy ones for the best taste.
For an added layer of flavor, check out tips from experts at The Berry Patch, who emphasize the importance of fresh ingredients.
With these ingredients, you're well on your way to creating Blackberry Pie Bars that everyone will rave about! Happy baking!
Step-by-Step Preparation of Blackberry Pie Bars
Creating delicious Blackberry Pie Bars is easier than you might think! This simple recipe will guide you step-by-step, ensuring that you enjoy every moment of the process and reward yourself with delicious treats. Let's dive into the making of these delightful bars!
Preheat the oven and prepare the baking dish
Start by preheating your oven to 350°F (175°C). This ensures your baking environment is just right for achieving that wonderful golden crust. While the oven heats up, grab a 9x9-inch square baking dish and grease it lightly. Using parchment paper can also be a great hack—it makes lifting the bars out of the pan so much easier once they’re cooled!
Make the crust mixture
For the crust, you’ll need an electric mixer fitted with a paddle attachment. Combine the dry ingredients: 2 cups of all-purpose flour, 1 cup of granulated sugar, and a pinch of salt. Add in 1 cup of cold, cubed unsalted butter. Mix these ingredients on medium speed until the mixture resembles dry crumbs. This crust is the foundation of your Blackberry Pie Bars, so take your time to get it right!
Reserve crust and bake the base
Now, it's time to reserve some of that crust! Set aside 1 ½ cups of the mixture for the topping later. Take the remaining dough and firmly press it into the bottom of your greased baking dish. Pop it in the oven for about 12 to 15 minutes until it's golden brown. This step is crucial as it creates a sturdy base for your luscious filling that’s about to come.
Prepare the luscious filling
While your crust is baking, let’s whip up the filling! In a large bowl, whisk together 2 large eggs. Add ¾ cup of granulated sugar, ⅔ cup of sour cream, and ½ cup of flour. Don’t forget to squeeze in 1 ½ tablespoons of fresh lime juice, adding a zesty kick! Finally, fold in around 4 cups of fresh blackberries. This fruity mixture will be the star of your Blackberry Pie Bars!
Assemble and spread the filling over the crust
Once the crust is done, remove it from the oven and let it cool a bit. Carefully spread the blackberry filling over the pre-baked crust. Make sure it’s evenly distributed; every bite deserves that berry goodness!
Top with reserved crust and bake
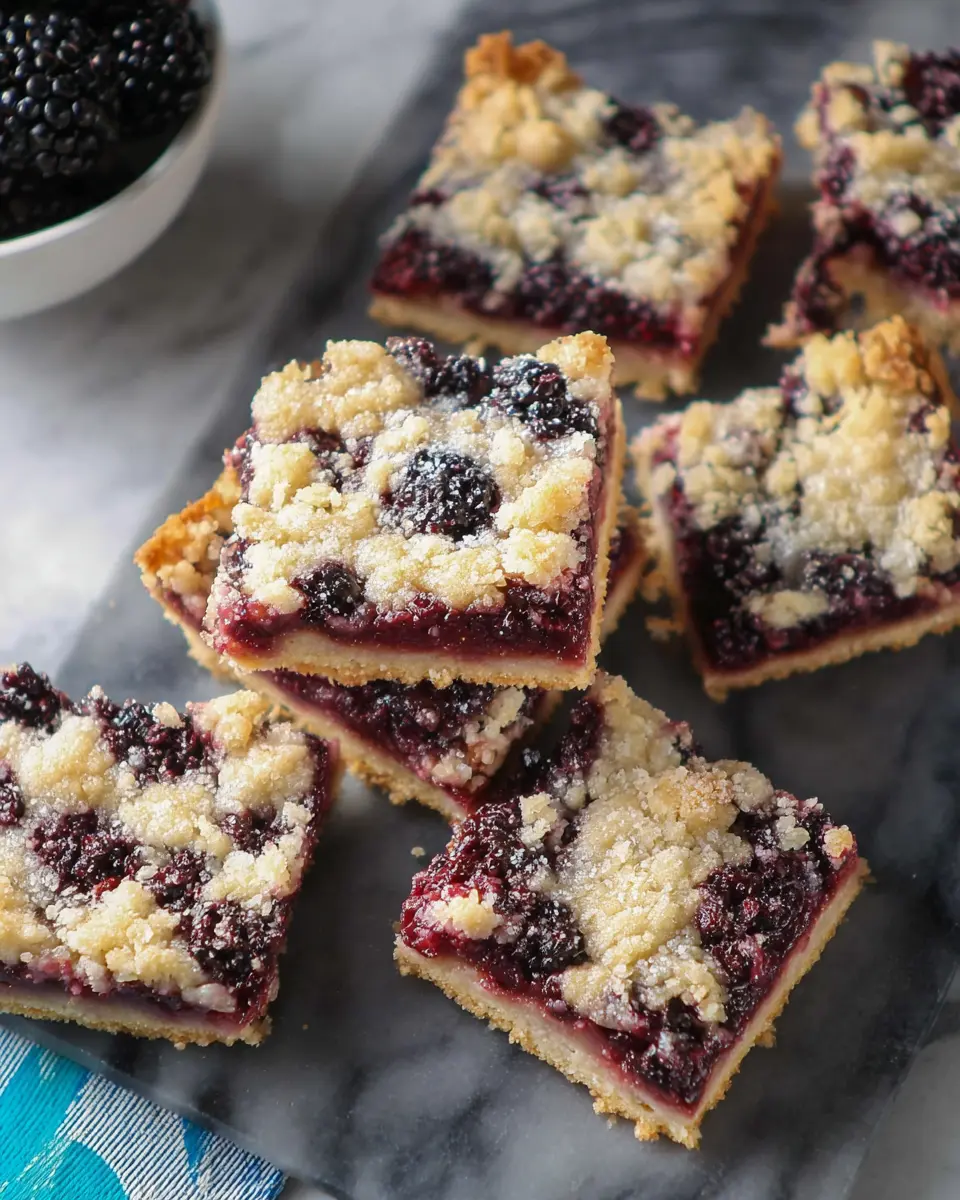
Now, remember that reserved crust? It’s time to sprinkle that over the tops of the filled baking dish! This will create a beautiful, crumbly texture that complements the juicy filling. Bake the entire dish for an additional 45 to 55 minutes until the top is lightly browned. Once done, allow it to cool for about an hour before slicing into perfect bars.
By following these simple steps, you’ll have a delightful batch of Blackberry Pie Bars that will surely impress family and friends. Share the love and enjoy this delicious treat!
Variations on Blackberry Pie Bars
Lemon zest addition for a citrus twist
If you're looking to elevate your Blackberry Pie Bars with a refreshing twist, try adding lemon zest to the filling. Just a teaspoon of lemon zest complements the blackberries beautifully, enhancing the overall flavor profile. Citrus adds brightness and balances the sweetness, making each bite even more delightful. Consider using fragrant lemon juice instead of lime for a different touch. For more tips on utilizing citrus in baking, check out resources from the American Institute for Cancer Research.
Swap blackberries with other berries
Not a fan of blackberries? No problem! Feel free to swap them out for other berries like raspberries, blueberries, or strawberries. Each berry will lend its unique flavor and sweetness, creating a new experience with your Blackberry Pie Bars. If you can't decide, mix a few varieties for a colorful, berry-packed treat! Be mindful of the berry size; smaller berries may work better for even baking. Need some inspiration? Check out this helpful guide on seasonal berries.
Experimenting with these variations is a fantastic way to make this recipe your own, so get creative!
Cooking Tips and Notes for Blackberry Pie Bars
Choosing the Best Blackberries
When making Blackberry Pie Bars, fresh blackberries truly elevate the flavor. Look for plump, juicy berries with a deep purple hue—these are usually the sweetest. Avoid any with signs of mold or mushiness. If local options are available, consider visiting a farmers' market; they'll often have the best selections. You can also check out resources like The Produce Moms for seasonal tips.
Storage Tips for Freshness
To keep your Blackberry Pie Bars fresh, store them in an airtight container at room temperature for up to three days. If you want to extend their life, slice and freeze them between layers of parchment paper for up to three months. Just thaw them at room temperature before enjoying! Having these bars on hand not only makes for a delightful snack but also brings a piece of summer back into your kitchen.
Serving Suggestions for Blackberry Pie Bars
Pairing with whipped cream or ice cream
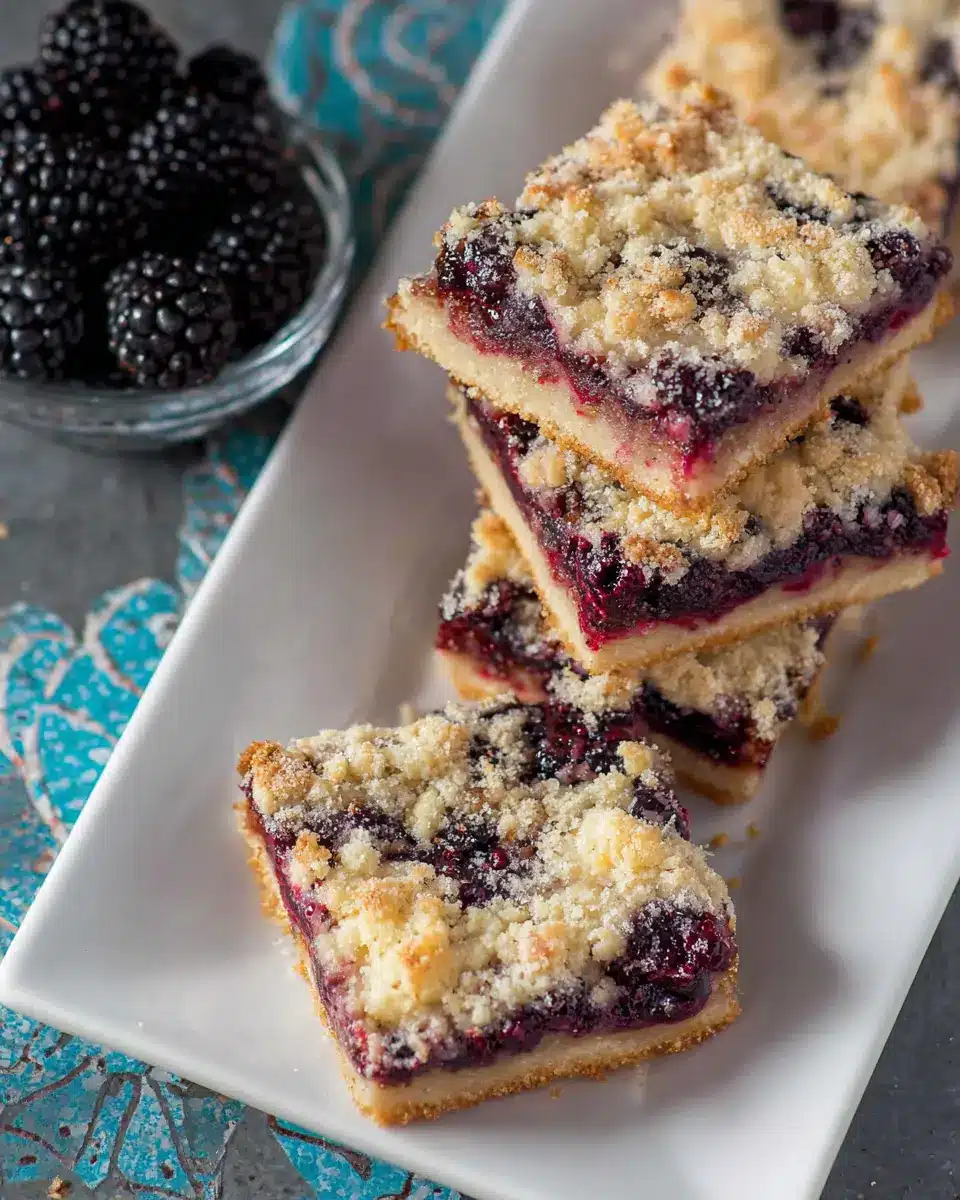
Elevate your Blackberry Pie Bars experience by serving them warm with a dollop of whipped cream or a scoop of vanilla ice cream. The cool creaminess adds a delightful contrast to the tart and sweet flavors of the blackberries. For a twist, consider drizzling some balsamic reduction over the top—this will enhance the berry notes and impress your guests!
Perfect for summer picnics or gatherings
Blackberry Pie Bars are not just delicious; they're a fantastic option for summer picnics or gatherings. They’re easy to transport and can be served with minimal fuss. Slice them into small squares for the perfect finger food, and pair with refreshing lemonade or iced tea. Plus, their vibrant color is sure to catch everyone's eye, making them a popular choice at any outdoor event. For more picnic ideas, check out The Spruce Eats.
Time Breakdown for Blackberry Pie Bars
When you're ready to whip up these delightful Blackberry Pie Bars, here’s how the time adds up.
Preparation Time
Get started with just 10 minutes of prep! This includes gathering your ingredients and mixing up the crust and filling.
Cooking Time
You'll need about 1 hour in the oven. That’s just enough time for the magic to happen, turning those fresh blackberries into a gooey, delicious filling.
Cooling Time
Finally, let your bars cool for 1 hour. Patience is key here, as this cooling period helps them set perfectly for slicing.
Want to dive deeper into baking techniques? Check out this baking basics resource for more tips.
With a total time of 2 hours and 10 minutes, you’ll be savoring a delightful dessert with friends and family in no time!
Nutritional Facts for Blackberry Pie Bars
Calories and Serving Size
These delightful Blackberry Pie Bars pack in about 303 calories per serving. Each bar offers a satisfying portion size, making it perfect for guilt-free indulgence during your afternoon snack or dessert time.
Key Nutrients per Serving
Each bar of these delicious treats brings you:
- Total Fat: 14.4g
- Carbohydrates: 41.2g
The combination of fresh blackberries not only enhances the flavor but also contributes dietary fiber and essential vitamins. For more detailed nutritional insights, check out resources like the USDA or Nutritional Data to see how these nourishing ingredients impact your diet. Enjoy every bite knowing you're treating yourself to something delicious yet wholesome!
FAQ about Blackberry Pie Bars
Can I freeze blackberry pie bars?
Absolutely! Blackberry Pie Bars freeze beautifully. Once they’ve completely cooled, simply cut them into squares and place them in an airtight container or a freezer-safe bag. They can last up to three months in the freezer. For best results, let them thaw in the refrigerator overnight before serving to maintain that delicious texture.
How do I make the crust gluten-free?
Making a gluten-free crust for your Blackberry Pie Bars is easier than you might think! Replace the all-purpose flour with a 1:1 gluten-free flour blend. Make sure the blend contains xanthan gum for better texture. Brands like Bob’s Red Mill or King Arthur Flour offer reliable options that will yield a scrumptious crust.
What are the best ways to enjoy leftovers?
Leftover Blackberry Pie Bars can be enjoyed in a variety of ways! Serve them warm with a scoop of vanilla ice cream or drizzle them with chocolate sauce for a decadent treat. Alternatively, enjoy them cold with a dollop of whipped cream for a refreshing snack. Store leftovers in the fridge for up to five days—if they last that long!
For additional tips, check out this guide on food storage for best practices.
Conclusion on Blackberry Pie Bars
Homemade Blackberry Pie Bars provide a delightful blend of tangy fruit and buttery crust that's hard to resist. Whether enjoyed during a cozy evening or shared with friends at a gathering, these bars encapsulate the essence of summer. Indulge in every bite and let the flavors inspire your baking adventures!
Summarizing the Joys of Homemade Blackberry Pie Bars
Making Blackberry Pie Bars is more than just a baking project; it’s an experience filled with sweet satisfaction. From the soft, tart blackberries bursting with flavor to the buttery crust that crumbles just right, these bars deliver joy in every bite. They’re an ideal dessert for any occasion—simple enough for a midweek treat yet elegant enough for gatherings. Plus, they're easy to store, making them a convenient option for meal prep or impromptu celebrations. Enjoy discovering new ways to savor these delectable bars!
Blackberry Pie Bars
Equipment
- Electric Mixer
- Baking dish
Ingredients
FOR THE CRUST
- 2 cups all-purpose flour
- 1 cup granulated sugar
- ¼ teaspoon salt
- 1 cup unsalted butter, cold cut into ½-inch cubes
FOR THE FILLING
- 2 large eggs
- ¾ cup granulated sugar
- ⅔ cup sour cream
- ½ cup all-purpose flour
- 1.5 tablespoons lime juice
- 1 unit lime zest of
- 1 pinch salt
- 4 cups fresh blackberries approx. 2 pints
Instructions
Instructions
- Preheat the oven to 350 °F. Grease a 9x9-inch square baking dish.
- To make the crust, combine the sugar, flour, salt, and butter in an electric mixer fitted with a paddle attachment. Beat the ingredients on medium speed until the mixture looks dry and crumbly.
- Reserve 1 ½ cups of the crust mixture to use as a topping. Press the remaining mixture into the bottom of the pan. Bake the crust for 12 to 15 minutes, until golden brown.
- While crust is cooling, prepare the filling. Whisk the eggs in a large bowl and add the sugar, sour cream, flour, lime juice and zest, and salt. Fold in the blackberries.
- Spread the mixture over the crust. Sprinkle the reserved crust mixture over the filling.
- Bake for 45 to 55 minutes, until the top is lightly browned. Cool for 1 hour before slicing and serving.

Leave a Reply