
Introduction to Creamy Strawberry Paletas
Why Creamy Strawberry Paletas Are a Game Changer for Summer Treats
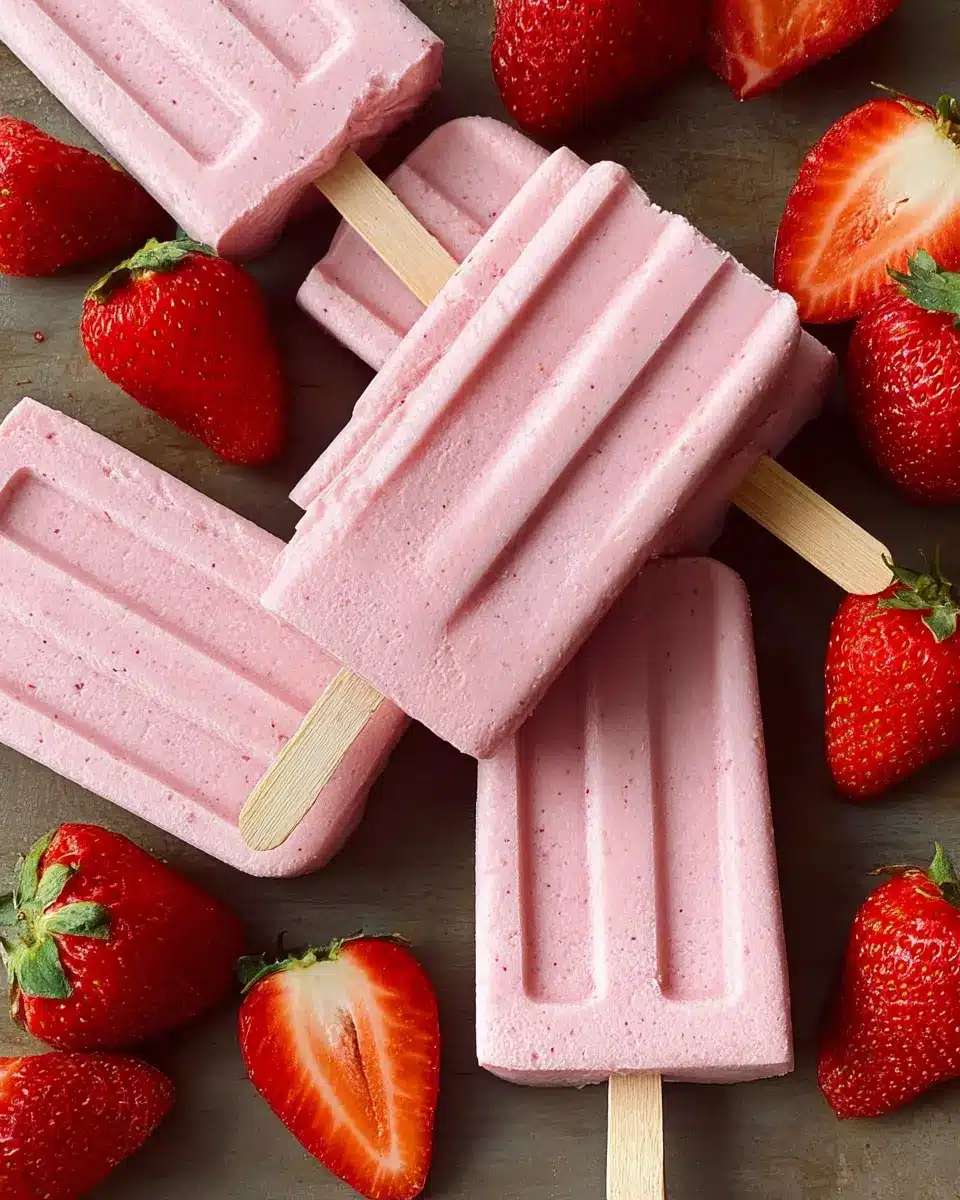
When the sun blazes down and the temperatures soar, nothing beats a refreshing treat to cool you off. Enter creamy strawberry paletas! These delightful popsicles are not your average frozen snacks; they offer a unique blend of smooth creaminess that sets them apart from traditional icy pops. Made with real strawberries and a rich cream base, these paletas deliver a deliciously indulgent yet refreshing experience that your taste buds will thank you for.
What makes them a game changer? Unlike typical ice pops that can be overly icy and hard, creamy strawberry paletas are velvety smooth and bursting with fresh flavor. The inclusion of ingredients like heavy cream and sweetened condensed milk provides a richness that elevates your snacking experience. Plus, they’re easy to make at home, requiring just a few simple ingredients and a little bit of patience while they freeze.
Whether you’re hosting a summer BBQ or just looking for a sweet treat to indulge in on a hot day, these creamy strawberry paletas are a must-try. Trust me, once you take that first creamy bite, you’ll want to share this recipe with all your friends!
Ingredients for Creamy Strawberry Paletas
Essential ingredients for a luscious paleta
To create these creamy strawberry paletas, you'll need a handful of simple yet essential ingredients that come together to make a refreshing treat. Here's what you'll want to gather:
- 1.5 lb fresh strawberries: The star of the show! Fresh, ripe strawberries provide the sweet, fruity flavor.
- ¼ cup sugar: To enhance the natural sweetness of the strawberries.
- ¼ teaspoon salt: A pinch helps balance flavors.
- ½ cup heavy whipping cream: This adds the creaminess characterizing paletas.
- ½ cup Mexican crema: Similar to crème fraîche, it contributes a rich, tangy flavor.
- 6-8 oz sweetened condensed milk: For a touch of decadence and additional sweetness.
- ¼ teaspoon cellulose gum or 2 teaspoon cornstarch: Acts as a stabilizer for that smooth texture.
These ingredients provide a delightful base for your creamy strawberry paletas.
Alternative ingredients for dietary preferences
Want to adjust the recipe for dietary needs? No problem! Here are a few alternatives:
- Dairy-Free Option: Substitute heavy cream and Mexican crema with coconut cream and a plant-based yogurt.
- Low-Sugar Variation: Use a sugar substitute like stevia or erythritol to cut down on sugar intake.
- Vegan-Friendly: Replace all dairy ingredients with almond or soy-based alternatives.
Feel free to mix and match based on your dietary preferences, and enjoy your homemade paletas guilt-free! For more inspiration, explore recipe variations on sites like Minimalist Baker or Cooking Light.
Preparing Creamy Strawberry Paletas
If you're looking for a refreshing treat that encapsulates the taste of summer, you can't go wrong with creamy strawberry paletas. These delightful popsicles are smooth, creamy, and packed with real strawberry flavor, making them a perfect dessert for warm days or any time you're craving something sweet. Here’s how to prepare your very own batch!
Step 1: Prepare the strawberries
Start by washing your fresh strawberries thoroughly. A quick soak in cold water for about 5 minutes works wonders! After soaking, give them a rinse under cold tap water to remove any dirt. Once cleaned, roughly chop the strawberries into manageable pieces. Consider saving a few small chunks to add to your popsicle molds for an extra fruity surprise later.
Step 2: Macerate the strawberries
Next up, it’s time to macerate your strawberries. This simple step involves covering your chopped strawberries with sugar and letting them sit for 20-30 minutes. The sugar draws out the natural juices of the strawberries, creating a wonderfully sweet syrup that enhances the flavor of your creamy strawberry paletas.
Step 3: Blend the strawberry puree
Once your strawberries have had time to mingle with the sugar, take them for a spin in the blender. Aim for a smooth puree—this should yield about 1.5 to 2 cups. If you prefer a chunkier texture, feel free to reserve some undisturbed strawberry pieces to fold in later!
Step 4: Combine the cream and stabilizer
In a separate bowl, combine heavy whipping cream, Mexican crema, sweetened condensed milk, salt, and your chosen stabilizer (either cellulose gum or cornstarch). With an electric mixer, blend this mixture for about a minute until it starts to thicken slightly. If you're using cornstarch, remember to heat it gently in a saucepan until it combines smoothly before adding it back to the mixture. This small step will ensure your paletas are creamy instead of icy!
Step 5: Mix in the strawberry puree
After combining your cream mixture, gently fold in the strawberry puree. Mix until just combined, taking care not to overdo it if you want those lovely strawberry swirls. If you're adding in those reserved strawberry chunks, now is the time to include them.
Step 6: Pour into molds
With your mixture ready, it's time to pour it into popsicle molds. As you do this, be mindful of where you place the popsicle sticks. Aim to center them in the mold, ensuring that they’re deep enough to hold but not so deep that they obstruct the pop’s texture.
Step 7: Freeze and release paletas
Finally, let your popsicles freeze for at least 8 hours. Once they’ve set, carefully run warm water over the molds for about 20 seconds to help loosen them. With a gentle wiggle, your creamy strawberry paletas should slide right out!
With a little planning and a handful of ingredients, you can enjoy homemade strawberry paletas that are perfect for any occasion! Plan to savor them within two weeks for the best experience, but they can technically linger a bit longer in the freezer if you need to stock up. Enjoy the blissful sweetness of these delightful pops!
Variations on Creamy Strawberry Paletas
Other Fruit Combinations for Delicious Paletas
While creamy strawberry paletas are heavenly, don’t hesitate to experiment with other fruits! Consider blending tropical flavors like mango, pineapple, or coconut for a refreshing twist. For berry lovers, blueberries, raspberries, or even a mixed berry medley can create vibrant color and flavor contrasts. You might even want to try pairing fruits, like strawberry-banana or peach-mango—each combo brings its own unique charm.
Dairy-Free Options for Creamy Paletas
If you're looking for a dairy-free alternative, you can easily replace the heavy cream and Mexican crema with coconut cream or any plant-based whipping cream. Using almond or oat milk helps you achieve a creamy consistency, while still delivering that rich flavor we adore in creamy strawberry paletas. Adding a touch of maple syrup or agave can enhance sweetness while maintaining a dairy-free delight. This way, everyone can enjoy these popsicles—no matter their dietary preferences!
Tips for Making Perfect Creamy Strawberry Paletas
Essential Tips for Texture and Creaminess
To achieve the ultimate creaminess in your creamy strawberry paletas, focus on the balance of ingredients. Using a combination of heavy whipping cream and Mexican crema will give you that luscious texture. Ensure your sweetened condensed milk is at room temperature for easier mixing. Don't skip the cellulose gum or cornstarch, as these act as stabilizers that prevent ice crystals, keeping your paletas ultra-smooth.
Common Mistakes to Avoid When Making Paletas
One common mistake is over-blending the strawberry mixture, which can lead to a watery texture. Aim for a smooth puree, but leave some strawberry chunks if you like that delightful contrast! Another pitfall is improper freezing time. Make sure to freeze your paletas for at least 8 hours to set completely; otherwise, they may fall apart when you try to remove them from the mold. Avoid these blunders, and you'll have beautifully crafted creamy strawberry paletas that everyone will love!
Serving Suggestions for Creamy Strawberry Paletas
Pairing Paletas with Toppings
Your creamy strawberry paletas are delicious on their own, but why not elevate them with some fun toppings? Try drizzling chocolate sauce or a tangy yogurt dressing over them for a delightful contrast. Additionally, crushed nuts or granola add a satisfying crunch. For a fresher approach, serve with a side of mint or basil to complement the strawberry flavor. You might also consider using organic honey or maple syrup as a natural sweetener.
Creative Presentation Ideas for Gatherings
Impress your guests by presenting your creamy strawberry paletas in a visually appealing way. Consider placing them in mason jars with fresh strawberries and mint leaves around the edges for a rustic touch. Using colorful ceramic plates or tiered cake stands can add an inviting flair to your dessert table. You could even create a “paleta bar” with various toppings and sauces laid out, allowing guests to customize their own. This interactive element not only looks beautiful but makes the experience engaging and memorable!
For more great serving ideas, check out The Kitchn for inspiration on creating stunning dessert displays.
Time Details for Creamy Strawberry Paletas
Planning to whip up these delicious creamy strawberry paletas? Here’s a quick glance at the time you'll need.
Preparation Time
You’ll spend about 15 minutes prepping this tasty treat. This includes washing and macerating the strawberries for maximum flavor.
Freezing Time
Once your mixture is ready, pop it in the freezer for at least 8 hours. The longer you freeze, the creamier the paletas will be!
Total Time
In total, you’re looking at 8 hours and 15 minutes from start to finish. Perfect for a hot day, and well worth the wait!
For more on freezing techniques, consider checking out resources from The Kitchn. Enjoy making your paletas!
Nutritional Information for Creamy Strawberry Paletas
Calories per paleta
Each creamy strawberry paleta contains approximately 140 calories. This makes them a delightful treat without derailing your healthy eating habits.
Key nutritional highlights
- Fruits First: Packed with fresh strawberries, these paletas contribute essential vitamins and antioxidants.
- Creamy Indulgence: The use of heavy cream and Mexican crema adds healthy fats, contributing to a smooth, satisfying texture.
- Moderate Sugar: While there's added sugar, it’s balanced with natural sweetness from the strawberries, making it a delicious guilt-free dessert.
For more detailed nutritional insights, consider checking resources like USDA’s FoodData Central to explore the benefits of the ingredients you’re enjoying. Remember, moderation is key, and these creamy strawberry paletas are perfect for satisfying your sweet tooth!
FAQs about Creamy Strawberry Paletas
Can I use frozen strawberries?
Absolutely! While fresh strawberries truly shine with flavor, using frozen strawberries is a convenient option. Just ensure they are thawed and well-drained to avoid excess moisture. Blending them into a creamy puree will yield delightful creamy strawberry paletas that are just as enjoyable!
How long can I store these paletas?
You can keep your creamy strawberry paletas in the freezer for up to two weeks. While they may last longer, they might develop ice crystals, affecting their creamy texture. To maintain their freshness, store them in an airtight container or wrap them individually.
What are some fun serving ideas for paletas?
Serving creamy strawberry paletas can be as fun as making them! Try:
- Dipping in chocolate: Melt some dark or white chocolate for a decadent touch.
- Adding toppings: Roll them in crushed nuts, coconut flakes, or sprinkles for a colorful twist.
- Pairing with fresh fruit: Serve alongside a refreshing fruit salad for an extra burst of flavor.
You can even create a fun dessert bar for guests—let your friends customize their paletas with various toppings!
Conclusion on Creamy Strawberry Paletas
Final thoughts on why you need to try making paletas at home
Making creamy strawberry paletas at home is not just about indulging in a sweet treat; it's about creating a delightful experience. You'll savor the vibrant flavors of fresh strawberries and the smooth richness of cream, all while keeping it healthy. Plus, it's a fun, creative process perfect for any occasion! So grab your ingredients, get experimental, and enjoy these delicious popsicles that are as satisfying to make as they are to eat. Trust us, once you try this recipe, store-bought options will be a thing of the past!
For more great recipes and tips, check out sites like Food Network for inspiration!
Creamy Strawberry Paletas
Equipment
- popsicle mold
Ingredients
- 1.5 lb fresh strawberries
- 0.25 cup sugar
- 0.25 teaspoon salt
- 0.5 cup heavy whipping cream
- 0.5 cup Mexican crema or creme fraiche
- 6-8 oz sweetened condensed milk
- 0.25 teaspoon cellulose gum or 2 teaspoon corn starch
Instructions
- Wash then soak strawberries in cold water for 5 minutes. Rinse under cold water again.
- Roughly chop the strawberries. You can also cut smaller chunks and set them aside to add into the popsicle mold later if you want.
- Cover the strawberries in sugar and let it sit for 20-30 minutes to macerate.
- Blend the macerated strawberries until you get a smooth puree. You should have about 1.5 to 2 cups of puree.
- Combine the heavy whipping cream, crema, sweetened condensed milk, salt, and cellulose gum with an electric mixer. Mix for about a minute or until it starts to thicken a bit.
- Alternatively: combine the heavy whipping cream, crema, salt, and sweetened condensed milk in a small saucepan. Once combined, turn on low heat. Stir and do not let it boil, then add about ¼ cup to a small bowl with the cornstarch and mix until smooth. Add it back to the saucepan and continue cooking over low heat until it thickens. Let it cool completely.
- Add the strawberry puree and mix until just combined, then fold in the strawberry chunks if using.
- Pour into your popsicle mold.
- Be mindful about the popsicle stick placement when you're sticking them into the mold. You don't want to push them all the way down.
- Freeze for at least 8 hours. To remove the paletas from the mold, place it in warm water for about 20 seconds to loosen.
- With a little wiggling and force, the popsicles will slide out perfectly. The sides of the silicone mold can be stretched to help loosen it up more.
- Store in the freezer for up to 2 weeks. They can be kept longer, but will start to form more ice crystals and get harder over time.

Leave a Reply