
Introduction to Grilled Cheese Roll Ups
Why Grilled Cheese Roll Ups are the Ultimate Comfort Food?
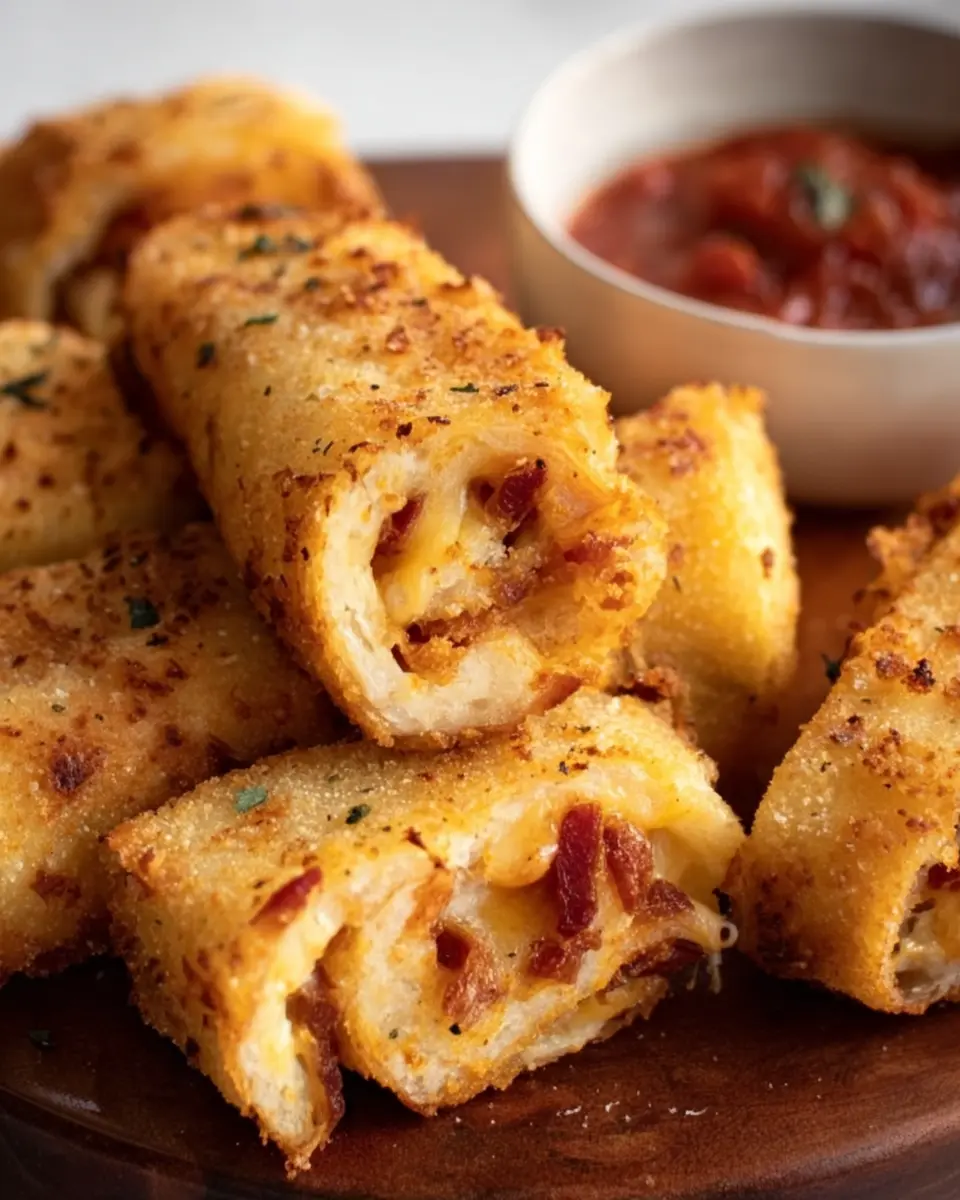
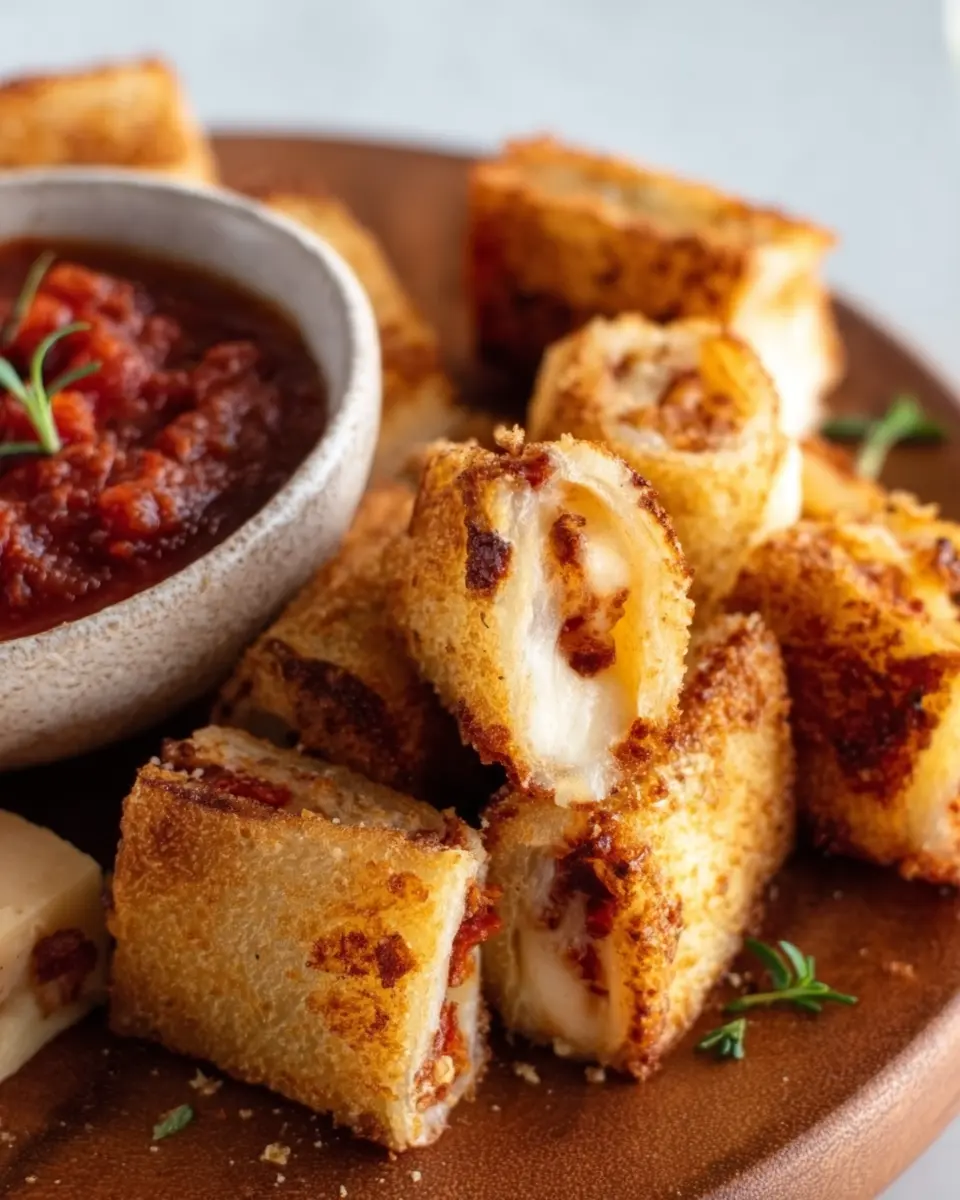
There's nothing quite like sinking your teeth into a warm, cheesy treat after a long day. Enter grilled cheese roll ups—the playful twist on a classic that combines nostalgia with modern convenience. These tasty morsels are perfect for busy professionals looking for a quick and satisfying meal. Picture this: crispy, buttery layers enveloped around melted cheese, ready for dipping in marinara sauce or a comforting tomato soup. With each bite, you not only indulge your taste buds but also experience a wave of comfort.
Why are they so beloved? Well, they’re easy to prepare and can be customized to fit any taste. Want a protein boost? Add some chicken ham or turkey bacon! Craving a little spice? Toss in some jalapeños. Studies show that comfort foods like grilled cheese are linked to emotional well-being, making these roll ups perfect for a cozy night in or a quick lunch. Plus, they’re fun to eat! Whether you're sharing them with friends or savoring them solo, there's no wrong way to enjoy this delightful dish. So grab those ingredients and get ready to roll into comfort food heaven!
Ingredients for Grilled Cheese Roll Ups
Essential Ingredients
Creating irresistible grilled cheese roll ups starts with simple, quality ingredients. Here’s what you’ll need:
- 8 slices of soft white bread: Choose a fresh loaf for the best texture and flavor.
- 1 cup of shredded cheddar cheese: Feel free to mix it up; mozzarella or a blend of your favorites can work beautifully too!
- 6 tablespoons of butter: Dividing this will ensure that the outside gets that perfect buttery crispness.
These pantry staples are enough to whip up a quick snack that’s not only satisfying but also a hit at gatherings!
Optional Dipping Sauces
While these grilled cheese roll ups are delicious on their own, pairing them with a dipping sauce can elevate the experience. Consider:
- Marinara sauce: Adds a punch of flavor and a touch of Italian flair.
- Tomato soup: A classic choice that takes you back to childhood.
- Ranch dressing: For those who love a creamy dip!
Experimenting with these sauces can turn your roll ups into a fun and interactive meal. What’s your favorite way to dip?
Step-by-Step Preparation for Grilled Cheese Roll Ups
When it comes to grilled cheese roll ups, nothing brings comfort and joy like a cheesy, crunchy treat. Let’s dive into the steps that will take you from ingredients to mouthwatering perfection!
Prepare the Bread
Start by gathering your ingredients, especially the soft white bread. This is key for achieving the right texture. First, trim the crusts off each slice. Crusts can make rolling difficult, and who wants to deal with that? Next, take a rolling pin and gently flatten each slice to about ⅛-inch thickness. This not only makes them more pliable but also allows for an even melt throughout the roll.
Roll the Cheese
Once your bread is ready, it's time to add the star of the show—cheese! Grab your shredded cheddar cheese (you can also mix in some pepper jack for a spicy kick). Sprinkle about 2 tablespoons of cheese onto the center of each rolled-out slice of bread, then carefully roll it up tightly. It's a fun process that reminds you of making tiny burritos! Make sure to roll them snugly to avoid any cheese leakage during cooking.
Melt the Butter
You can’t have that golden-brown crunch without plenty of butter! In a large non-stick sauté pan, melt 2 tablespoons of butter over medium heat. The aroma of melting butter is simply irresistible and sets the perfect stage for cooking your roll ups. Meanwhile, melt the remaining 4 tablespoons of butter in a shallow bowl for dipping your roll-ups before they hit the pan.
Sautéing the Roll Ups
After the butter is melted, it’s time to cook your grilled cheese roll ups! Dip each roll-up in the melted butter to coat nicely before transferring them to the sizzling pan. Sauté for about 1-2 minutes on each side, until they turn golden brown and achieve that buttery crispiness. Keep an eye on them; the smell of toasting bread and melting cheese might just be too tempting!
Serving Hot and Delicious
Once your roll ups are perfectly sautéed, transfer them to a serving platter. Now, for the best part: dipping! Serve them with marinara sauce, tomato soup, or ranch dressing for an extra flavor boost. Imagine cozying up on the couch with a warm bowl of soup and your delicious grilled cheese roll ups. It’s comfort food at its finest!
So there you have it, a step-by-step guide that transforms simple ingredients into a delightful meal. Quick, easy, and oh-so-satisfying, these roll ups are sure to be a hit at your next gathering or even a midweek dinner treat. Happy cooking!
Variations on Grilled Cheese Roll Ups
Adding Different Cheeses
One of the best things about grilled cheese roll ups is their versatility. While classic cheddar is a fan favorite, consider mixing in different cheeses for a flavor twist. Try mozzarella for a stringy, melty texture, or gouda for a rich, smoky taste. You could even blend cream cheese with your favorite shredded cheese for a creamy delight. Don’t be afraid to experiment—every cheese brings its own unique profile to the dish, making each bite a new experience!
Creative Fillings
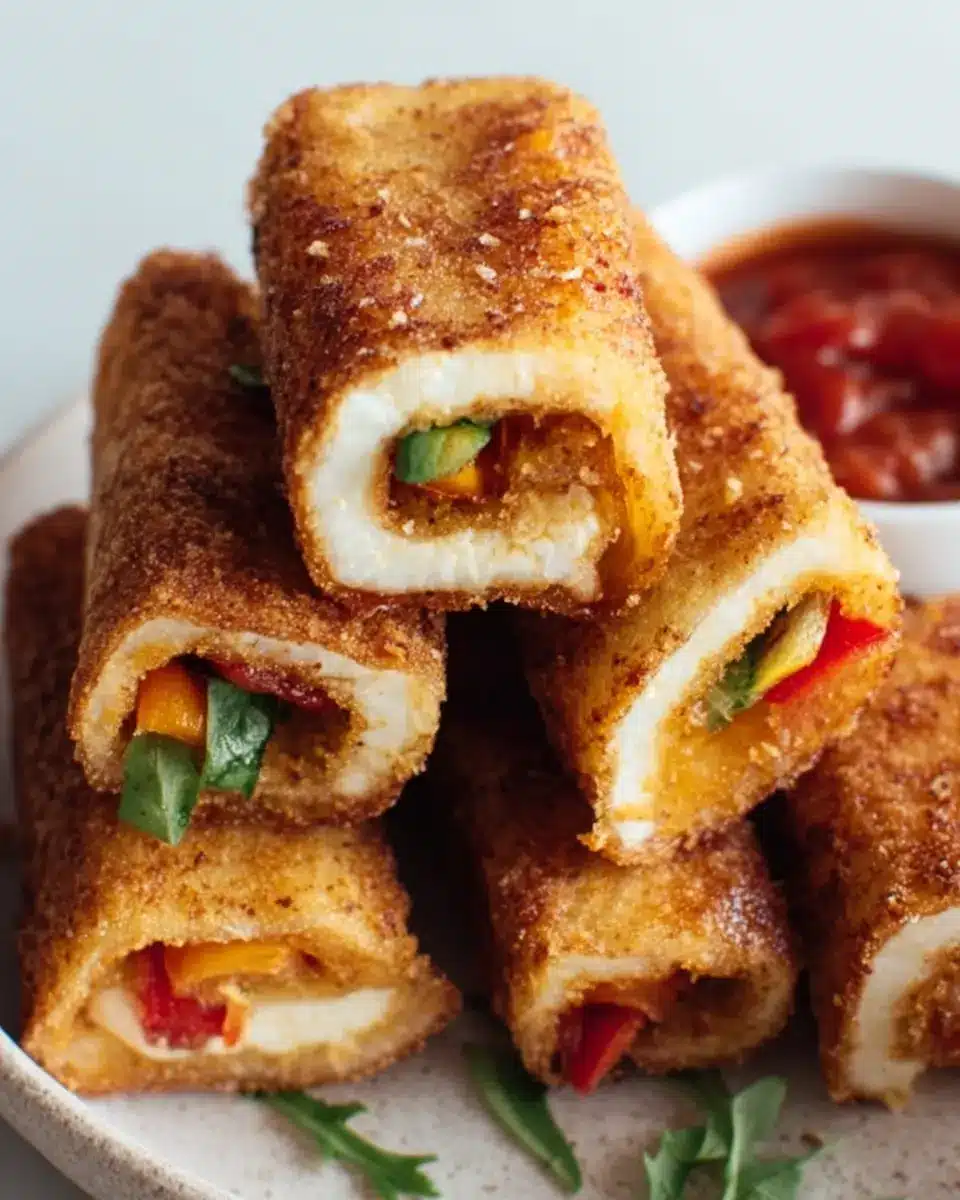
Why stop at cheese when you can enhance your grilled cheese roll ups with exciting fillings? Add slices of turkey bacon or chicken ham for a delightful protein boost. Want a vegetarian option? Include sautéed spinach, roasted red peppers, or even avocado for a creamy contrast. Add fresh herbs like basil or dill to brighten the flavors. The possibilities are endless, allowing you to customize these roll ups to suit your taste buds! For more ideas, check out this cheese pairing guide.
Cooking Tips and Notes for Grilled Cheese Roll Ups
Achieving Perfect Crispiness
To get those grilled cheese roll ups perfectly crispy, ensure your skillet is at the right temperature. If it’s too hot, the outside may burn before the cheese melts. A medium heat setting is ideal. Additionally, brushing the rolls with melted butter not only enhances flavor but also aids in achieving that golden crust. Flip them gently to avoid crushing the cheese-filled goodness inside.
Storage Tips for Leftovers
If you find yourself with leftover grilled cheese roll ups, store them in an airtight container in the fridge for up to 3 days. To reheat, pop them in the air fryer or toaster oven to regain that crispy exterior. Avoid the microwave if you can—no one likes a soggy roll up! For more storage hacks, check out this handy guide on food preservation.
Serving Suggestions for Grilled Cheese Roll Ups
Best Side Dishes to Pair
When it comes to pairing grilled cheese roll ups, think comfort! Classic tomato soup is always a hit—its creamy texture and tangy flavor create a perfect match. For something a bit heartier, consider serving them with a robust vegetable or chicken soup. You can also add a fresh side salad for a little crunch and color, perhaps tossed with a tangy vinaigrette. And let’s not forget crispy sweet potato fries or air-fried zucchini sticks, which can add a fun twist to your meal!
Creative Presentation Ideas
Serving grilled cheese roll ups doesn’t have to be boring! Try stacking them in a mason jar for a rustic look or laying them out in a fun pattern on a large wooden board. You might even drizzle sauces artfully around the plate. If you’re serving at a gathering, consider offering assorted dipping sauces in small bowls for an interactive experience. The combinations of colors and textures will elevate your dish from simple to stunning!
For more inspiration, check out this guide on food presentation, which provides excellent tips and tricks.
Time Breakdown for Grilled Cheese Roll Ups
When you're ready to whip up some grilled cheese roll ups, knowing the timing can help you seamlessly bring this tasty dish to life. Here's a quick glance at the time you'll need to set aside:
Preparation Time
Expect about 15 minutes for prep. This includes trimming the crusts, rolling the bread, and getting your ingredients ready.
Cooking Time
In just 5 minutes, you can have these roll ups sizzling on the stove until they're beautifully golden brown and crispy.
Total Time
With everything combined, you're looking at a quick and delightful 20 minutes from start to finish—a perfect option for a busy weekday dinner or a fun snack!
By efficiently managing your time, you can enjoy these cheesy delights without any hassle. If you're interested in expanding your grilled cheese repertoire, check out this resource on creative grilled cheese variations. Happy cooking!
Nutritional Facts for Grilled Cheese Roll Ups
Calories per Serving
Each serving of these delightful grilled cheese roll ups contains approximately 300 calories. This makes them a great option for a quick meal without straying too far from your dietary goals.
Protein Content
Packed with cheesy goodness, these roll ups offer about 10 grams of protein per serving. If you're looking for a tasty way to boost your protein intake, these are definitely a hit!
Carbohydrates
With around 30 grams of carbohydrates in each serving, these grilled cheese roll ups serve up that satisfying crunch and chewiness you love. Enjoy them guilt-free, especially when dipped in a nutritious tomato soup or marinara sauce!
FAQs about Grilled Cheese Roll Ups
What types of bread work best for roll ups?
When choosing bread for your grilled cheese roll ups, opt for soft varieties like white, whole wheat, or sourdough. These breads are forgiving and roll easily without tearing. For a twist, consider using tortillas for a unique take that pairs well with various fillings and dips. Experimenting with bread can add exciting flavors and textures!
Can I make Grilled Cheese Roll Ups ahead of time?
Yes, you can easily prepare grilled cheese roll ups ahead of time. For best results, assemble and roll them up, then refrigerate for a few hours or even overnight. When you’re ready to serve, simply sauté them as directed! This makes them a fantastic option for meal prep or entertaining guests.
What are some alternative dipping sauces?
While marinara sauce and tomato soup are classic choices for dipping your grilled cheese roll ups, there are plenty of alternatives you can try. Ranch dressing, hot sauce, or even a creamy avocado dip can elevate your experience. Don’t hesitate to explore flavors—your taste buds will thank you!
For more on creative dipping sauces, check out Serious Eats for some inspiration!
Conclusion on Grilled Cheese Roll Ups
Why You Should Try Making Them Today!
If you’re looking for a quick, satisfying meal, grilled cheese roll ups are a must-try! They capture the classic grilled cheese experience in a fun, portable format perfect for busy lifestyles. Plus, who can resist dipping them into a rich marinara sauce or creamy ranch dressing? Make these delicious bites today for an easy dinner or snack that everyone will love!
Explore more on creative cheese dishes here for even more culinary inspiration!

Grilled Cheese Roll Ups
Equipment
- Rolling Pin
- non-stick saute pan
- shallow bowl
- microwave
Ingredients
- 8 slices soft white bread
- 1 cup shredded cheddar cheese
- 6 tablespoons butter divided
- marinara sauce or tomato soup or ranch dressing for dipping, if desired
Instructions
- Trim the crusts from each slice of bread. Roll one slice out to about ⅛-inch thickness with a rolling pin. Sprinkle the rolled out slice with about 2 tablespoons shredded cheese. Roll up tightly. Repeat with remaining bread slices and shredded cheese.
- Place 2 tablespoons butter in a large non-stick saute pan and melt over medium heat.
- Melt remaining 4 tablespoons butter in a shallow bowl in the microwave. Dip one roll up at a time in the melted butter in the shallow bowl and then transfer to the saute pan. Allow roll ups to saute for 1-2 minutes per side until golden brown and buttery crisp on the outside. Remove to a serving platter.
- Serve with tomato sauce, tomato soup or ranch dressing for dipping, if desired.


Leave a Reply