
Introduction to Milk Bread Loaf
The Allure of Homemade Bread
There’s something magical about the aroma of freshly baked bread wafting through your home. The act of kneading dough can be incredibly therapeutic, giving you a break from the hustle and bustle of daily life. It’s a simple yet rewarding process that connects you to the age-old tradition of bread-making. Plus, who doesn’t love the taste of warm, fluffy bread slathered with butter?
Why Milk Bread is a Game Changer
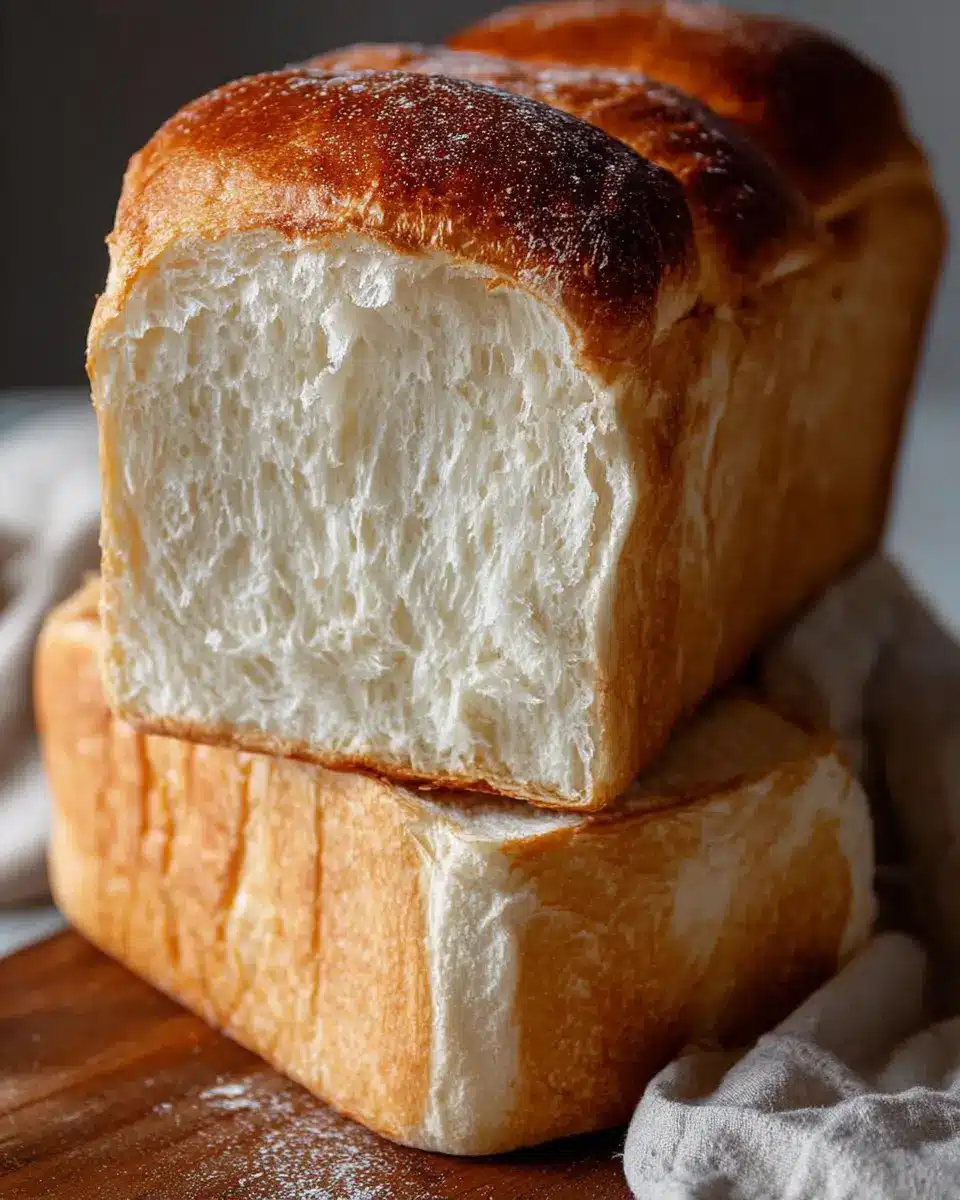
One type of bread that stands out in this world of endless varieties is milk bread loaf. It offers not just a softer texture but also a lovely sweetness due to the milk and sugar used in the recipe. This luscious bread is incredibly versatile; whether you use it for sandwiches or simply enjoy it with a cup of tea, it’s bound to elevate any meal. Its unique texture makes it beginner-friendly too, allowing even novice bakers to succeed on their first try.
A Little Personal Story About My First Homemade Loaf
I clearly remember the first time I decided to bake a milk bread loaf on a rainy Sunday afternoon. Armed with a simple recipe and a touch of optimism, I dove in headfirst. Watching the dough rise and transform was mesmerizing. When I finally pulled that golden loaf from the oven, I felt a sense of achievement that was hard to describe. That evening, with the warm bread in hand and a hot drink by my side, I knew homemade bread would become a regular part of my life. If I can do it, so can you!
Ready to embark on your milk bread adventure? Let's dive into the recipe!
Ingredients for Milk Bread Loaf
Essential ingredients for fluffy milk bread
Creating a delightful Milk Bread Loaf starts with a handful of essential ingredients that harmonize to produce a soft, airy texture. You’ll need:
- 500 g bread flour: This helps achieve that beautiful rise.
- 40 g sugar: A touch of sweetness enhances flavor and aids browning.
- 1½ tsps instant yeast: The magic worker that makes your bread rise.
- 225 g cold water: Hydration is key for development.
- 115 g cold milk: Adds richness and that appealing milky taste.
- 9 g sea salt: Balances flavors and strengthens the dough.
- 25 g unsalted butter: For a tender crumb and glossy crust.
The importance of using high-quality bread flour
Opting for a high-quality bread flour ensures your loaf has sufficient gluten formation, which is vital for achieving that coveted fluffiness. The protein content in bread flour makes it ideal for yeast-based recipes. Always check for strength—look for a flour that has at least 12% protein for the best results.
How each ingredient contributes to flavor and texture
Every ingredient you include plays a specific role:
- Bread flour: Provides structure.
- Sugar: Boosts caramelization for a lovely crust.
- Yeast: Produces carbon dioxide, creating air pockets that result in softness.
- Milk and butter: Offer rich flavors and tenderize the bread, making every bite divine.
As you mix and bake these ingredients together, you’re not just making bread—you’re creating a warm, welcoming experience to share with friends and family. For a deeper dive into the baking magic, check out resources like King Arthur Baking.
Preparing Milk Bread Loaf
Baking a Milk Bread Loaf might feel daunting at first, but with the right steps and some enthusiasm, you can create a deliciously fluffy loaf at home. Let’s take this journey together!
Gathering Your Equipment
Before diving into the mixing and kneading, ensure you have all your tools at hand. This not only streamlines the process but also makes baking more enjoyable. You’ll need:
- A loaf pan (10 x 5 inch)
- A stand mixer or a mixing bowl and a spatula if you prefer a more hands-on approach
Having everything ready allows you to focus on creating your Milk Bread Loaf rather than searching for that elusive measuring cup halfway through!
Mixing the Ingredients
Start by combining the core ingredients: 500 g of bread flour, 40 g of sugar, 1½ tsps of instant yeast, 225 g of cold water, and 115 g of cold milk. If you're unsure how much that is in cups, a kitchen scale is a baker's best friend. Mix these in your stand mixer on low speed until a dough forms.
Once mixed, let it rest for about 30 minutes. This step, known as the autolyse method, helps to hydrate the flour and improves dough texture. While you wait, let’s prepare that butter for later!
Kneading the Dough to Perfection
After the rest period, add in 9 g of sea salt and continue kneading for about one minute. Then, introduce 25 g of unsalted butter, cut into pieces. Kneading might take about 7-8 minutes until the dough passes the windowpane test, which means it stretches without tearing. Don’t worry if it feels a bit sticky; that’s perfectly normal!
The Art of the First Rise
Once your dough is nicely kneaded, form it into a ball and place it in a lightly greased bowl. Cover it up and find a warm, draft-free spot to let it rise for about one hour, until it almost doubles in size. This step is crucial for that ultimate fluffy texture — having patience here will pay off!
Shaping the Dough into Beautiful Loaves
After the first rise, gently transfer the dough onto a lightly floured surface. Divide it into three even pieces. Form each piece into a ball and let them rest under a damp towel for another 15 minutes.
Rolling out the dough into an oval shape, then rolling it back into a log, will give your Milk Bread Loaf its signature beautiful swirls. Repeat this process with all the pieces and place them in your greased loaf pan.
The Final Proof Before Baking
Cover your pan with greased plastic wrap and let the dough rise again until it fills about 80-90% of the pan — this can take anywhere from 1 to 1.5 hours. You might want to preheat your oven during the last 20 minutes so that you’re set for the next step!
Baking Your Masterpiece
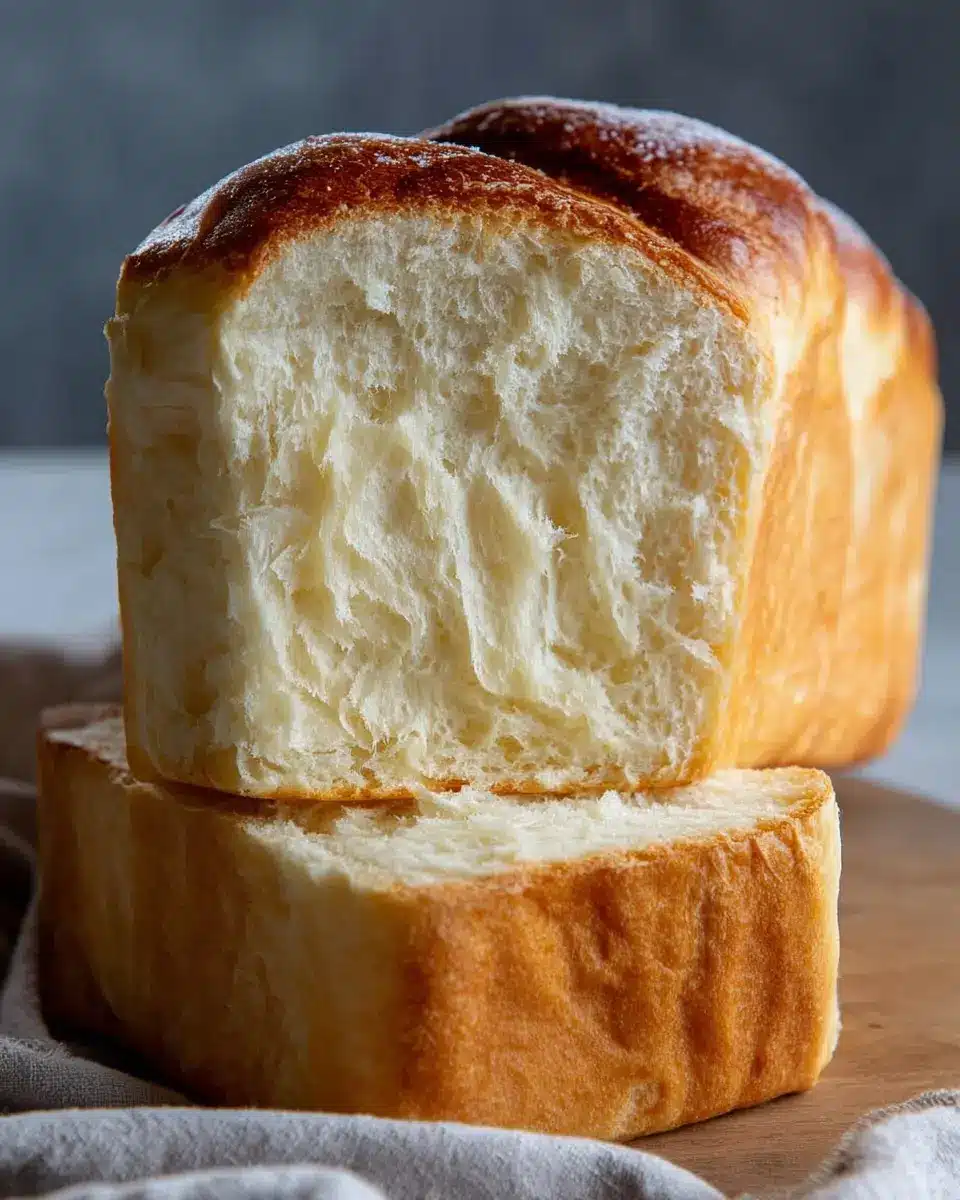
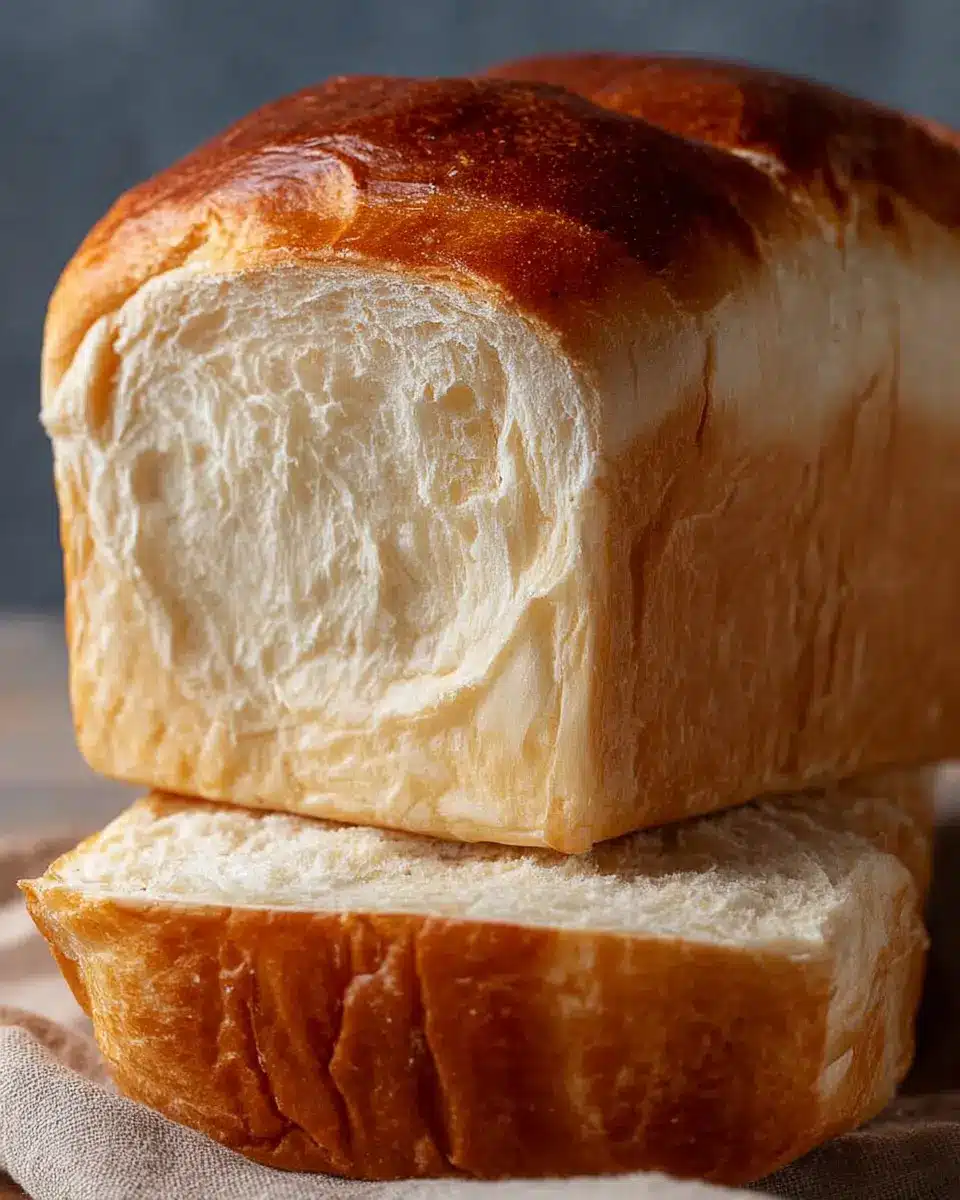
Finally, it’s time to bake! Preheat your oven to 375°F. Bake your loaf for 30-35 minutes, covering it with foil after 15 minutes to prevent excessive browning. Check for the internal temperature at 190°F to ensure it’s perfectly baked. Once done, let it drop from a small height onto the counter, this prevents shrinkage!
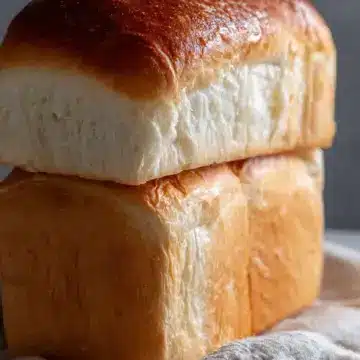
Let your Milk Bread Loaf cool for about 15 minutes before slicing into that fluffy goodness. Enjoy with your favorite spread, and don’t forget to share a slice or two!
For more expert tips on baking, check out resources like King Arthur Baking or Food52 to deepen your baking knowledge. Happy baking!
Variations on Milk Bread Loaf
Adding flavors: herbs and spices
Transform your Milk Bread Loaf by incorporating delightful herbs and spices. Consider adding dried rosemary, thyme, or even a hint of garlic powder for a savory twist. For a sweet variation, a sprinkle of cinnamon or nutmeg can elevate your loaf into something extraordinary. Mixing in fresh herbs not only provides an aromatic experience but also gives your bread a gourmet touch.
Enriching with seeds or nuts
Boost the texture and nutritional value of your Milk Bread Loaf by including seeds or nuts. Flaxseeds, sunflower seeds, and chopped walnuts can add a satisfying crunch and boost your intake of omega-3 fatty acids. Try using a mix of your favorites to create a unique, wholesome loaf that appeals to both your taste buds and health goals.
For more inspiration on flavor combinations, check out Serious Eats.
Cooking tips and notes for Milk Bread Loaf
Key tips for achieving the perfect texture
To achieve that delightful soft and fluffy texture in your Milk Bread Loaf, here are some golden tips:
- Use cold liquids: Beginning with cold milk and water helps prevent the dough from warming too quickly. This is crucial for a great texture.
- Perfect kneading: Ensure the dough passes the windowpane test—you should be able to stretch it thin without tearing. This usually takes about 7 to 10 minutes of kneading.
Troubleshooting common bread-making issues
Sometimes, even the best bakers face hiccups. Here are a few quick fixes:
- Dough too sticky: If your dough sticks to your hands, consider adding a little more flour gradually, but be careful not to overdo it.
- Bread not rising: Ensure your yeast is fresh and your proofing environment is warm enough (ideal around 80-90°F).
For more tips, you might find resources like King Arthur Baking helpful. Happy baking!
Serving suggestions for Milk Bread Loaf
Best spreads and toppings to elevate your loaf
Looking to take your Milk Bread Loaf to the next level? Here are some delightful spreads and toppings that can transform your slice:
- Nut butters: Almond or hazelnut butter adds a nutty twist, packed with healthy fats.
- Avocado mash: For a creamy, savory flavor, mash some ripe avocado and sprinkle with sea salt and pepper.
- Honey or maple syrup: A drizzle will amplify the natural sweetness, making it perfect for breakfast.
- Turkey bacon or chicken ham: For a protein-packed snack, layer your bread with turkey bacon or chicken ham.
- Cream cheese or ricotta: Spread a layer for a rich, velvety texture that pairs well with fruit preserves.
Creative uses for leftover milk bread
Don't let any of your Milk Bread Loaf go to waste! Here are some fun ideas to utilize those extra slices:
- French toast: Dip your bread slices in a mixture of eggs and milk, then pan-fry for a delightful breakfast treat.
- Bread pudding: Combine leftover bread with eggs, milk, and spices for a comforting dessert.
- Croutons: Cube and toast your bread to make crispy croutons for salads or soups.
- Sandwiches: Get creative with fillings, from grilled cheese to hearty veggie stacks.
- Bread crumbs: Blend up your leftover bread to make fresh breadcrumbs, perfect for topping casseroles or binding meatloaf.
With these ideas, you'll find that your Milk Bread Loaf is versatile, allowing you to enjoy it in various delicious ways!
Time Breakdown for Milk Bread Loaf
Preparation Time
Get your apron on! You’ll need about 30 minutes to prepare your Milk Bread Loaf dough. This includes mixing and initial rest time.
Baking Time
After proofing, the baking will take approximately 30-35 minutes. The delicious aroma will fill your kitchen, enticing everyone around!
Total Time
From start to finish, the entire process takes about 4 hours and 20 minutes. Don't worry—most of this time is for proofing, so you can relax or prepare other dishes while your bread rises!
For time management tips, check out this guide on proofing bread. Enjoy the process—baking is as much about the journey as it is about the final product!
Nutritional Facts for Milk Bread Loaf
When you're indulging in a slice of milk bread loaf, it’s good to know what you’re getting. Here’s a quick rundown of its nutritional content:
Calories
Each slice of milk bread loaf packs approximately 189 calories, making it a satisfying yet light choice for breakfast or snacks.
Protein
With 6 grams of protein per slice, this loaf helps keep you fuller for longer while adding some nutritional value to your meal.
Sodium
This delightful treat contains about 298 mg of sodium. It's always wise to enjoy it in balance, especially if you're watching your sodium intake.
For more on healthy eating habits, consider visiting resources like Nutrition.gov or Eat Right. Whether you’re enjoying it with turkey bacon or as part of a unique sandwich, this milk bread loaf is sure to add a touch of comfort to your meals!
FAQs about Milk Bread Loaf
How can I store milk bread?
To keep your Milk Bread Loaf fresh, store it at room temperature in an airtight container or a resealable plastic bag. A loaf like this can typically stay fresh for 3 to 5 days. If the weather is humid, consider wrapping the bread in a paper towel before placing it in the container to absorb excess moisture.
Can I freeze milk bread for later?
Absolutely! Freezing is a great way to extend the life of your Milk Bread Loaf. Simply slice the loaf once it's completely cool, then wrap individual slices or the entire loaf tightly in plastic wrap and aluminum foil. It can last in the freezer for up to 3 months. When you’re ready to enjoy, just thaw at room temperature or warm in the oven.
Why is my bread not rising?
If your Milk Bread Loaf isn’t rising, check your yeast. If it’s expired or not activated properly, it could lead to a flat loaf. Additionally, ensure your dough is in a warm environment for proofing; colder temperatures can slow down yeast activity. For tips on yeast troubleshooting, you might find this resource helpful: King Arthur Baking.
Conclusion on Milk Bread Loaf
The joy of baking at home
Nothing compares to the joy of whipping up a Milk Bread Loaf in your very own kitchen. The smell of freshly baked bread fills the air, and each slice is a soft, inviting treat. It's an experience that brings comfort and a sense of accomplishment.
A reminder to try it yourself!
Baking is a wonderfully rewarding endeavor, and this Milk Bread Loaf is the perfect way to start. So roll up your sleeves, gather your ingredients, and dive into the delightful world of baking. Trust me, the satisfaction you'll feel is worth every bit of effort! Don't forget to share your results. Happy baking!
Milk Bread Loaf
Equipment
- loaf pan
- Stand Mixer
Ingredients
- 500 g bread flour 3¾ cup
- 40 g sugar 3 tablespoon
- 1.5 tsps instant yeast
- 225 g cold water a little bit less than 1 cup
- 115 g cold milk ½ cup
- 9 g sea salt 1½ tsp
- 25 g unsalted butter 1¾ tbsp
- butter for coating the pan and brushing the bread
- flour for coating the pan
Instructions
Making Bread Dough
- Mix bread flour, sugar, yeast, water and milk in a stand mixer, kneading on low speed until the dough is formed.
- Cover the mixing bowl and let it rest for 30 minutes. Meanwhile, bring the butter out from the fridge, cut it into 4 pieces and leave it on the counter to soften a little.
- Add salt and continue to knead the dough for 1 minute.
- Add butter cubes and knead until the dough passes the windowpane test.
- Form the dough into a ball and put it in a lightly greased bowl. Cover and let it rise in a warm place for 1 hour until it almost doubles in size.
Shaping
- Transfer the dough onto a working surface and cut it into 3 even pieces. Form each piece into a ball. Cover the dough balls with a damp dish towel or greased plastic wrap, allowing them to rest for 15 minutes.
- Roll the dough out with a rolling pin to an oval shape and then roll it up to a log, do the same for the other two pieces, cover and let it rest for another 15 minutes.
- For each log, rotate the dough 90 degrees before rolling them out again into long rectangles and rolling each rectangle back up into a cinnamon roll type of shape.
- Grease a 10 x 5 loaf pan and coat with a thin layer of flour. Put the rolled up dough into the pan, cover with greased plastic wrap and let it rise in a warm place until it fills 80-90% of the pan.
Baking
- Preheat the oven to 375°F in the last 20 minutes of proofing. Move the rack to about ⅓ of the way from the bottom.
- Put it in the oven to bake for 30-35 minutes. Loosely cover with a piece of foil after baking for 15 minutes to prevent the bread color from turning too dark.
- Remove bread from the oven and drop the pan on the counter top (from around two inches up) to help prevent it from shrinking, then transfer the bread on a cooling rack right away. Brush the top with melted butter and let it cool for 15 minutes before enjoying.


Leave a Reply