
Introduction to My Fave Birria Tacos
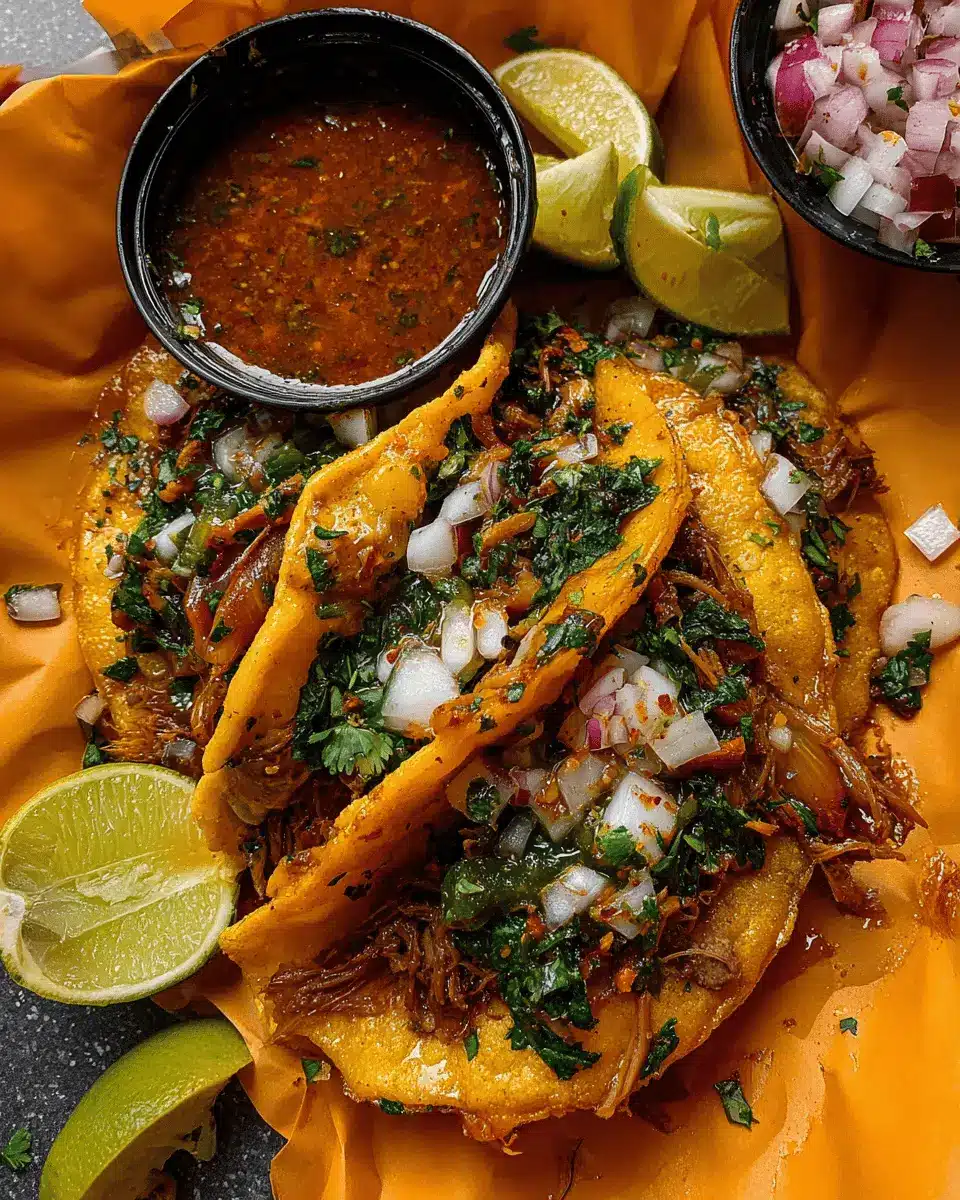
When it comes to a quick yet delicious meal, birria tacos are a game changer for young professionals. Why? Because they perfectly blend convenience with robust flavor, making them ideal for busy weeknights or casual gatherings with friends. The rich, aromatic flavors of savory beef, blended with delightful spices, culminate in a taco experience that even the most discerning palate can appreciate.
Imagine returning home after a long day at work, craving something comforting yet wholesome. With just a little prep, you can create my fave birria tacos, which not only tantalize your taste buds but also fill your kitchen with irresistible aromas. You can easily make the components ahead of time, allowing you to assemble them quickly during your weeknight rush. Plus, if you prefer to meal prep, these tacos can be stored individually, ready to elevate any lunch or dinner experience.
For those curious about exploring more recipes or finding tips on meal preparation, consider checking out resources like BBC Good Food or Serious Eats for additional inspiration. Now, let’s dive into how to make these unforgettable tacos!
Ingredients for My Fave Birria Tacos
Overview of Essential Ingredients
Creating my fave birria tacos requires a symphony of flavors and textures that take this dish to the next level. Key ingredients include:
- Chili Paste: Dried guajillo and ancho chiles add depth, while chipotle peppers bring smokiness.
- Meat: I recommend using organic chuck roast for its rich flavor and ability to become tender during braising.
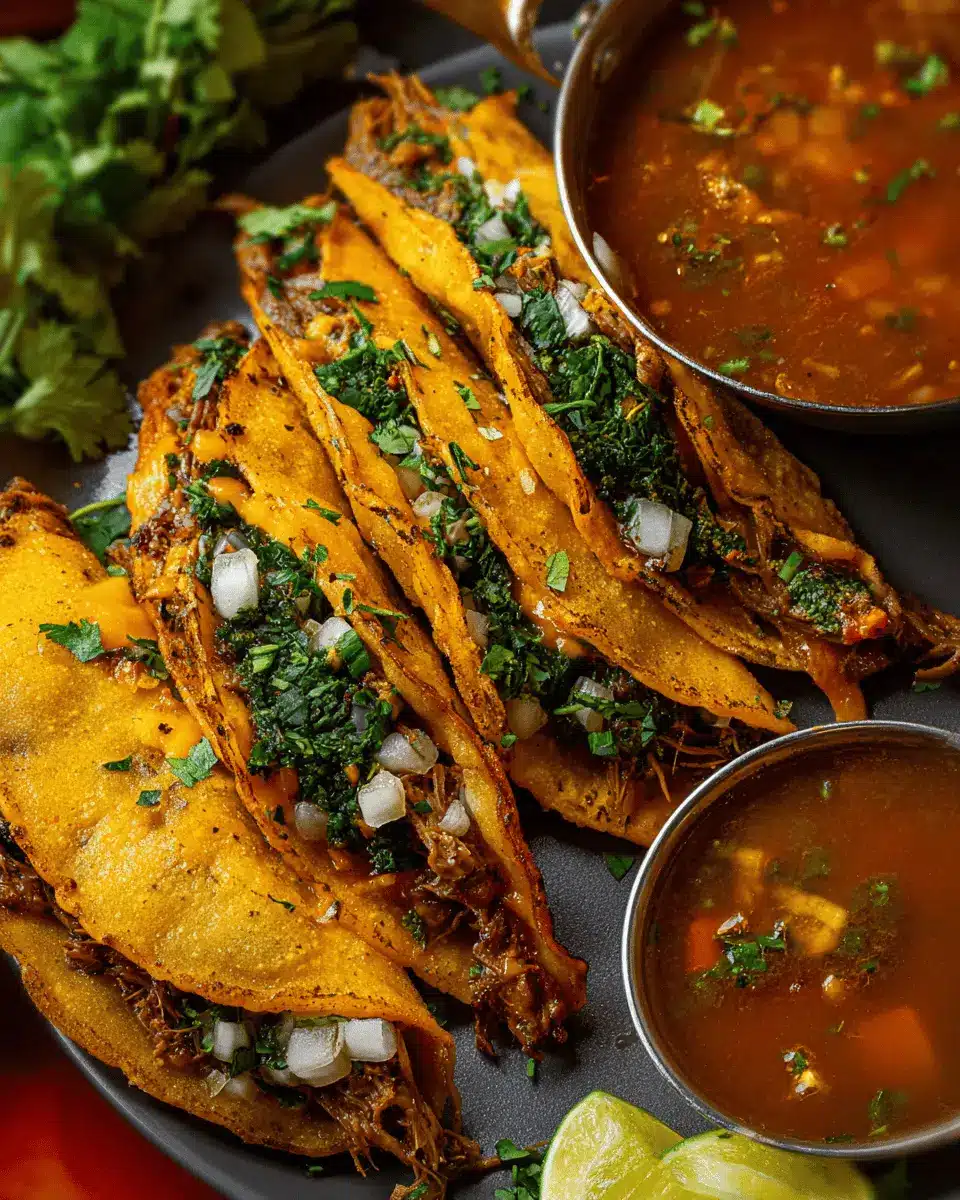
- Consomé: The broth, enriched with spices and aromatic veggies, serves as both a cooking liquid and a dipping sauce, giving everything a hearty kick.
- Tortillas: Organic corn tortillas hold everything together beautifully, especially when fried to crispy perfection.
Alternative Ingredients for Dietary Preferences
If you're looking for alternatives to suit your dietary needs, worry not! You can swap the beef for:
- Lamb: For a unique twist.
- Chicken: Use shredded chicken for a lighter option.
- Vegan Options: Substitute the meat with jackfruit or mushrooms for a plant-based version, and use vegetable broth in place of beef stock.
For gluten-free tacos, simply ensure your tortillas are gluten-free and you’re all set!
For more inspiring taco variations, you can check out various taco recipes over at Taco USA.
Step-by-Step Preparation of My Fave Birria Tacos
Creating my fave birria tacos is one of those culinary experiences that transports you straight to the vibrant streets of Mexico. This step-by-step guide will help you navigate the process smoothly, making your kitchen feel like a home away from home.
Make the Chili Paste
Begin with the heart of flavor in your birria: the chili paste. You'll need to start by deseeding and stemming 4 dried guajillo and 4 dried ancho chiles. In a medium pot, bring ½ cup of organic beef stock to a boil and then add your chiles. Remove from heat, cover, and allow them to soak for about 15-20 minutes until they soften.
Once softened, transfer them to a high-powered blender along with 1 chopped onion, 4 garlic cloves, ½ cup crushed tomatoes, 1 tablespoon apple cider vinegar, and the spices — think oregano, thyme, cumin, cinnamon, smoked paprika, and allspice. Blend until smooth. The result should resemble a rich, luxurious paste; feel free to add a splash more beef stock if you want a thinner consistency.
Prepare the Meat and Consommé Sauce
Next, it’s time to prepare the meat. Preheat your oven to 350°F. Take 3 lbs. of organic chuck roast, seasoned with salt, black pepper, and garlic powder, and sear it in a Dutch oven with some olive oil on medium-high heat. After 3-4 minutes on each side, remove the beef and set it aside. In the same pot, sauté ½ diced onion until translucent, then stir in your prepared chili paste.
Return the meat to the pot, add 4 cups of organic beef stock and 2 cups of water, and mix well. This flavorful concoction will serve as your brothy base.
Let Everything Braise
Cover your Dutch oven and move it to the preheated oven for about 2 ½ hours. This slow braising process is crucial; the longer the beef cooks, the more tender it will become. You'll know it's ready when you can easily shred it using forks. Remove and shred your beef, making sure to keep that rich sauce to drizzle over the tacos later.
Assemble the Tacos
Now comes the fun part—assembling your my fave birria tacos! Take a small bowl, and scoop out a cup of that flavorful broth to serve as your dipping sauce. Lightly coat a skillet with olive oil. Dip each corn tortilla in the broth, then fry it in the skillet. Top it with shredded beef, diced onion, chopped cilantro, and a generous helping of shredded Oaxacan cheese. Fold it in half and give it a good char, ensuring that cheese oozes out deliciously!
Serve and Enjoy
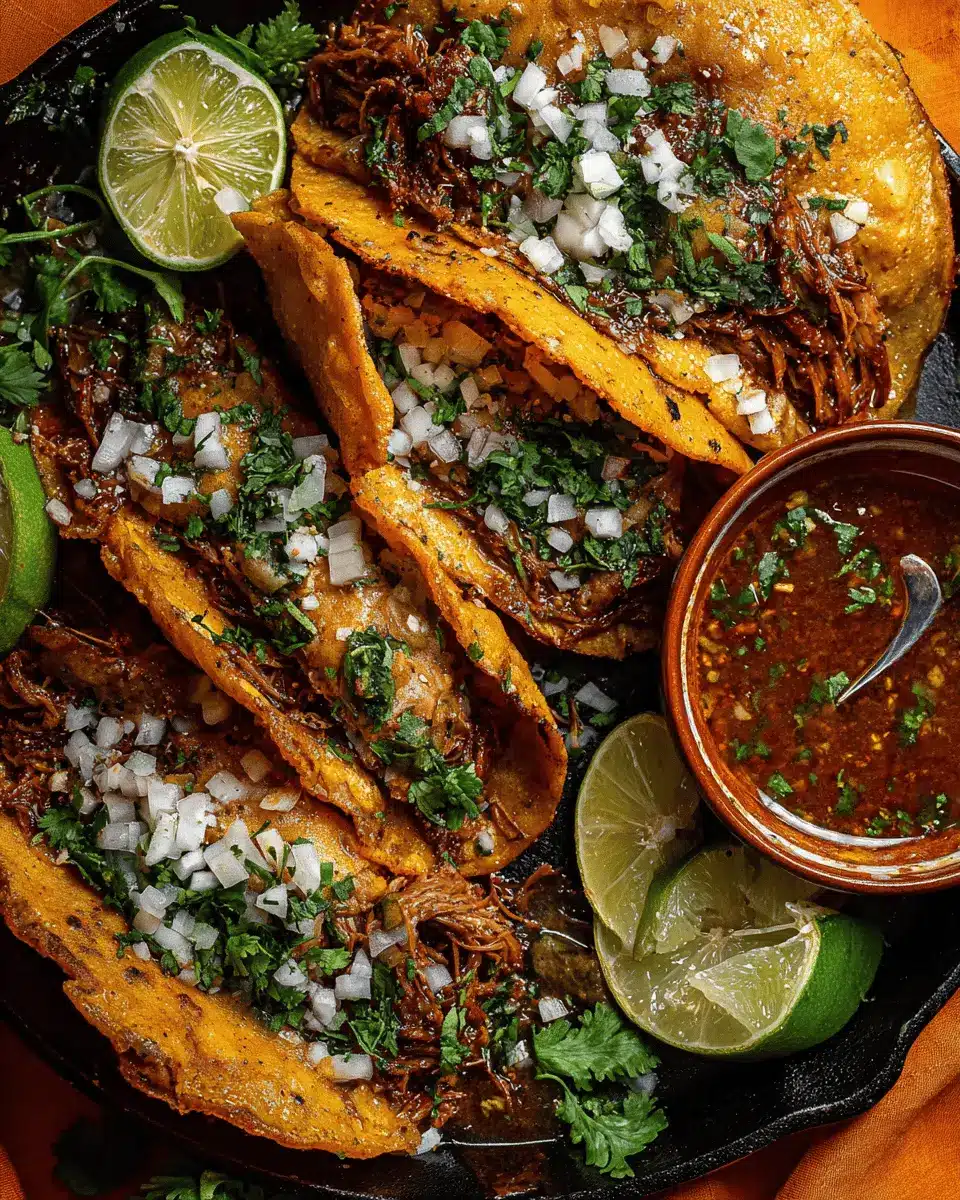
Plate your birria tacos alongside the broth for dipping, and add some fresh salsa or pico de gallo for that bright, zesty touch. You’re not just serving a meal; you’re offering a culinary experience that your guests won’t soon forget.
With these steps, you're well on your way to taco perfection. Bon appétit!
Variations on My Fave Birria Tacos
Vegetarian or Vegan Birria Tacos
If you're looking for a plant-based twist on my fave birria tacos, try swapping the meat for hearty mushrooms or jackfruit! Shredded jackfruit absorbs flavors beautifully and mimics the texture of meat. Simply follow the same braising process with vegetable broth and spices for that rich taste. Add a sprinkle of nutritional yeast for an extra umami kick, and you won’t miss the meat!
Chicken Birria Tacos
For a lighter option, chicken birria tacos are a crowd-pleaser. Use boneless chicken thighs and follow the same cooking method as the beef version. The chicken will tenderize beautifully and soak up all those delicious flavors. Serve with your dipping consomé and your favorite toppings for a perfect weeknight dinner. It’s a simple swap that doesn’t compromise on flavor!
These variations ensure everyone can enjoy a delicious birria taco feast!
Cooking Tips and Notes for My Fave Birria Tacos
Tips for Flavor Enhancement
For my fave birria tacos, consider marinating your meat overnight for deeper flavor penetration. Don't shy away from fresh herbs like cilantro or even a dash of lime juice right before serving. For an extra kick, add diced jalapeños to your tacos. Additionally, experimenting with different cheese types can elevate the traditional taste.
Storage and Reheating Recommendations
After enjoying your delicious birria tacos, store any leftovers separately in airtight containers in the refrigerator for up to three days. When reheating, use the oven at 350°F; it will keep the tacos crispy while allowing the filling to warm through. Remember, the key to great tacos is enjoying them fresh, but these tips ensure you savor the leftovers, too!
Serving Suggestions for My Fave Birria Tacos
Classic Accompaniments
To elevate your my fave birria tacos, serve them with traditional sides that burst with flavor. Fresh Pico de Gallo adds a zesty touch, while chopped onions and cilantro provide a refreshing crunch. A dollop of creamy avocado or guacamole can balance the rich essence of the tacos. Don't forget a squeeze of lime—it's the perfect way to brighten the dish. For a heartier bite, consider adding some grilled Mexican chorizo on the side.
Suggested Drinks to Pair
Complement your taco feast with a delightful drink selection. I recommend trying a refreshing Hibiscus Iced Tea or tangy Lemonade for a non-alcoholic option. If you're feeling adventurous, a cool Mango Agua Fresca can create an irresistible sweet contrast to the savory tacos. For a cozy evening, consider serving a rich hot chocolate or even a creamy horchata! These beverages will not only quench your thirst but also enhance the overall taco experience.
Time Breakdown for My Fave Birria Tacos
Preparation Time
You’ll need about 20 minutes to gather and prep your ingredients. Think of it as your warm-up to culinary greatness!
Cooking Time
The magic happens over 2 hours and 30 minutes as your beef braises into tender perfection. Don’t rush it; this is where rich flavors develop.
Total Time
In just under 3 hours—2 hours and 50 minutes to be exact—you’ll experience the delightful journey from prep to that first epic bite of my fave birria tacos!
For a deeper dive into the wonder of birria tacos, consider reading about the cultural significance of birria on platforms like Mexico In My Kitchen. Enjoy the process!
Nutritional Facts for My Fave Birria Tacos
When enjoying my fave birria tacos, it's always great to be mindful of the nutritional content. Here’s a quick overview:
Calories
Each taco brings in approximately 38 calories, making them a tasty yet relatively light option, especially for a satisfying meal.
Protein
You can expect about 2 grams of protein per taco. While not a powerhouse, the protein content helps balance the flavors and sustenance.
Sodium
With 389 mg of sodium per taco, it's wise to enjoy these infrequently if you're watching your salt intake. Pair them with fresh toppings like pico de gallo for a refreshing balance!
For more insights on healthy taco options, check out resources on nutrition.gov or choosemyplate.gov. Enjoy your delicious birria tacos while being mindful of the ingredients!
FAQs about My Fave Birria Tacos
How can I make the tacos crispier?
To achieve that perfectly crispy taco, consider using a non-stick skillet and frying them in a bit of oil. A fun trick is to dip the tortillas briefly in the birria consomé before frying; this adds flavor and helps create a delightful crunch. You can also try using a higher heat setting and frying them just long enough to get golden without burning. Enjoy experimenting with these techniques!
Can I freeze the birria mixture?
Absolutely! You can freeze the shredded birria mixture for up to three months. Just make sure to store it in an airtight container. When you’re ready to enjoy it again, thaw it overnight in the fridge and reheat gently on the stove. It’s a lifesaver for quick weeknight meals!
What are the best toppings for birria tacos?
For my fave birria tacos, I recommend topping them with fresh cilantro, diced onions, and a squeeze of lime. Add some Pico de Gallo for a refreshing twist! Don’t forget a side of the flavorful consomé for dipping—trust me, it elevates your taco experience to the next level.
For more tips on enhancing your taco game, check out this guide on taco toppings!
Conclusion on My Fave Birria Tacos
In summary, my fave birria tacos are more than just food—they're a celebration of rich flavors and comforting textures. With tender, juicy beef and decadent cheese wrapped in warm tortillas, every bite transports you to taco heaven. Try this recipe for your next gathering; your taste buds will thank you!

My Fave Birria Tacos
Equipment
- Dutch oven
- High powered blender
- skillet
Ingredients
CHILI PASTE
- 4 pieces dried guajillo peppers
- 4 pieces dried ancho chiles
- 4 pieces chipotle peppers in adobo
- 1 medium onion, chopped
- 4 cloves garlic
- 0.5 cup crushed tomatoes
- 0.5 cup organic beef stock You can sub with water
- 1 tablespoon apple cider vinegar
- 2 pieces bay leaves
- 2 tablespoons Mexican oregano
- 1 teaspoon dried thyme
- 0.5 teaspoon cumin
- 0.5 teaspoon ground cinnamon
- 0.5 teaspoon smoked paprika
- 0.5 teaspoon ground allspice
THE MEAT + CONSOMME [DIPPING] SAUCE
- 3 lbs organic chuck roast beef, chopped You can also use shank cut of beef or lamb or chicken
- 1 tablespoon Extra virgin olive oil
- 1 teaspoon sea salt
- 1 teaspoon black pepper
- 1 teaspoon garlic powder
- 0.5 onion diced
- 4 cups organic beef stock
- 2 cups water
TACOS
- 12 pieces organic corn tortillas
- shredded Oaxaca cheese
- 1 cup chopped fresh cilantro
- Pico de Gallo You can make my Fresh Homemade Pico de Gallo recipe
Instructions
TO MAKE THE CHILI PASTE
- Remove the stems and seeds from all of the dried ancho and guajillo chiles and add the beef stock to a medium-sized pot and bring to a boil. Next, add chiles, turn off the heat and cover and allow it to sit for 15-20 minutes.
- When the peppers are softened, add them to a high-powered blender or food processor along with the remaining ingredients and blend until smooth and thick. You can add another ½ cup or more of beef stock (or water) for desired consistency + less thickness.
TO MAKE THE 'MEAT'
- Preheat the oven to 350 degrees Fahrenheit.
- In a dutch oven over medium-high heat, add the olive oil. Once heated, add the chopped beef chunks and sear on each side for 3-4 minutes or until golden.
- Remove seared meat from pot and set onto a plate with paper towel. If needed, you can work in batches until all meat are seared.
- In the same pot, add the onions, sautéing until fragrant and translucent, about 1-2 minutes. Add the chili paste and stir together, allowing everything to simmer for about 1-2 minutes.
- Add the beef stock and water, stirring to combine. Add the seared beef and stir again and reduce the heat to low and allow to simmer for another minute or so.
LET EVERYTHING BRAISE IN THE OVEN
- Carefully, transfer the dutch oven into the oven and let everything slowly cook and braise for about 2 ½ hours or until the beef is really tender and can be easily shredded using forks.
- Remove from oven and begin shredding all of the meat until completely 'pulled' in texture.
- You want to have a good amount of sauciness to serve over the tortillas (plus for dipping).
TO ASSEMBLE THE TACOS
- Remove 1 cup of the broth/liquid from the cooked beef and add to a small bowl. Add some fresh chopped cilantro to the top and set aside as the dipping sauce.
- In a medium skillet over medium heat, add 1 tablespoon of olive oil and using a paper towel, gently wipe it evenly at the base.
- Carefully dip a tortilla at the top part of the dipping sauce and place it in the heated skillet/pan and fry for a few seconds.
- Top with shredded beef, diced onions, chopped parsley, and shredded cheese. Flip in half and allow the cheese to melt and become gooey before flipping it carefully onto the opposite side again for a nice 'char'.
- Remove from heat once golden on both side and repeat until all tacos are made. Serve with the dipping sauce, Pico de Gallo, or whatever else you love and enjoy!


Leave a Reply