
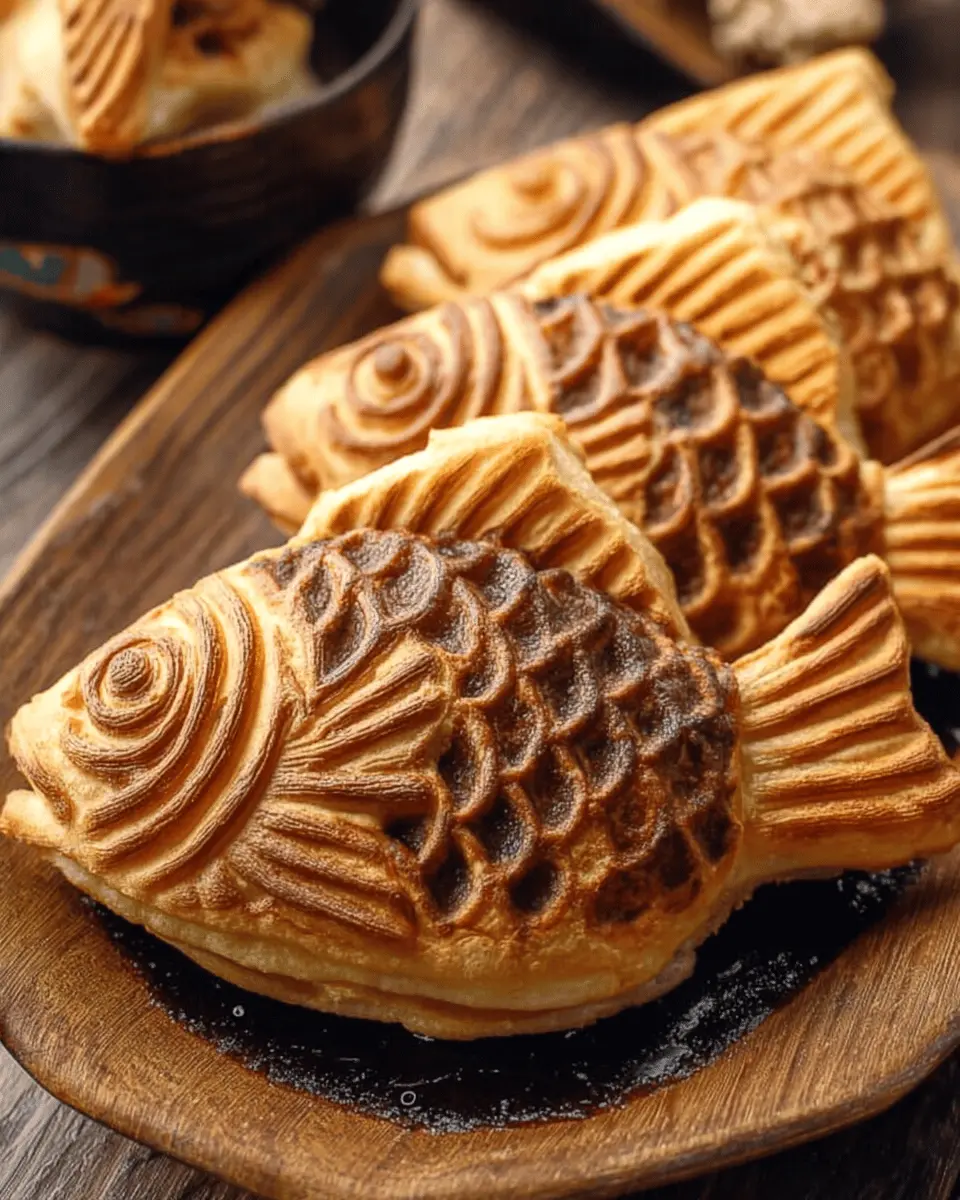
Introduction to Homemade Taiyaki Recipe
If you're looking for a delightful snack that combines comfort and nostalgia, taiyaki is a wonderful choice. This warm, fish-shaped treat hails from Japan and is often filled with sweet red bean paste, though you can get creative with fillings such as Nutella or custard. Making homemade taiyaki not only fills your kitchen with enticing aromas but also lets you customize flavors to suit your palate.
Why Taiyaki is the Perfect Homemade Snack?
Making taiyaki at home is quicker and easier than you might think. With a simple batter that requires just a few ingredients and a taiyaki maker, you can whip up a batch in no time. The best part? You get to enjoy them fresh off the grill, golden brown and crisp on the outside—an irresistible treat for gatherings, afternoon snacks, or even dessert!
Additionally, taiyaki caters to various dietary preferences. Want to ditch the red bean paste? Substitute it with your favorite filling! You can even tweak the batter to make it gluten-free or dairy-free by starting with alternatives. Plus, if you’re creative, taiyaki can be a fun project to tackle with friends, making it a fantastic excuse to gather and enjoy some kitchen time together.
Curious about the steps to making your own? Let’s dive into the full taiyaki recipe below!
Ingredients for Homemade Taiyaki
Essential Ingredients for Taiyaki Batter
To create the perfect homemade taiyaki recipe, you'll need a few essential ingredients that come together to make a light and fluffy batter:
- 1¼ cups cake flour: This gives taiyaki its airy texture. If you don’t have cake flour, you can make your own by mixing all-purpose flour with cornstarch.
- 1 teaspoon baking powder and 1 teaspoon baking soda: These leavening agents provide the needed lift.
- 3 tablespoon sugar: A hint of sweetness to balance the flavors.
- 1 large egg: It binds the ingredients and adds richness.
- ¾ cup whole milk: Adjust based on the size of your egg; this keeps the batter moist.
- 1 tablespoon neutral oil: For greasing the taiyaki mold, ensuring a non-stick experience.
Optional Fillings and Variations
While sweet red bean paste (anko) is the traditional filling, feel free to get creative! Here are some ideas to personalize your taiyaki:
- Nutella: A chocolaty delight for the dessert lovers.
- Custard: For a creamy texture that’s irresistible.
- Matcha chocolate: If you're a fan of green tea flavors.
- Fruits: Slices of banana or strawberries can brighten up each bite.
Choosing your filling can transform your homemade taiyaki into a unique treat that suits your taste! Have you ever considered experimenting with savory fillings like cheese or sweet potato? Why not give them a go?
Step-by-Step Preparation of Taiyaki
Making homemade taiyaki is a delightful experience, allowing you to savor the unique flavors of this Japanese treat right in your kitchen. Let’s dive into the step-by-step process to ensure your taiyaki turns out perfect!
Gather Your Ingredients and Tools
Before you start, it's essential to assemble all your ingredients and tools. Here’s what you’ll need:
-
Ingredients:
-
1¼ cups cake flour
-
1 teaspoon baking powder
-
1 teaspoon baking soda
-
3 tablespoon sugar
-
1 large egg
-
¾ cup whole milk (adjusted based on egg size)
-
8 tablespoon sweet red bean paste (anko) or your favorite filling like Nutella
-
1 tablespoon neutral oil (for greasing)
-
Tools:
-
A taiyaki maker
-
Mixing bowls
-
Whisk
-
Measuring cups and spoons
Having everything ready will streamline your cooking experience and prevent any mid-recipe hiccups.
Prepare the Taiyaki Batter
Start by preparing your batter:
- In a large bowl, sift together the cake flour, baking powder, and baking soda.
- Add the sugar, stirring well to combine.
- In a separate bowl, whisk the egg and mix in the whole milk until fully blended.
- Combine the wet and dry ingredients, whisking until smooth.
Make sure to avoid over-mixing, as you want your batter to be light and fluffy!
Let the Batter Rest (and Why It Matters)
Once your batter is ready, let it rest in the refrigerator for about one hour. This step is crucial! Allowing the batter to sit lets the flour hydrate and the gluten relax, resulting in a lighter and softer texture.
Preheat the Taiyaki Maker
While your batter is resting, preheat your taiyaki maker over medium-low heat. Once hot, brush the molds with a little neutral oil to prevent sticking. This step is essential for achieving that lovely, crispy exterior.
Fill the Mold and Cook to Perfection
Now comes the exciting part!
- Carefully pour the batter into each mold, filling it about 60% full.
- Add about a tablespoon of sweet red bean paste into the center—don’t be shy with this sweet addition!
- Cover the filling with more batter until the mold is filled.
Seal the taiyaki maker and flip it over. Cook for about 2 to 2½ minutes per side or until golden brown. The key is to check for that beautiful, crisp exterior that makes taiyaki so irresistible.
Cool and Enjoy Your Taiyaki
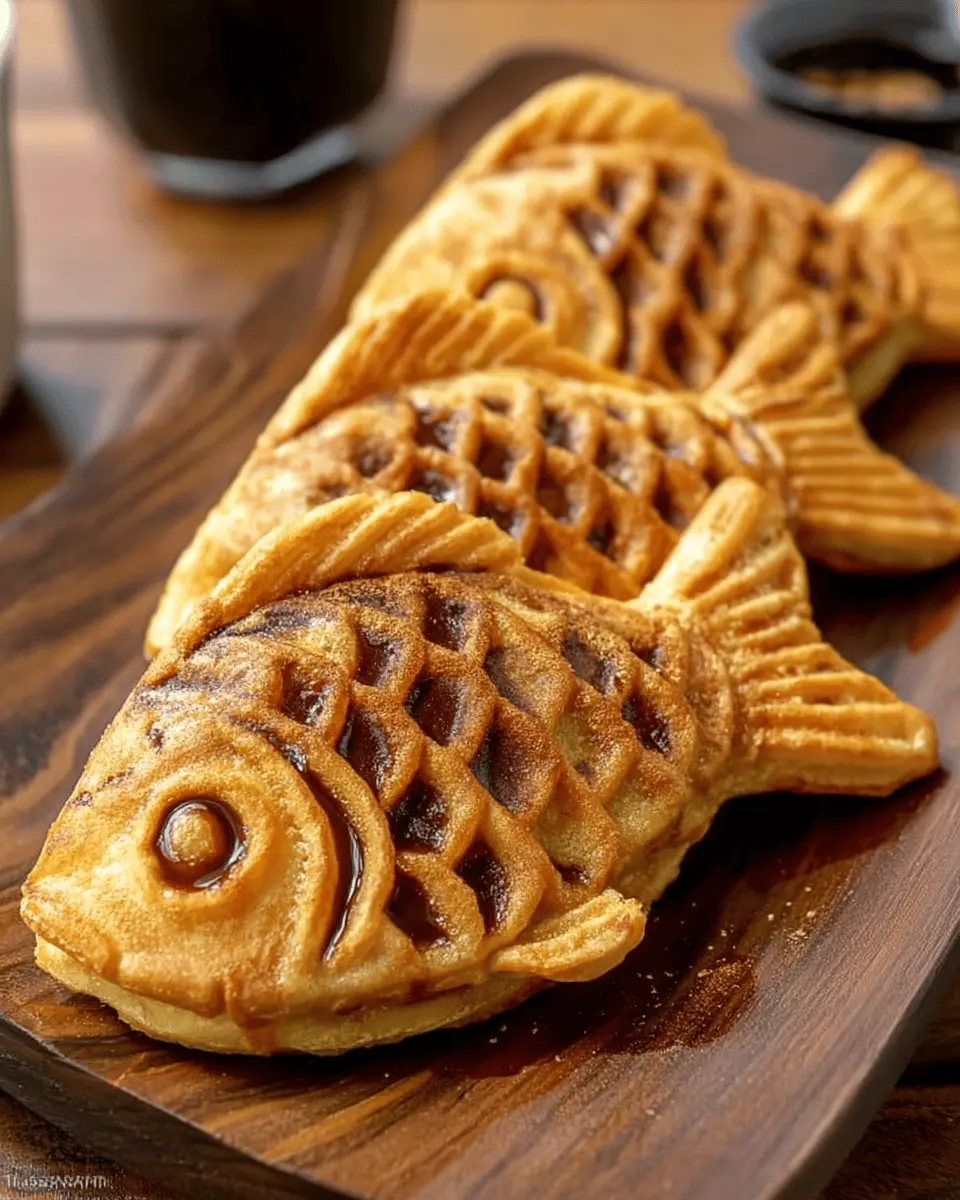
Once cooked, remove the taiyaki from the mold and let them cool on a wire rack. This cooling process helps them stay crispy. Serve them warm and enjoy the delicious blend of flavors. You could even dust them with powdered sugar or add a drizzle of chocolate for a decadent touch.
Making homemade taiyaki can be a fun activity to enjoy with friends or family. So why not gather everyone for a taiyaki party? Don’t forget to share your culinary adventures—happy cooking!
Variations on Taiyaki
Sweet Red Bean Paste vs. Other Fillings
While sweet red bean paste (anko) is the classic filling for your homemade taiyaki recipe, don’t hesitate to explore other delicious options! For a twist, try Nutella for a chocolatey treat or vanilla custard that will delight your taste buds. Fruit preserves, like blueberry or strawberry, also add a fruity flair to this delightful snack. Experimenting with fillings can turn a simple dessert into a personalized delight!
Savory Options: Incorporating Proteins and Vegetables
Why not think outside the box? If you crave something savory, consider fillings like chicken ham, turkey bacon, or even seasoned beef. Adding sautéed vegetables like spinach or mushrooms brings a delightful texture and flavor to the mix. Don't be afraid to get creative—your taiyaki can be both satisfying and unique! Check out more on different variations at Just One Cookbook.
Cooking Tips and Notes for Taiyaki
Tips for Achieving the Best Texture
To create the perfect homemade taiyaki recipe, focus on the batter's resting time. Allow it to rest for at least an hour, as this helps develop a smooth texture and prevents it from becoming too dense. To achieve that lovely golden-brown crust, ensure the taiyaki maker is adequately preheated and greased with a neutral oil. This step is vital for that beautiful finish.
Troubleshooting Common Taiyaki Mishaps
If your taiyaki sticks to the mold, you may not have greased it enough. Additionally, if they end up too thick, try pouring less batter to ensure they cook evenly. If the insides are undercooked, consider lowering the heat and extending the cooking time. Perfecting your technique takes practice, so don't hesitate to experiment! Remember, each taiyaki maker may behave a bit differently. Happy cooking!

Serving Suggestions for Taiyaki
Best ways to serve taiyaki
When enjoying your homemade taiyaki recipe, serve these delightful fish-shaped waffles warm for a delightful experience. You can dust them with powdered sugar or drizzle with honey or chocolate sauce for added sweetness. For a fun twist, try filling your taiyaki with a mix of matcha or taro paste. The possibilities are endless, and pairing flavors can bring a unique touch to this classic treat!
Pairing taiyaki with drinks or side dishes
Taiyaki goes wonderfully with a variety of beverages and side dishes. Consider pairing them with:
- Green tea: Its subtle earthiness complements the sweetness of the filling.
- Milk or almond milk: A creamy drink can create a comforting balance.
- Fruits: Fresh strawberries or a fruit salad offer a refreshing contrast.
Experimenting with these combinations will elevate your homemade taiyaki recipe, making your snack time even more enjoyable.
Time Breakdown for Taiyaki
Preparation time
The preparation for your homemade taiyaki recipe takes about 10 minutes. During this time, you'll gather your ingredients, measure them out, and whip up the batter.
Cooking time
Cooking takes approximately 15 minutes once the batter has rested. This includes the time needed to fill the molds and cook each batch to a golden crisp.
Total time
With a resting period of 1 hour, your total time comes to an enjoyable 1 hour and 25 minutes, allowing you to create delicious, fish-shaped waffles filled with sweetened red bean paste or your favorite fillings. Happy cooking!
For more detailed recipes and tips, check out Japanese Cooking 101 or explore Just One Cookbook for authentic techniques!
Nutritional Facts for Taiyaki
Calories and Key Nutrients
One serving of Taiyaki packs around 232 calories, making it a delightful treat to enjoy without the guilt. Key nutrients include 41g of carbohydrates, 7g of protein, and 5g of fat, along with essential vitamins and minerals like calcium and iron.
Consideration for Dietary Adjustments
If you're thinking about variations, you can easily adapt this homemade taiyaki recipe to fit various dietary needs. For instance, opt for gluten-free flour for those with gluten sensitivities or use a sugar substitute to lower the calorie count. Remember, the filling can also be tailored—consider using fruit or nut spreads for a unique twist! For more insights, check out WebMD's guide on nutritional substitutions.
Feel free to explore different fillings and toppings, allowing you to personalize your Taiyaki experience while keeping the nutrition in check!
FAQ about Taiyaki
Can I make taiyaki gluten-free?
Absolutely! To make a homemade taiyaki recipe that’s gluten-free, simply substitute the cake flour with a gluten-free flour blend or almond flour. The texture may vary slightly, but it should still yield delicious results. Experimenting with different options can lead to a unique twist on this classic treat.
How do I store leftover taiyaki?
If you find yourself with extra taiyaki, don’t fret! Store them in an airtight container in the refrigerator for up to 2 days. For longer storage, freeze them for up to a month. When you’re ready to enjoy, just pop them in a toaster oven or regular oven until crispy.
What can I do if I don’t have a taiyaki maker?
No taiyaki maker? No problem! You can use a regular waffle iron or pancake molds to achieve similar shapes. Just adjust cooking times accordingly, and enjoy the essence of taiyaki right in your kitchen. With a little creativity, your homemade taiyaki recipe can turn into delightful pancakes or waffles!
Conclusion on Homemade Taiyaki Recipe
Creating your own taiyaki at home is a delightful adventure in snack-making! The joy of mixing ingredients, watching them transform into crispy, fish-shaped treats, and savoring warm bites filled with sweet red bean paste is truly rewarding. Your homemade taiyaki will surely impress family and friends!
Recap of the Joy of Creating Homemade Snacks
Baking, particularly a homemade taiyaki recipe, embodies the essence of creativity and comfort. Each taiyaki comes with the love and effort you put into crafting it, making each bite extra special. The satisfaction of enjoying a fresh treat, straight from your kitchen, is unmatched.
Whether you enjoy them on a quiet afternoon or share them at a gathering, homemade snacks like taiyaki can bring people together. So, gather your ingredients, unleash your inner chef, and let the delightful aroma fill your kitchen as you create these heartwarming snacks! For more fun recipes and tips, check out sites like Serious Eats and Bon Appétit.

Taiyaki
Equipment
- taiyaki maker
Ingredients
- 1.25 cups cake flour or make homemade cake flour
- 1 teaspoon baking powder
- 1 teaspoon baking soda
- 3 tablespoon sugar
- 1 large egg (50 g each w/o shell)
- 0.75 cups whole milk (adjust depending on egg size)
- 8 tablespoon sweet red bean paste (anko) or use Nutella, custard, or favorite filling
- 1 tablespoon neutral oil (for greasing the grill)
Instructions
Before You Start
- Please note that the batter requires a resting time of 1 hour.
- Gather all the ingredients and a taiyaki maker.
To Make the Batter
- Sift cake flour, baking powder, and baking soda into a large bowl.
- Add sugar and whisk well to combine.
- In a medium bowl, whisk the egg and then add whole milk. Combine well.
- Pour the wet ingredients into the dry ingredients and whisk well. Let batter rest in the refrigerator for at least one hour.
- Pour the batter into a measuring cup.
To Cook the Taiyaki
- Preheat the taiyaki maker over medium-low heat and grease with oil.
- Fill the taiyaki mold about 60% full of batter.
- In the center of each mold, put red bean paste and pour more batter on top.
- Close the lid and flip. Cook for 2 to 2½ minutes on that side, then flip and cook for another 2 to 2½ minutes.
- Check if the taiyaki is golden brown, remove from the pan, and cool on a wire rack.
To Serve
- Serve warm. If cold, toast until crispy.
To Store
- Store in an airtight container in the refrigerator for up to 2 days or freeze for up to a month.
- To reheat, toast until crispy.


Leave a Reply