
Introduction to Mini Ice Cream Cone Cupcakes
If you’re looking for a delightful, whimsical treat that’s sure to impress at your next gathering, look no further than mini ice cream cone cupcakes. These charming little desserts combine the nostalgic joy of ice cream cones with the rich, moist texture of cupcakes for a fun eating experience. Imagine serving a bite-sized cone that not only looks adorable but also tastes delicious!
Why Mini Ice Cream Cone Cupcakes are the Perfect Treat?
There are plenty of reasons to love these sweet creations:
- Unique Presentation: Mini ice cream cones instantly elevate the dessert game, offering a fun and playful twist that’s perfect for parties or casual get-togethers.
- Portion Control: Their small size makes them an excellent option for those who want to indulge without overdoing it. Plus, who doesn’t love dessert that’s easy to share?
- Customization: You can personalize these cupcakes in countless ways—different flavors of cake mix, types of frosting, and a variety of toppings such as sprinkles, chocolate sauce, or gummy candies.
Whether you’re celebrating a birthday, hosting a summer BBQ, or just wanting to treat yourself, these mini ice cream cone cupcakes are the perfect way to bring a smile to everyone’s face. Ready to whip up a batch? Let's dive into the recipe!
Ingredients for Mini Ice Cream Cone Cupcakes
Making mini ice cream cone cupcakes is a delightful adventure and requires just a handful of ingredients. Let’s break it down so you can gather everything you need for this delicious treat.
Essential Ingredients for Cupcakes
To whip up these scrumptious cupcakes, you’ll need:
- 15.25 ounces of Cake Mix – A classic vanilla or chocolate works great for this recipe.
- 48 Mini Ice Cream Cones – These serve as the delightful bases and should be sturdy enough to hold the batter.
- 15.6 ounces of Prepared Frosting – Choose your favorite flavor! Creamy frosting creates that irresistible “ice cream” look.
- ½ Cup Cooled Hot Fudge Sauce – Drizzling this on top elevates your cupcake game to the next level.
- ¼ Cup Sprinkles – Because who doesn’t love a little extra colorful crunch?
Optional Ingredients for Customization
Feel free to get creative with your mini ice cream cone cupcakes. Consider adding:
- Mini Jelly Beans or Candies – These make for a fun and chewy topping.
- Different Sprinkles – Experiment with various shapes or colors for a unique twist.
- Flavor Enhancements – A splash of vanilla extract or a hint of almond flavor in your batter can add a personal touch.
As you prepare to dive into this baking experience, think about your favorite flavors. Whether you’re hosting a party or just indulging, these mini ice cream cone cupcakes will surely impress!
Steps to Make Mini Ice Cream Cone Cupcakes
Creating mini ice cream cone cupcakes can be a fun and creative way to enjoy dessert! Let's dive into the steps to bring these delightful treats to life, perfect for parties or a sweet snack at home.
Gather Your Equipment
The first step is gathering all the tools you'll need. Having everything on hand will make the process smoother and a lot more enjoyable. Here’s what you’ll need:
- 12-Cup Muffin Pan: This will help to hold your ice cream cones upright while they bake.
- Glass Mixing Bowl: Great for mixing your cake batter—easy to clean too!
- Piping Bag: Fancy or simple, it allows you to pipe frosting onto your cupcakes beautifully.
Not sure where to find these items? You can check online retailers like Amazon for reliable options.
Preheat Your Oven
Before you start mixing your cake batter, preheat your oven to 350 degrees F. A properly heated oven is crucial for even baking — you don’t want to end up with unevenly cooked cupcakes!
Prepare the Ice Cream Cones
While the oven is warming up, it’s time to prep your cones. Spray your mini muffin tins with some non-stick spray to ensure that the cones come out easily after baking. Then, place one mini ice cream cone in each well of the muffin pan, standing upright and ready to be filled.
Mix the Cake Batter
Now for some fun! In a large glass bowl, mix the cake batter according to the package instructions (we recommend a simple white cake mix for that classic flavor). Once it’s smooth and lump-free, you're ready to move on to the next step.
Fill the Cones
Grab a spoon or a piping bag and fill each ice cream cone about halfway with the batter. It’s essential not to overfill; otherwise, your mini ice cream cone cupcakes will overflow when they bake! Just a little more than half full is perfect.
Bake to Perfection
Carefully place the muffin tin in the preheated oven. Bake for 12-15 minutes or until the tops are golden brown and a toothpick inserted into the center comes out clean. This is where the magic happens—soon you’ll have adorable little cupcakes peeking out of their cones!
Cool the Cupcakes
Once baked, remove the muffin tin from the oven—be cautious, it will be hot! Allow the mini cupcakes to cool entirely in the pan. This helps them set and makes them easier to frost later on.
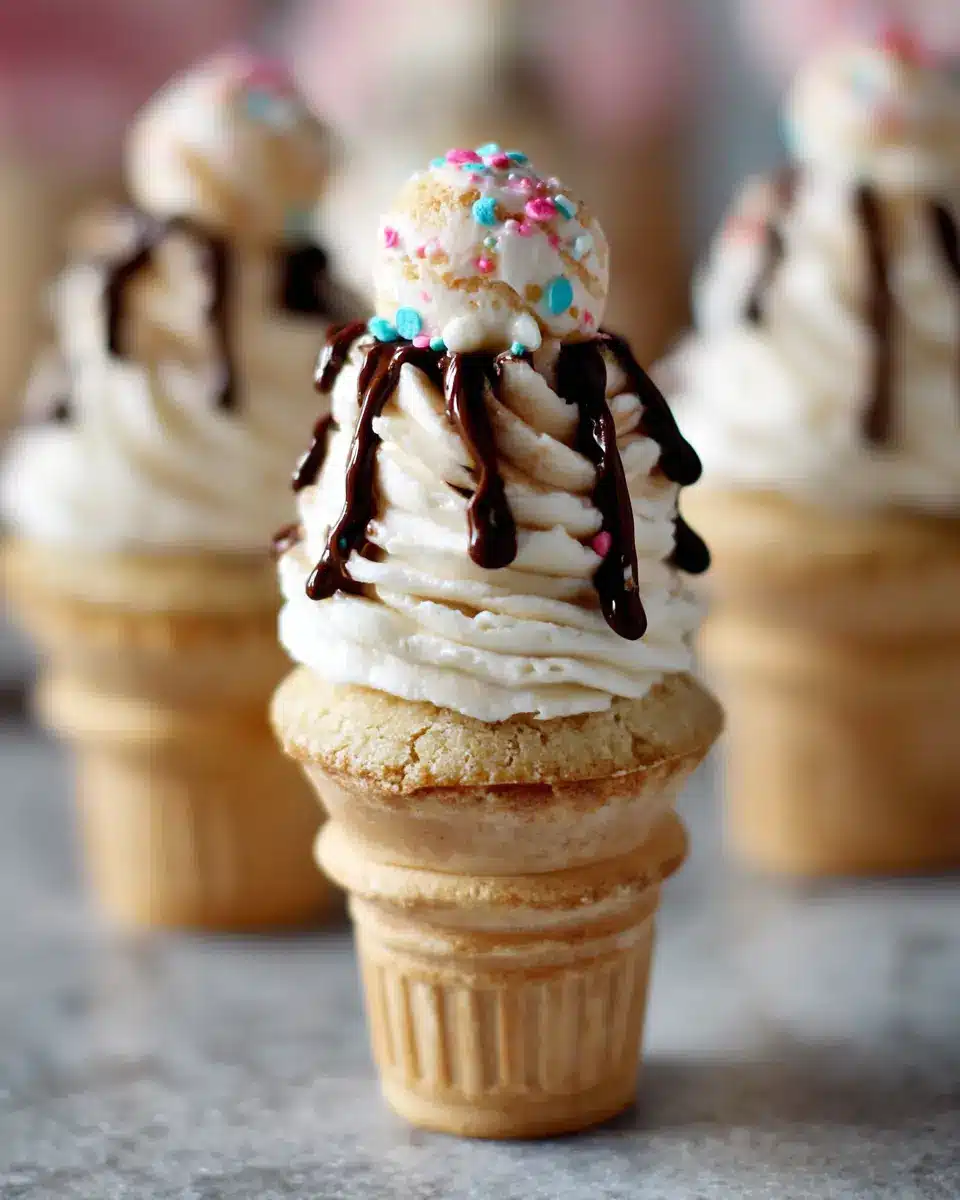
Frost and Decorate
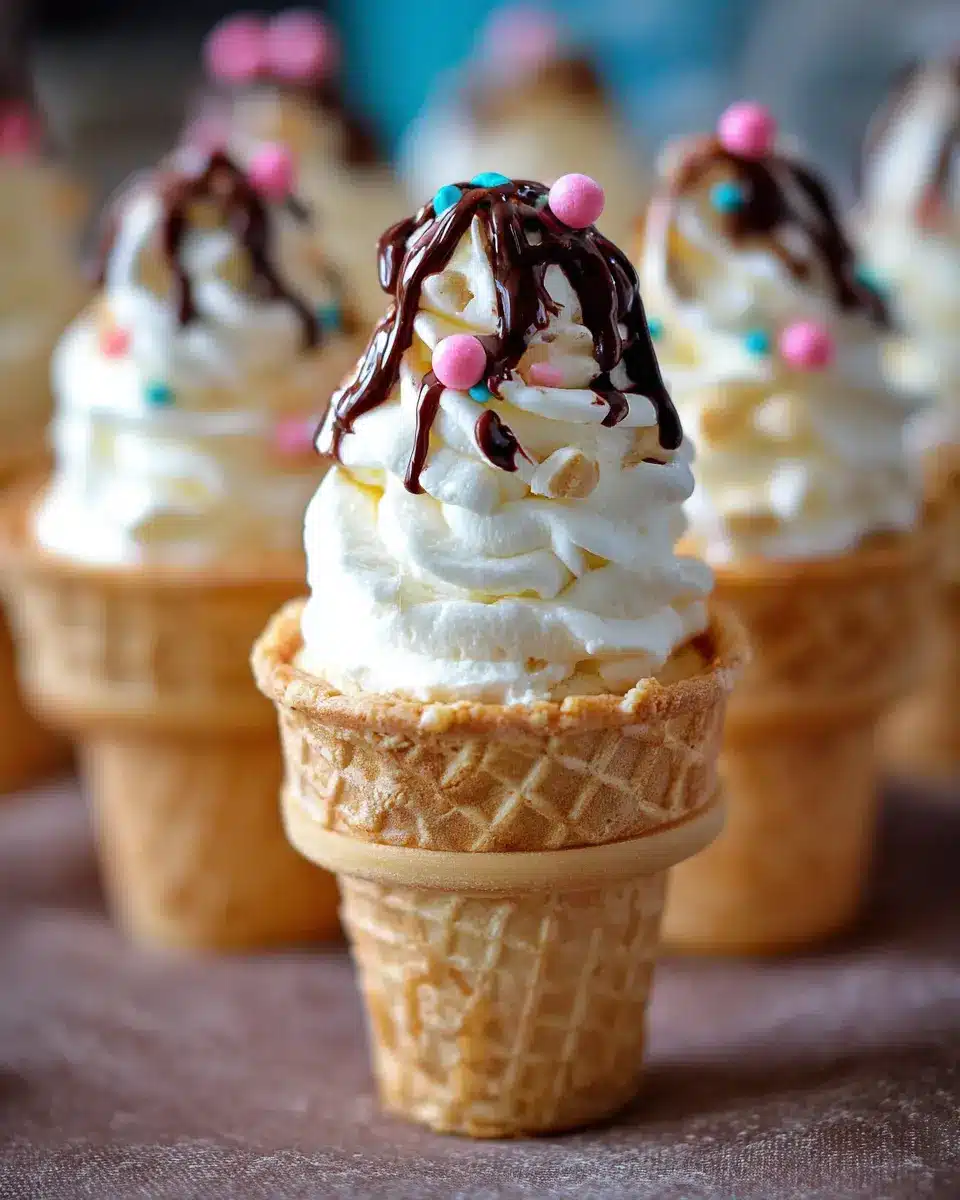
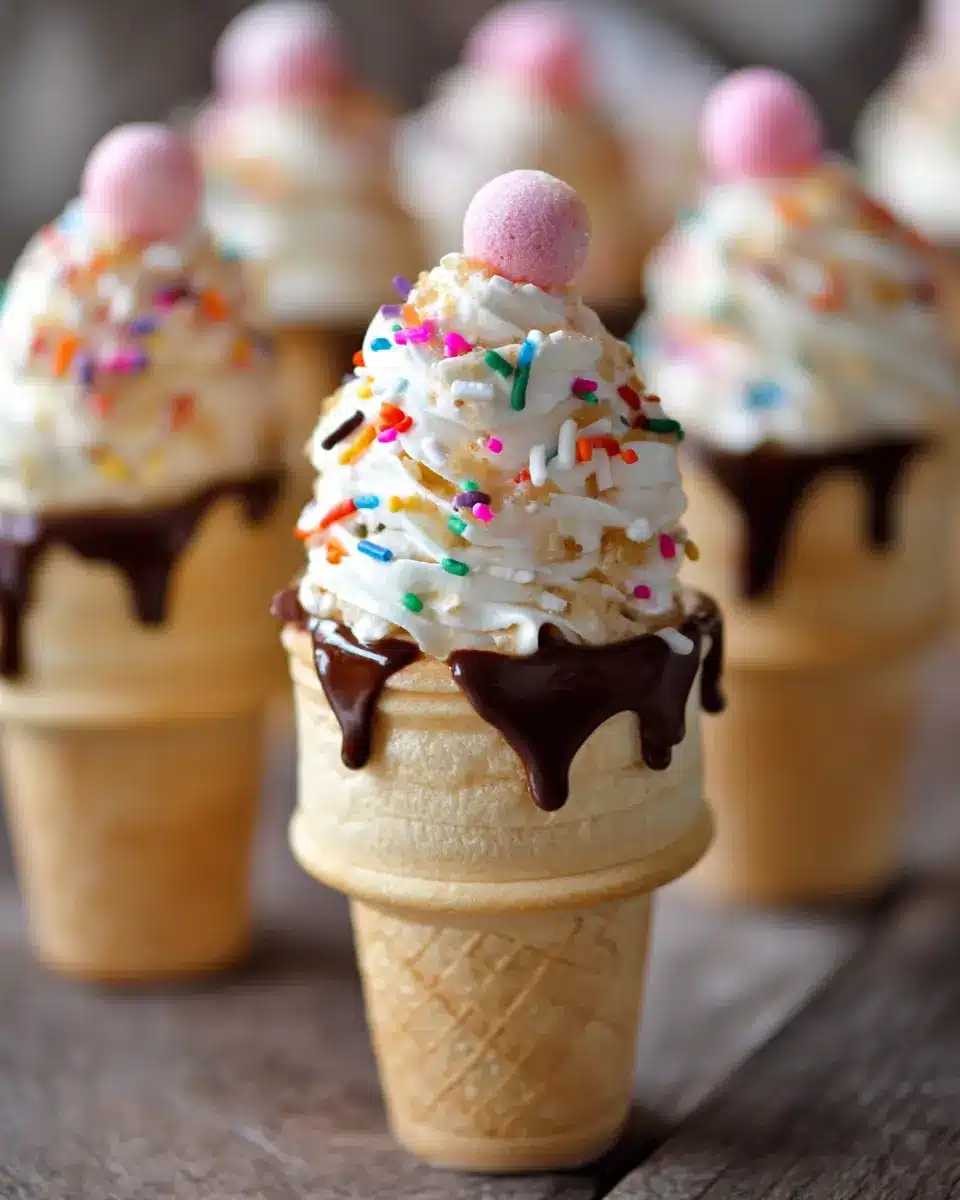
Time for the fun part! Once the cupcakes are completely cool, use your piping bag filled with frosting to crown each cone with a swirl of frosting. Want to get a little fancy? You can make it look like soft-serve ice cream. Drizzle some cooled hot fudge sauce over the top and add sprinkles for that colorful flair. Don’t forget to top each one with a mini jelly bean or your favorite candy!
So there you have it—a delightful twist on traditional cupcakes. These mini ice cream cone cupcakes not only look adorable but are sure to bring smiles to anyone who tries them. Enjoy your sweet creations!
Creative Variations on Mini Ice Cream Cone Cupcakes
Chocolate Ice Cream Cone Cupcakes
Why stop at vanilla? Elevate your mini ice cream cone cupcakes with a rich chocolate twist! Simply replace the white cake mix with chocolate cake mix for a decadent flavor explosion. Top with chocolate frosting for an extra layer of indulgence, and drizzle on some chocolate syrup. The combination of the fudgy cupcake and sweet, creamy frosting is sure to impress your guests. Plus, the visual appeal of chocolate sprinkles adds a fun touch!
Funfetti Ice Cream Cone Cupcakes
Looking to add a pop of color? Funfetti mini ice cream cone cupcakes are your answer! Use a funfetti cake mix, and watch the colorful sprinkles bake right into your cupcake. Finish them off with vanilla frosting and a sprinkle party on top. This delightful version is perfect for celebrations or an everyday treat that brings joy to any occasion. Playful and tasty, these cupcakes will surely put a smile on everyone’s face!
Baking Tips and Notes for Mini Ice Cream Cone Cupcakes
Best Practices for Baking
To achieve the best mini ice cream cone cupcakes, make sure to only fill the cones halfway with batter. This prevents overflow and gives you that perfect cupcake shape. Additionally, keep an eye on your oven; even though the baking time is roughly 12 minutes, every oven runs a bit differently. A toothpick inserted into the center should come out clean when they're done!
Storage Tips for Leftovers
If you have leftover mini ice cream cone cupcakes, store them in an airtight container in the refrigerator. This helps maintain their freshness and prevents the frosting from melting. They’re best enjoyed within 2-3 days, but good luck having any left by then!
Serving Suggestions for Mini Ice Cream Cone Cupcakes
Pairing with Other Desserts
To elevate your mini ice cream cone cupcakes experience, consider serving them alongside a variety of other sweet treats. A scoop of homemade vanilla ice cream can complement the cupcakes' flavors beautifully. You might also want to create a dessert platter with chocolate-covered strawberries or some chewy cookie bars for texture and variety. For a fun twist, serve your cupcakes with a refreshing fruit sorbet in vibrant flavors like raspberry or mango, offering a delightful contrast to the rich frosting and fudge.
Creative Ways to Serve
Presenting mini ice cream cone cupcakes can be just as fun as making them! Try placing them in a decorative cupcake tower or on colorful platters to capture attention. For an added touch, use themed liners that match a party's color scheme, or let each guest customize their cone with extra toppings at a DIY dessert bar featuring options like whipped cream, crushed cookies, or caramel drizzle. Don’t forget to include whimsical serving utensils like fun paper straws or retro-style dessert forks to enhance the visual appeal. Your guests will love the creativity!
Time Breakdown for Mini Ice Cream Cone Cupcakes
Preparation Time
Getting ready to whip up these delightful mini ice cream cone cupcakes will take about 15 minutes. This includes gathering your ingredients, prepping the ice cream cones, and mixing your cake batter. It’s quick and easy, making it perfect for beginners or busy dessert lovers!
Baking Time
Once you've prepped everything, it’s time to bake! Your mini ice cream cone cupcakes will need about 15 minutes in the oven. Just long enough for those sweet treats to rise perfectly and get that lovely golden brown color on top.
Total Time
All in all, you can expect to spend around 30 minutes from start to finish. In just half an hour, you’ll have adorable treats that are sure to impress at any gathering. What better way to combine the joys of cake and ice cream into one fun and portable dessert?
For more tips on baking techniques, check out this helpful guide.
Nutritional Information for Mini Ice Cream Cone Cupcakes
Calories per Serving
Delightful yet indulgent, each mini ice cream cone cupcake contains approximately 214 calories. Perfect for satisfying your sweet tooth without going overboard, these treats are ideal for parties or casual afternoon snacks.
Key Nutritional Facts
These charming cupcakes pack a punch with flavors and textures while remaining balanced in some nutritional aspects. Here’s a quick snapshot:
- Carbohydrates: 41g
- Protein: 2g
- Fat: 5g
- Sugar: 25g
- Sodium: 202mg
Each serving provides a fun dessert experience that can be enjoyed in moderation. If you’re looking for delicious alternatives to traditional desserts, these mini ice cream cone cupcakes are the perfect choice! For more detailed nutritional insights, consider visiting resources like the USDA FoodData Central.
FAQs about Mini Ice Cream Cone Cupcakes
How can I make the cake batter from scratch?
Making cake batter from scratch is simpler than you may think! Combine 2 cups of all-purpose flour, 1 ½ cups of sugar, ½ cup of unsalted butter softened, 1 cup of milk, 3 ½ teaspoons of baking powder, and a pinch of salt. Beat together until smooth and fluffy. Add in 4 large eggs and 2 teaspoons of vanilla extract for flavor. Mix until fully combined! This homemade batter will elevate your mini ice cream cone cupcakes to the next level.
Can I use gluten-free cake mix?
Absolutely! Many brands offer gluten-free cake mixes that will work perfectly in this recipe. Just use your favorite gluten-free mix instead of traditional cake mix. Always check the packaging for the best results, and your guests will love the delightful taste just as much!
How do I store the cupcakes to keep them fresh?
To keep your mini ice cream cone cupcakes fresh, store them in an airtight container at room temperature for up to two days. If you need to keep them longer, refrigerate them for up to a week. Just remember, if refrigerated, let them sit out for a bit before serving so the frosting softens up nicely.
Conclusion on Mini Ice Cream Cone Cupcakes
In summary, mini ice cream cone cupcakes are not just desserts; they are a delightful experience for any occasion. With their playful presentation and delicious flavors, these treats will surely impress your friends and family. So why not whip up a batch today? It’s a sweet adventure waiting to happen!

Mini Ice Cream Cone Cupcakes
Equipment
- 12-Cup Muffin Pan
- Glass Mixing Bowl
- piping bag
Ingredients
Dry Ingredients
- 15.25 ounces cake mix
- 48 mini ice cream cones
Wet Ingredients
- 15.6 ounces prepared frosting
- 0.5 cup cooled hot fudge sauce
- 0.25 cup sprinkles
- 48 mini jelly beans
Instructions
Baking Instructions
- Preheat oven to 350 degrees F.
- Spray 2 mini muffin tins with non-stick spray. Place on a flat surface. Place a mini ice cream cone in each well.
- In a large bowl mix the cake mix. Scoop mixture into each mini ice cream cone until it's ½ full, otherwise the cupcakes will overflow out of the cones.
- Place very carefully in the oven so you don't tip the cones over. Cook for about 12 minutes, or until the tops are golden brown.
- Remove the mini muffin tins from the oven carefully and allow to cool completely.
- Scoop frosting into a piping bag with a fancy tip. Pipe frosting on top of each cupcake cone.
- Drizzle cooled hot fudge sauce over each cupcake. Toss some sprinkles over each cupcake. Top with a mini jelly bean, or any other candy.
- Place in fridge until you need them.
- Serve with a big old mini ice cream cone cupcake loving smile.

Leave a Reply