
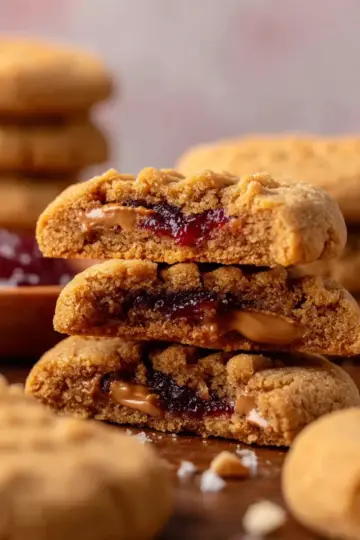
Introduction to Christmas Kitchen Sink Cookies
When it comes to holiday baking, the Christmas Kitchen Sink Cookies steal the show! But why are they called “kitchen sink” cookies, you ask? The name reflects the delightful chaos that comes with their ingredient list—a little bit of everything is mixed in, much like tossing in all but the kitchen sink.
These cookies are a festive blend of flavors and textures, incorporating everything from sweet chocolate chips and M&M's to salty pretzel and potato chip bits. This combination creates an irresistible treat that balances sweetness with a salty crunch, making them a favorite among guests. They are perfect for cookie exchanges, holiday parties, or simply enjoying at home with a glass of milk, hot cocoa, or your choice of festive drink.
As you gather your ingredients, you’ll notice the beauty of these cookies lies not only in their taste but also in their versatility. Feel free to customize them with your favorite bits—after all, that’s the joy of kitchen sink cookies! Interested in more delightful cookie variations? Consider exploring distinctive recipes like chocolate chip or oatmeal raisin to round out your holiday baking repertoire.

Ingredients for Christmas Kitchen Sink Cookies
Discover the delightful combination of flavors and textures in these Christmas Kitchen Sink Cookies! With a base of sweet and salty ingredients, you can customize them to suit your tastes. Let’s break down what you’ll need.
Essential Ingredients
For the perfect cookie base, gather:
- ¾ cup salted butter, softened to give that luscious texture
- ¾ cup light brown sugar and ¼ cup granulated sugar for sweetness
- 2 egg yolks (at room temperature) to create richness
- 2 teaspoon vanilla bean paste or extract for aromatic flavor
- 1 ½ cups all-purpose flour, making sure to spoon and level for precision
- ½ teaspoon baking powder and ½ teaspoon baking soda for leavening
- ½ teaspoon salt to balance the sweetness
- ½ cup red and green M&M’s for festive charm
Optional Add-ins
Feel free to get creative with your cookies! Some fun add-ins include:
- ⅓ cup white chocolate chips for extra sweetness
- ⅓ cup pretzel pieces to introduce a salty crunch
- ⅓ cup potato chip pieces for a unique savory touch
- 2 tablespoon red and green jimmies for that holiday sparkle
Want a beautiful presentation? Consider adding a few extra toppings before baking. Each cookie can be a unique canvas reflecting your holiday spirit!
For more baking tips, check out this helpful resource on measuring flour correctly from BBC Good Food.
Preparing Christmas Kitchen Sink Cookies
Making your Christmas Kitchen Sink Cookies is an enjoyable process that combines simple ingredients with a dash of holiday spirit. These cookies are perfect for sharing at holiday gatherings or simply enjoying with a warm cup of cocoa. Let's dive into the step-by-step preparation!
Step 1: Preheat the oven and prep the sheets
Start by preheating your oven to 350 degrees Fahrenheit (175 degrees Celsius). This temperature is ideal for producing a beautiful golden cookie. While it warms up, line two baking sheets with parchment paper. This helps prevent sticking and ensures even baking. If you've never used parchment paper before, it's a game-changer for effortless cleanup!
Step 2: Cream the butter and sugars
In a large mixing bowl, add ¾ cup of softened salted butter, along with ¾ cup of light brown sugar (packed) and ¼ cup of granulated white sugar. Using an electric mixer, cream these ingredients together on medium speed for about two minutes until the mixture is light and fluffy. This is a critical step that introduces air into the dough, making your cookies tender and soft.
Step 3: Add egg yolks and vanilla
Next, it's time to elevate those flavors! Add in two egg yolks (make sure they’re at room temperature for better mixing) and two teaspoons of vanilla bean paste or extract. Mix on medium speed for another two minutes until everything is well combined and the mixture is pale in color. The vanilla will infuse your cookies with a delightful aroma that will certainly make your kitchen feel festive.
Step 4: Combine dry ingredients
In another bowl, mix together 1 ½ cups of all-purpose flour, ½ teaspoon of baking powder, ½ teaspoon of baking soda, and ½ teaspoon of salt. This step is essential to ensure that all your leavening agents are evenly distributed. Gradually add this dry mixture to the butter-sugar mixture, combining them until just incorporated. Avoid overmixing, as this can lead to tougher cookies.
Step 5: Fold in the mix-ins
Now for the fun part: the mix-ins! Fold in ½ cup of red and green M&M's, ⅓ cup of white chocolate chips, ⅓ cup of pretzel pieces, ⅓ cup of potato chip pieces, and 2 tablespoons of red and green jimmies. The combination of sweet, salty, and crunchy elements is what makes these Christmas Kitchen Sink Cookies so special!
Step 6: Scoop and shape the cookie dough
Using a cookie scoop or two tablespoons, portion the dough into 20 balls. Arrange them on your prepared baking sheets, leaving about two inches of space between each one. Want to give them a photo-worthy finish? Before baking, add a few extra mix-ins on top!
Step 7: Bake to perfection
Slide the baking sheets into your preheated oven and bake for 10-12 minutes. If you prefer chewy centers, aim for around 10 minutes; if you like crisper edges, go for the full 12. An optional trick? Once they come out of the oven, use a large cookie cutter to gently reshape them into perfect circles.
Once baked, let the cookies cool on the sheets for 5 minutes before transferring them to a cooling rack. After about 10 minutes, they’re ready to enjoy or store. These cookies can last in an airtight container for up to three days, though I doubt they'll stick around that long!
For more festive recipes, check out Bon Appétit’s holiday guide for inspiration and tips! Enjoy the holiday baking season!

Variations on Christmas Kitchen Sink Cookies
Substitute Dark Chocolate Chips
If you’re a fan of rich flavors, why not swap in dark chocolate chips for a decadent twist in your Christmas Kitchen Sink Cookies? Dark chocolate not only enhances the cookie's sweetness but also adds a lovely depth of flavor. Plus, it pairs beautifully with the salty pretzel and potato chip pieces. Feel free to adjust the amount to suit your taste—if you love chocolate, why not go for a full cup?
Use Gluten-Free Flour
Catering to gluten-free friends? You can easily make these festive treats accessible by using a gluten-free flour blend instead of regular all-purpose flour. Just keep an eye on the texture, as gluten-free options can be more absorbent. Check out reputable sources like King Arthur Baking for guidance on the best gluten-free flours to suit your baking adventures. Your loved ones won’t even notice the difference, and they’ll appreciate your thoughtful gesture!
Baking Notes for Christmas Kitchen Sink Cookies
Measuring Flour Correctly
To ensure your Christmas Kitchen Sink Cookies come out perfect every time, it's crucial to measure your flour correctly. Never scoop directly from the bag, as this can pack the flour and lead to dry cookies. Instead, spoon the flour into your measuring cup and level it off with a knife. For added accuracy, consider using a kitchen scale; 1 cup of all-purpose flour typically weighs about 125 grams. This little tip will help your cookies achieve that delightful chewy texture!
Adjusting for Altitudes
Baking at high altitudes can be a bit tricky, but fear not! If you're in a mountainous area, you might need to make some adjustments for your Christmas Kitchen Sink Cookies. At altitudes above 3,000 feet, increase the oven temperature by 15-25°F and reduce sugar slightly. Sometimes, adding a tablespoon of flour can help too. Always remember to keep an eye on your cookies as they bake; they might need a minute or two less or more depending on your elevation. Happy baking!

Serving Suggestions for Christmas Kitchen Sink Cookies
Pair with Warm Beverages
To truly elevate your Christmas Kitchen Sink Cookies, consider pairing them with your favorite warm beverages. Whether it’s a cozy mug of hot cocoa, spiced chai, or even a rich, brewed coffee, these drinks complement the sweet and salty flavors beautifully. Imagine sinking your teeth into a warm cookie while sipping a steaming cup—sheer holiday bliss!
Gift Packaging Ideas
These cookies make fantastic gifts! Dress them up in festive cellophane bags tied with a cheerful ribbon, or place them in a decorative tin filled with festive decorations. Don’t forget to add a hand-written note; a personal touch goes a long way in making your gifts feel special. For some inspiration, check out the creative packaging ideas showcased on sites like Martha Stewart or Pinterest. Sharing your Christmas Kitchen Sink Cookies will surely spread holiday cheer!
Tips for Making Perfect Christmas Kitchen Sink Cookies
Avoid Overmixing
When whipping up your Christmas Kitchen Sink Cookies, it's crucial to mix just until ingredients are combined. Overmixing can lead to dense cookies rather than light and chewy ones. Gently folding in your mix-ins, like M&M's and pretzels, will maintain the perfect texture, ensuring every bite is delightful.
Cooking Times for Desired Texture
Timing is everything! Bake your cookies for 10 minutes if you prefer a chewy center, or go for 12 minutes for a crisper edge. Keep an eye on them as they bake; they’ll continue to firm up slightly after coming out of the oven. With these tips, your festive cookies are sure to shine and be a holiday favorite!
Interested in more festive treats? Check out this cookie guide for additional inspiration!
Time details for Christmas Kitchen Sink Cookies
Preparation time
Preparing your Christmas Kitchen Sink Cookies is a breeze! You’ll only need about 15 minutes to mix up that delicious dough. Grab your ingredients, and set out your mixing bowls; it's time to get festive in the kitchen!
Baking time
These cookies bake up beautifully in just 10 to 12 minutes. For chewier centers, aim for 10 minutes, while a little longer will give you crispy edges. Keep an eye on them to get your perfect cookie texture!
Total time
In total, you'll need about 25 to 27 minutes to create your amazing Christmas Kitchen Sink Cookies. This includes prep and baking time, leaving you some extra moments to enjoy the sweet aromas filling your home. Perfect for holiday gatherings!
For more festive recipes, check out the Food Network for inspiration or share your cookie creations with friends!
Nutritional information for Christmas Kitchen Sink Cookies
Calories per cookie
Each delicious Christmas Kitchen Sink Cookie contains approximately 150 calories. Perfect for indulging during the holiday season while still keeping an eye on your treats!
Sugar content
These festive cookies pack a sweet punch, with around 10 grams of sugar each. The combination of brown sugar, granulated sugar, and all those delightful mix-ins makes them irresistibly sweet.
Fats and proteins
With about 7 grams of fat and 2 grams of protein per cookie, they provide a satisfying balance of flavors. The butter and mix-ins contribute to both the rich texture and festive flavor, making them a delightful addition to your holiday spread.
Looking for healthier alternatives or more cookies to bake this holiday season? Check out Nutrition.gov for additional ideas and tips!
FAQs about Christmas Kitchen Sink Cookies
Can I freeze the cookie dough?
Absolutely! Freezing the Christmas Kitchen Sink Cookies dough is a great way to prepare in advance. Simply scoop the cookie dough balls onto a baking sheet, freeze them until firm, then transfer them to a zip-top bag. You can store them in the freezer for up to three months. When you’re ready to bake, just add a couple of minutes to the baking time from frozen!
How do I store leftover cookies?
To keep your delicious Christmas Kitchen Sink Cookies fresh, store any leftovers in an airtight container at room temperature. They should stay good for about three days. If you want them to last a bit longer, you can refrigerate them. Just make sure to let them warm to room temperature for a couple of minutes before enjoying!
What’s the best way to customize these cookies?
One of the best parts of making kitchen sink cookies is how customizable they are! Feel free to mix and match your favorite add-ins. Consider using different types of chocolate chips (like dark or milk chocolate), or swap out the pretzel and potato chip pieces for your preferred snacks. You could even add spices like cinnamon for a cozy twist. The options are endless! If you want more ideas, check out this article on cookie customization. Enjoy the creativity!
Conclusion on Christmas Kitchen Sink Cookies
In summary, Christmas Kitchen Sink Cookies are a delightful mix of flavors and textures, bringing a festive twist to your holiday baking. The blend of sweet and salty treats ensures they'll be a crowd-pleaser. Enjoy them fresh from the oven and share the joy of these delightful cookies with friends and family! For more festive ideas, check out these holiday baking tips from Bon Appétit.

Christmas Kitchen Sink Cookies
Equipment
- oven
- mixing bowl
- Electric Mixer
- spatula
- baking sheets
- parchment paper
Ingredients
Butter and Sugars
- ¾ cup salted butter softened
- ¾ cup light brown sugar packed
- ¼ cup granulated white sugar
- 2 large egg yolks at room temperature
- 2 teaspoon vanilla bean paste or extract
Dry Ingredients
- 1 ½ cups all-purpose flour spooned and leveled
- ½ teaspoon baking powder
- ½ teaspoon baking soda
- ½ teaspoon salt
Mix-ins
- ½ cup red and green M&M's
- ⅓ cup white chocolate chips
- ⅓ cup pretzel pieces
- ⅓ cup potato chip pieces
- 2 tablespoon red and green jimmies
Instructions
Baking Instructions
- Preheat oven to 350 degrees. Line two baking sheets with parchment paper and set aside.
- Add softened butter, light brown sugar, and granulated sugar to a large bowl. Cream together with an electric mixer for 2 minutes until light and fluffy.
- Add in egg yolks and vanilla, mix for 2 minutes on medium speed until pale and fluffy.
- Add in flour, baking powder, baking soda, and salt. Mix until combined.
- Fold in M&M's, white chocolate chips, pretzel pieces, potato chip pieces, and jimmies until everything is combined.
- Scoop the dough into 20 balls, arrange 2 inches apart on prepared baking sheets.
- Optional: Add extra mix-ins on top of the scooped cookie dough balls.
- Bake for 10-12 minutes, 10 for chewier centers, 12 for crisper edges.
- Optional: Use a circular cookie cutter to shape the cookies right after baking.
- Let cookies cool on baking sheets for 5 minutes, then transfer to a cooling rack for another 10 minutes.
- Store leftovers in an airtight container for up to three days.

Leave a Reply