
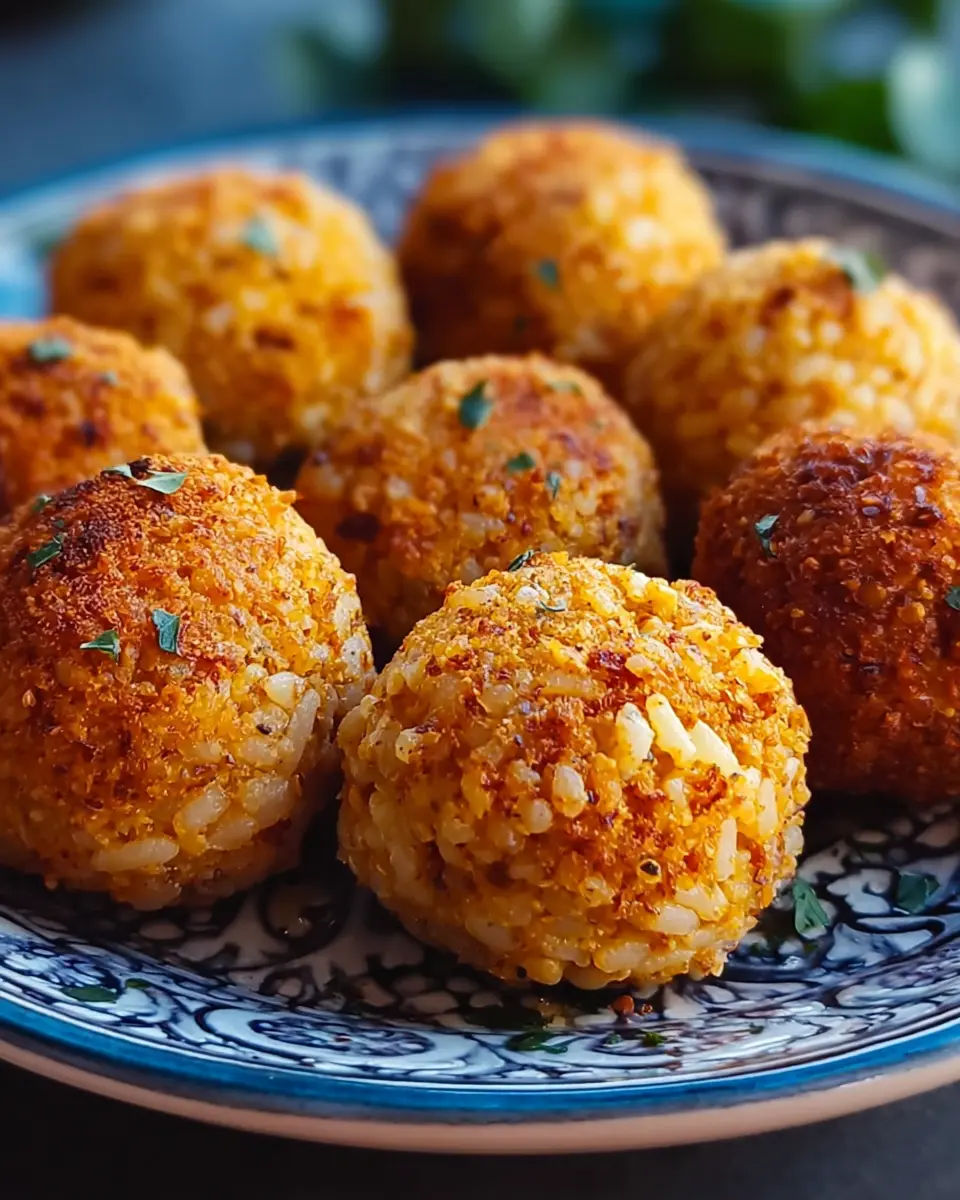
Introduction to Baked Chickpea and Rice Balls
Why choose homemade snacks?
In today's fast-paced world, grabbing a snack on the go often leads us to unhealthy choices. That's why opting for homemade snacks like baked chickpea and rice balls is not just a great way to nourish your body, but also an enjoyable kitchen activity! Making them at home allows you to control the ingredients, helping you cut down on preservatives and excess sodium typically found in store-bought options. Plus, it’s a fun experiment in flavor where you can adjust spices and seasonings to cater to your taste buds!
The health benefits of chickpeas and rice
Let’s talk about the stars of this recipe: chickpeas and rice. Chickpeas are a nutritional powerhouse, packed with protein, fiber, and essential vitamins — making them great for heart health and digestion. Rice, especially when you opt for brown or whole grain varieties, provides complex carbohydrates that release energy gradually, keeping you satiated longer. You'll be pleased to know that together, these ingredients create a satisfying and nutritious snack that’s perfect for both kids and adults. For more inspiration on the benefits of legumes, check out this article.
So, grab your apron and let’s dive into making these delightful baked chickpea and rice balls!
Ingredients for Baked Chickpea and Rice Balls
Main Ingredients
To create your delicious baked chickpea and rice balls, you’ll need a few essential components that come together for a delightful flavor and texture. Here’s what you’ll need:
- 1 can Chickpeas: Rinsed and dried, they form the base for your protein-packed snack.
- 1 cup Cooked Rice: Leftover rice works perfectly; short or medium grain adds a nice chew.
- 2 cloves Garlic: Minced or a sprinkle of garlic powder will add a warm, aromatic quality.
- 1 teaspoon Onion Powder: Alternatively, chopped onions can give a fresh burst of flavor.
- 1 teaspoon Smoked Paprika: For that irresistible smoky depth.
- Salt & Pepper: To taste, enhancing all the flavors beautifully.
Optional Ingredients for Enhanced Flavor
Feel like elevating your baked chickpea and rice balls even further? Here are a couple of optional ingredients you might want to consider:
- ¼ cup Parsley: Freshly chopped for a hint of brightness.
- ¼ cup Chives: Also chopped, they contribute a mild onion flavor that complements the dish beautifully.
These extra touches can really transform your snack from good to unforgettable! Want to learn more about herbs and their benefits? Check out this herb guide.
By using these ingredients, you’re not just whipping up a snack; you're crafting an experience everyone will love!
Step-by-Step Preparation of Baked Chickpea and Rice Balls
Creating delicious baked chickpea and rice balls is not just a rewarding kitchen task but also a great way to impress your friends and family with a healthy yet savory snack. Let’s get started with the steps to bring this easy recipe to life!
Preheat the oven and prepare the baking sheet
Start by preheating your oven to 400°F (200°C). This ensures that your baked chickpea and rice balls will cook evenly and develop that beautiful golden brown exterior. While the oven heats up, line a baking sheet with parchment paper. This will help prevent the balls from sticking and make cleanup a breeze.
Mash the chickpeas
Grab a large mixing bowl and rinse your canned chickpeas thoroughly before drying them. Using a fork or a potato masher, mash the chickpeas until they’re mostly broken down but still have some texture. This is an essential step, as it creates a base that’s both hearty and able to bind the rest of the ingredients together without becoming too mushy.
Combine all ingredients
Once your chickpeas are mashed, it’s time to add the other ingredients. Mix in 1 cup of cooked rice, minced garlic, onion powder, smoked paprika, and season with salt and pepper to taste. If you want to elevate the flavor even further, consider adding some chopped parsley or chives—these fresh herbs will bring a burst of color and taste. Stir everything together until evenly mixed. For tips on selecting fresh herbs, check out this guide by The Spruce Eats.
Add the binding agent
To hold your baked chickpea and rice balls together, it's crucial to include a binding agent. In this case, whisk 1 egg in a small bowl and add it to your mixture. If you prefer a vegan alternative, you could use a flax egg instead. Just mix 1 tablespoon of flaxseed meal with 2.5 tablespoons of water and let it sit for a few minutes until it becomes gel-like. This step helps ensure your balls keep their shape while baking!
Chill the mixture
Cover your mixing bowl with plastic wrap and pop it into the refrigerator for at least 30 minutes. Chilling the mixture helps firm it up, making it easier to shape into balls later on.
Shape the balls
After the mixture has chilled, take small portions—about 1.5 inches in diameter—and roll them tightly in your hands to create compact balls. The effort you put in here pays off in the taste and texture of your baked chickpea and rice balls.
Coat with breadcrumbs
To add that golden crunch, roll each ball in panko breadcrumbs before placing them onto your prepared baking sheet. This extra step can take your Snack game to a new level of crunchiness. If you like, you can mix some spices into the breadcrumbs for additional flavor.
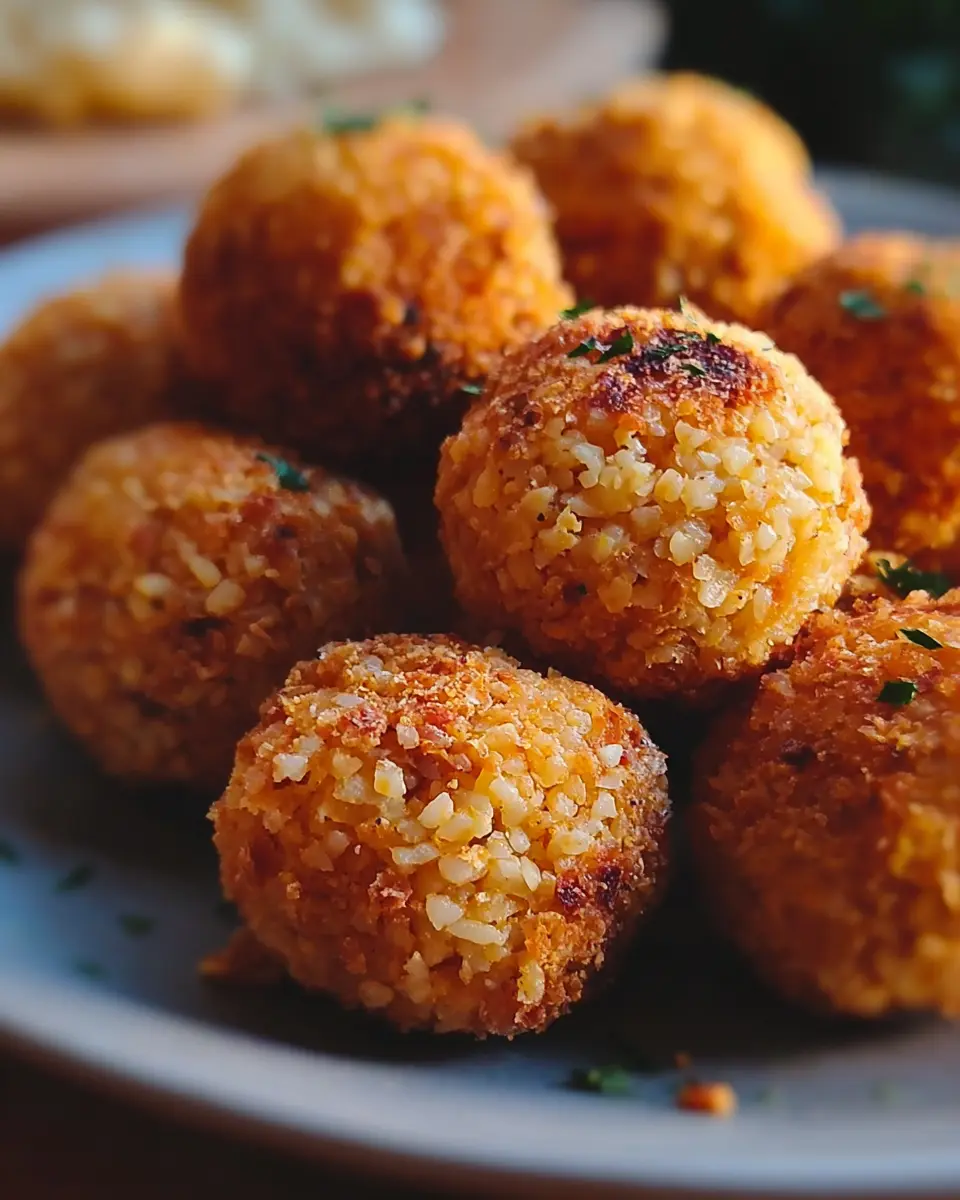
Bake until golden brown
Finally, lightly brush the tops of the balls with olive oil and bake them for 20-25 minutes, flipping halfway through. Keep an eye on them until they’re perfectly golden brown. Allow them to cool slightly before serving. Enjoy these baked chickpea and rice balls warm with your favorite dipping sauce for a delightful snack that will quickly become your favorite!
Variations on Baked Chickpea and Rice Balls
Spicy Chickpea and Rice Balls
If you love a little heat, consider adding cayenne pepper or red pepper flakes to your baked chickpea and rice balls mixture. You can also swap out the smoked paprika for Chipotle powder for a smoky kick! Adding finely chopped jalapeños can amp up the spice levels even further. These fiery versions pair perfectly with a cooling yogurt dip or a tangy lime sauce. Trust us, you'll want to keep these in your snack rotation!
Mediterranean-Inspired Version
Bring a taste of the Mediterranean to your snack time by incorporating diced sun-dried tomatoes, feta cheese, and olives into your baked chickpea and rice balls. Fresh herbs like oregano and basil add an aromatic touch that makes these balls irresistible. Serve them alongside a homemade tzatziki sauce, and you'll find yourself transported to a sun-soaked terrace in Greece with every bite! Feel free to explore more Mediterranean flavors by checking out recipes on Mediterranean Living.
Cooking Tips and Notes for Baked Chickpea and Rice Balls
Tips for Achieving the Perfect Texture
To ensure your baked chickpea and rice balls come out perfectly crispy and flavorful, don’t skip the chilling step! Chilling the mixture for at least 30 minutes helps the flavors meld and the balls hold their shape. Using leftover cooked rice adds a delightful chewiness, but make sure it's not too wet. If your mixture feels too loose, a bit more Panko or breadcrumbs can help bind everything together for a firmer texture.
Notes on Storage and Reheating
These delicious snacks are great for meal prep! Store any leftovers in an airtight container in the fridge for up to three days. To reheat, simply pop them in the oven at 350°F (175°C) for about 10 minutes until warmed through and crispy again. For longer storage, freeze the baked chickpea and rice balls before baking, and then bake directly from frozen, adding a few extra minutes to your cooking time. Don't forget to dip in your favorite sauce for the best experience!
For more tips, check out this chickpea cooking guide.

Serving Suggestions for Baked Chickpea and Rice Balls
Pairing with Dipping Sauces
Elevate your baked chickpea and rice balls experience by serving with a variety of delicious dipping sauces. Consider a creamy tahini sauce, zesty tzatziki, or a sweet chili sauce for a kick. For a classic touch, a simple homemade marinara or spicy sriracha aioli can really complement the flavors. Dip, savor, and experiment—everyone will find a favorite!
Ideas for Meal Presentation
To make your baked chickpea and rice balls a standout dish, think about how you serve them. Arrange the balls on a colorful platter surrounded by fresh veggies like sliced cucumbers and bell peppers for dipping. You could also serve them atop a bed of leafy greens or alongside a grain salad. Add a sprinkle of fresh herbs like parsley or chives to elevate the look and flavor of your dish!
For more serving inspiration, check out this article on presentation tips.
Time Breakdown for Baked Chickpea and Rice Balls
Preparation Time
The prep time for these baked chickpea and rice balls is just 15 minutes! This includes gathering your ingredients, mashing the chickpeas, and mixing everything together. It's straightforward, so you won’t feel overwhelmed.
Cooking Time
Once everything is prepped, allow for about 25 minutes of cooking time. Just pop those tasty balls in the oven and let them transform into golden deliciousness!
Total Time
All in all, from start to finish, you're looking at roughly 1 hour and 10 minutes. This includes 30 minutes of chill time, which helps your balls hold their shape while baking. Perfect for when you need a little break to think about how delightful your snack will be!
If you're curious about more efficient meal prepping, consider checking out Meal Prep on a Budget.
Nutritional Facts for Baked Chickpea and Rice Balls
Calories
A serving of these baked chickpea and rice balls contains approximately 180 calories, making them a guilt-free snacking option that fits well into various diets.
Protein Content
With about 6 grams of protein per serving, these baked chickpea and rice balls are a great way to add some plant-based protein to your diet. Chickpeas are a fantastic source, contributing to your daily nutritional needs.
Key Vitamins and Minerals
These delightful balls aren’t just tasty—they're packed with essential vitamins and minerals. Each serving provides:
- Vitamin A: 500 IU, supporting eye health.
- Calcium: 30 mg for bone strength.
- Iron: 2 mg, essential for oxygen transport in the body.
Experiment with adding different vegetables or herbs to boost these benefits even further!
FAQs about Baked Chickpea and Rice Balls
Can I make these ahead of time?
Absolutely! You can prepare the baked chickpea and rice balls mixture and refrigerate it for up to 24 hours before shaping and baking. Alternatively, you can freeze the shaped balls for later use; just take them out when you're ready to bake and extend the cooking time a bit.
What can I use instead of egg?
If you want a vegan option or simply need an egg substitute, a flax egg works beautifully. To make one, mix 1 tablespoon of ground flaxseeds with 2.5 tablespoons of water. Let it sit for about 5 minutes until it thickens, and then incorporate it into your mixture as you would with an egg.
How do I store leftovers?
Store any leftover baked chickpea and rice balls in an airtight container in the fridge. They should stay fresh for about 3-4 days. For longer storage, consider freezing them in a single layer on a baking sheet, then transfer to a freezer bag once fully frozen. Just reheat them in the oven for perfectly crispy bites!
Want to dive deeper into meal prep? Check out food storage basics for tips.
Conclusion on Baked Chickpea and Rice Balls
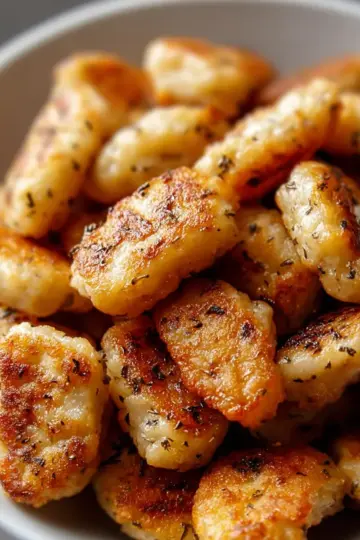
These baked chickpea and rice balls are a delicious choice for a healthy snack or appetizer. They're easy to make, customizable, and sure to be a hit at your next gathering. Try dipping them in your favorite sauce for an added flavor boost! Enjoy!

Baked Chickpea and Rice Balls: Your New Favorite Snack!
Equipment
- mixing bowl
- baking sheet
- Fork or potato masher
- Plastic wrap
Ingredients
For the Mixture
- 1 can Chickpeas rinsed and dried
- 1 cup Cooked Rice leftover short-grain or medium-grain
- 2 cloves Minced Garlic or garlic powder
- 1 teaspoon Onion Powder or chopped onions
- 1 teaspoon Smoked Paprika or regular paprika
- Salt & Pepper to taste
For Coating
- 1 cup Panko Breadcrumbs or regular breadcrumbs
For Binding
For Freshness
- ¼ cup Parsley chopped, optional
- ¼ cup Chives chopped, optional
Instructions
Instructions
- Preheat the Oven: Set your oven to 400°F (200°C) and prepare a baking sheet with parchment paper.
- Mash the Chickpeas: In a large mixing bowl, mash the rinsed and dried chickpeas with a fork or potato masher until mostly broken down but still chunky.
- Combine Ingredients: Add cooked rice, Panko breadcrumbs, chopped herbs, minced garlic, onion powder, smoked paprika, salt, and pepper to the chickpeas. Mix until even.
- Add the Egg: Whisk the egg and pour it into the mixture. Mix gently until cohesive, being careful not to overwork.
- Chill the Mixture: Cover the bowl with plastic wrap and chill in the refrigerator for at least 30 minutes.
- Shape the Balls: After chilling, shape the mixture into balls about 1.5 inches in diameter, rolling tightly.
- Coat with Panko: Roll each ball in remaining Panko breadcrumbs before placing on the baking sheet.
- Brush and Bake: Lightly brush the balls with olive oil. Bake for 20-25 minutes, flipping halfway until golden brown.
- Serve: Allow to cool slightly before serving warm with your favorite dipping sauce.

Leave a Reply