
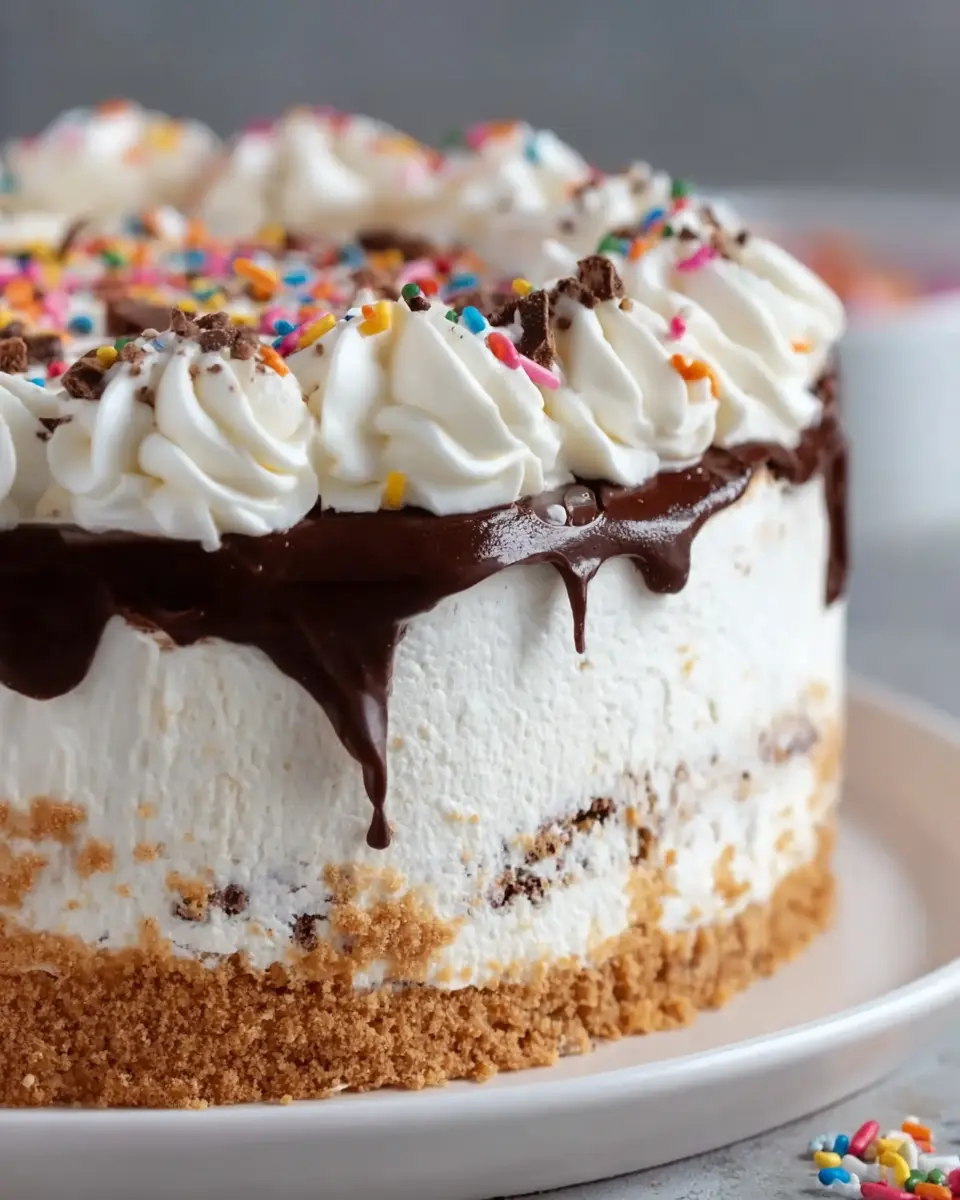
Introduction to Dairy Queen Ice Cream Cake
When that craving for something sweet and creamy hits, nothing quite satisfies like a classic Dairy Queen Ice Cream Cake. This iconic dessert, known for its velvety layers of ice cream, rich fudge, and crunchy cookie bits, holds a special place in the hearts of many. But why settle for just a store-bought version when you can whip up a homemade delight in your own kitchen?
Why make a homemade Dairy Queen Ice Cream Cake?
Creating your own Dairy Queen Ice Cream Cake offers several advantages. First and foremost, you have control over the ingredients, ensuring your dessert is made with high-quality, fresh products. Plus, it's an excellent opportunity to customize your cake to your tastes—add in your favorite flavors, swap cookie bases, or even get creative with toppings!
Homemade cakes are also a budget-friendly option. Typically, making your own dessert can save you a pretty penny compared to purchasing one from a store. Furthermore, nothing beats the satisfaction of serving a cake you've made from scratch to friends and family. Who wouldn't love a delicious, homemade treat that captures the joy and nostalgia of childhood ice cream cakes?
For a detailed recipe that reproduces that iconic taste, check out our complete guide below!

Ingredients for Dairy Queen Ice Cream Cake
Creating the perfect Dairy Queen Ice Cream Cake at home is all about gathering the right ingredients. Let's dive into what you'll need to craft this delightful treat that’s always a crowd-pleaser.
Essential ingredients for the perfect ice cream cake
-
Ice Cream: For that classic texture and flavor, you’ll need 1 ½ quarts each of chocolate and vanilla ice cream. Make sure to soften them slightly for easy layering.
-
Oreo Cookies: Nothing beats the classic combination of ice cream and cookies! You’ll need 10 crushed Oreo cookies to create that crunchy layer.
-
Fudge Sauce Ingredients: You’ll need 1 cup of semisweet chocolate chips, 3 tablespoons of light corn syrup, ½ teaspoon of vanilla extract, and ½ cup of heavy whipping cream to whip up a rich fudge layer.
-
Frosting Essentials: For the frosting, have 2 cups of heavy whipping cream, 1 cup of powdered sugar, and 1 teaspoon of vanilla extract on hand.
-
Decorative Touch: Sprinkles (optional) can add that festive flair to your finished cake!
For more on creating perfect ice cream treats, check out this ice cream recipe guide. Enjoy the process, and soon you’ll have a homemade Dairy Queen Ice Cream Cake that rivals the original!
Step-by-step Preparation of Dairy Queen Ice Cream Cake
Creating a homemade Dairy Queen Ice Cream Cake is a delightful journey that’s sure to impress friends and family. Let’s walk through the steps together, ensuring every layer comes out perfectly delicious.
Preheat and prepare the Oreo crust
Start by preheating your oven to 350°F (175°C). In a mixing bowl, combine 10 crushed Oreo cookies with 1 ½ tablespoons of melted butter. Mix until the crumbs are evenly coated. Spread this mixture onto a lined baking sheet and bake it for 8 to 10 minutes. Let it cool completely; once it's cool, you can crumble it further to ensure a crunchy texture that will make your cake irresistible.
Create the chocolate ice cream layer
While the crust is cooling, line an 8-inch round cake pan with plastic wrap for easy removal later. Scoop 1 ½ quarts of softened chocolate ice cream into the pan, spreading it evenly. Freeze this layer for about 30 minutes, allowing it to harden. This step is crucial for achieving the perfect structural integrity of your cake.
Make the fudge topping
Now, let’s create that rich fudge topping everyone loves. In a saucepan, heat ½ cup of heavy cream until it simmers, then remove it from heat and pour it over 1 cup of semisweet chocolate chips, 3 tablespoons of light corn syrup, and ½ teaspoon of vanilla extract. Let it sit for 3 minutes before whisking it all together until smooth. Allow the fudge to cool slightly before proceeding to the next step.
Layer the Oreo cookies
Once your fudge topping is ready, take the chocolate ice cream layer out of the freezer and pour the fudge over it, spreading it into an even layer. Next, sprinkle your prepared Oreo cookie crumbs across the fudge layer, ensuring you cover it well. This crunchy layer needs to freeze for 2 to 3 hours to fully set, so be patient—it'll be worth it!
Add the vanilla ice cream layer
After the Oreo cookie layer has frozen solid, it's time to add the vanilla ice cream. Scoop 1 ½ quarts of softened vanilla ice cream on top of the cookie layer. Spread it evenly and freeze again for at least 2 hours. This contrasting flavor will really complement your Dairy Queen Ice Cream Cake.
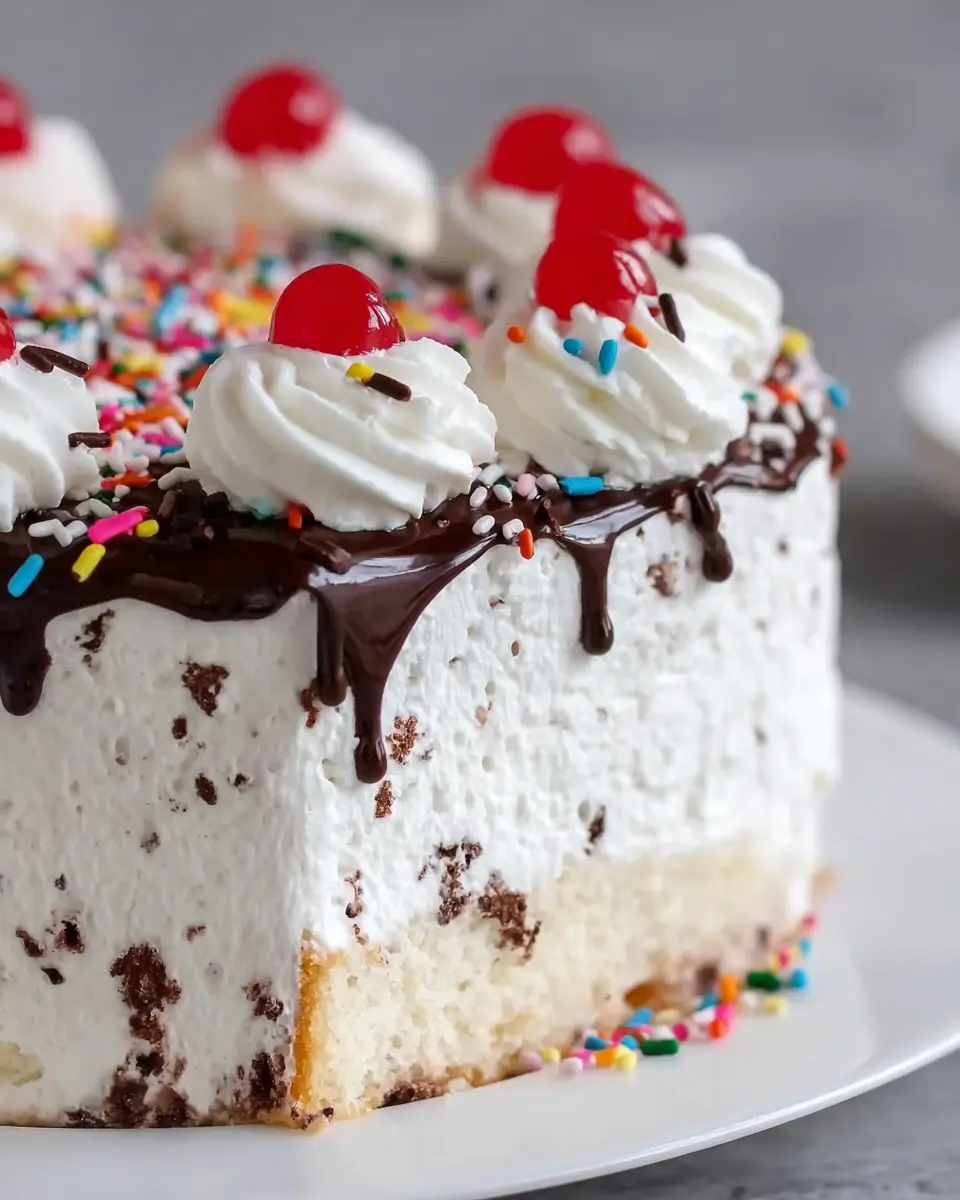
Frost the cake
To frost your cake, beat 2 cups of heavy whipping cream with 1 cup of powdered sugar and 1 teaspoon of vanilla extract until stiff peaks form. Remove the cake from the pan using the plastic wrap, placing it on a serving plate. Frost the entire cake evenly with the prepared whipped cream, creating a smooth and inviting finish.
Final freezing and serving
For the final touch, you can add some colorful sprinkles on top if you’d like. Freeze the cake for at least 8 hours, or preferably overnight, to ensure it's solidly frozen. When you’re ready to serve, let it sit at room temperature for about 10 to 15 minutes for easier slicing. Enjoy this delightful and nostalgic treat—you've earned it!
For more ice cream inspirations, check out Food Network or BBC Good Food. Happy baking!
Variations on Dairy Queen Ice Cream Cake
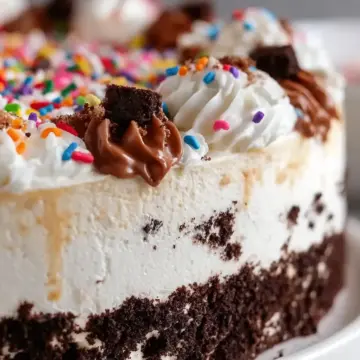
Cookies and Cream Twist
For a delightful spin on the classic Dairy Queen Ice Cream Cake, consider layering your favorite cookies and cream ice cream. Simply swap out the chocolate or vanilla layers for a rich cookies and cream flavor. You can enhance the experience by adding extra crushed Oreo cookies into the fudge layer or even folding them into the frosting for added texture. This version balances sweetness and crunch, making it a hit at any celebration!
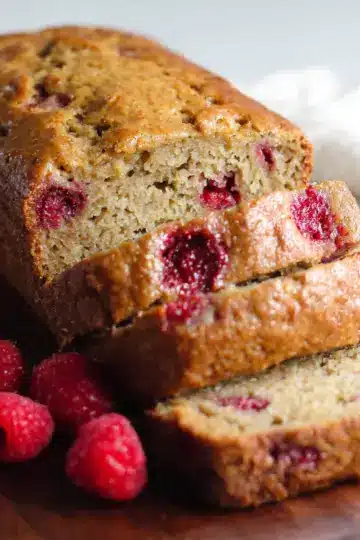
Fruit-Flavored Ice Cream Cakes
If you're dreaming of something fruity, a Dairy Queen Ice Cream Cake can easily accommodate flavors like strawberry or mango. Replace the vanilla layer with a fruity counterpart, and think about drizzling in some homemade fruit sauce between layers. Fresh fruit slices atop the whipped cream frosting can bring in a refreshing contrast that’s perfect for summer parties. This twist not only adds vibrant colors to your cake but also a delightful flavor burst that everyone will love!
Explore more creative variations to make your Dairy Queen Ice Cream Cake uniquely yours!
Cooking Tips and Notes for Dairy Queen Ice Cream Cake
Creating a delightful Dairy Queen Ice Cream Cake at home is an enjoyable adventure, and ensuring a smooth frosting can elevate your dessert game. Here are some helpful hints for achieving that perfect finish:
Helpful hints for a smoother frosting
- Chill Your Equipment: Start with a chilled bowl and beaters when whipping the cream. This helps achieve stable, airy peaks.
- Use Heavy Cream: Always opt for heavy whipping cream; it whips better and holds its shape beautifully.
- Don’t Overwhip: Whip the cream just until stiff peaks form. Overwhipping can lead to a grainy texture, less ideal for frosting.
- Add Powdered Sugar Gradually: Sift in the powdered sugar slowly while mixing to prevent clumps and create a velvety consistency.
Whether it’s for a birthday, a summer gathering, or just a sweet craving, your Dairy Queen Ice Cream Cake will impress! Enjoy the process and don’t hesitate to get creative with your toppings. For tips on making homemade whip cream, check out this guide from Food Network. Happy baking!
Serving Suggestions for Dairy Queen Ice Cream Cake
Creative ways to serve and enjoy
After mastering your Dairy Queen Ice Cream Cake, it’s time to get creative with your presentation and serving! Here are a few fun ideas:
- Layered Slices: Serve slices with a drizzle of warm chocolate or caramel sauce for an extra indulgent touch.
- Ice Cream Sandwiches: Use two slices of cake with a scoop of your favorite ice cream in between for a delicious twist!
- Toppings Station: Set up a toppings bar with fresh fruit, nuts, and whipped cream, allowing guests to customize their slice.
- Festive Plates: Sprinkle some extra Oreo crumbles or colorful sprinkles on the plate for a pop of color.
For more inspiration, check out these serving ideas on Taste of Home or Food Network. Enjoy the joy this homemade treat brings to your gatherings!
Time Breakdown for Dairy Queen Ice Cream Cake
Preparation Time
Creating the layers for your Dairy Queen Ice Cream Cake takes about 1 hour. This includes softening the ice creams, preparing the fudge, and assembling the cake layers.
Freezing Time
Patience is key here! You’ll need a total of 8-10 hours for freezing each layer, allowing the cake to set perfectly.
Total Time
In all, plan for about 10 hours from start to finish, mainly due to the freezing time. Trust us, the result is well worth the wait!
For additional tips and tricks, check out this guide on freezing desserts to ensure your cake comes out beautifully. Whether you're making this for a birthday or a simple gathering, your homemade Dairy Queen Ice Cream Cake will surely impress!
Nutritional Facts for Dairy Queen Ice Cream Cake
When indulging in a slice of Dairy Queen Ice Cream Cake, it's essential to understand what you're treating yourself to. Here's a quick overview of the nutritional profile:
Calories per Slice
A single slice of your homemade Dairy Queen Ice Cream Cake packs a delightful punch at 869 calories. Perfect for a special occasion but keep portion control in mind!
Sugar Content
With a generous 75 grams of sugar, this cake is undeniably sweet. It's a treat that satisfies your cravings but think about balancing your sugar intake throughout the day.
Fat Content
Each slice contains 43 grams of total fat, including 25 grams of saturated fat. This richness comes from the layers of ice cream and the buttery Oreo crust, making it a decadent dessert worth savoring occasionally.
For more information on the impact of sugar and fat in your diet, consider checking out reputable sources like the American Heart Association for valuable insights. Enjoy your cake, and remember to balance it with some nutritious choices throughout your day!
FAQs about Dairy Queen Ice Cream Cake
How can I soften ice cream for easier spreading?
To make spreading your ice cream easier, simply let it sit at room temperature for about 10–15 minutes before you start working with it. This slight softening process will give your Dairy Queen Ice Cream Cake a smoother layer without turning it into a soupy mess. Just be careful not to let it melt; you want it soft, not liquid!
Can I use different types of cookies for the crust?
Absolutely! While Oreo cookies are a classic choice for that rich flavor, feel free to get creative. Graham crackers, chocolate wafer cookies, or even vanilla cookies can work just as well. Just crush them down and mix with melted butter to form a cohesive base for your cake.
How do I store leftover ice cream cake?
To keep your Dairy Queen Ice Cream Cake fresh, wrap it tightly in plastic wrap or aluminum foil, then store it in the freezer. Ideally, consume it within a month for the best taste and texture. When you’re ready to enjoy a slice, let it sit out for about 10 minutes to make slicing easier!
Conclusion on Dairy Queen Ice Cream Cake
Creating your own Dairy Queen Ice Cream Cake at home is not just a delightful experience but also a rewarding way to celebrate special occasions. The combination of rich chocolate, creamy vanilla, and crunchy Oreos makes this dessert a crowd-pleaser. Enjoy every slice with family and friends!
Dairy Queen Ice Cream Cake Easy Copycat Recipe
Equipment
- 8-inch round cake pan
- baking sheet
- Plastic wrap
- whisk
- mixing bowl
Ingredients
Ice Cream Layers
- 1.5 quarts chocolate ice cream softened
- 1.5 quarts vanilla ice cream softened
Oreo Cookie Layer
- 10 pieces Oreo cookies crushed
- 1.5 tablespoons butter melted
Fudge Sauce
- 1 cup semisweet chocolate chips
- 3 tablespoons light corn syrup
- 0.5 teaspoon vanilla extract for fudge
- 0.5 cup heavy whipping cream for fudge
Frosting
- 2 cups heavy whipping cream for frosting
- 1 cup powdered sugar
- 1 teaspoon vanilla extract for frosting
- 2 tablespoons sprinkles optional
Instructions
Preparation Steps
- Preheat oven to 350°F (175°C). Mix crushed Oreo cookies with melted butter, spread on a lined baking sheet, and bake for 8–10 minutes. Cool and crumble.
- Line an 8-inch round cake pan with plastic wrap, covering the bottom and sides.
- Spread softened chocolate ice cream evenly into the pan and freeze for 30 minutes.
- Heat ½ cup heavy cream until simmering, then pour over chocolate chips, corn syrup, and vanilla. Let sit 3 minutes and whisk until smooth.
- Pour fudge over chocolate ice cream layer and freeze for 10 minutes.
- Sprinkle Oreo cookie crumbs evenly over the fudge and freeze for 2–3 hours until firm.
- Spread softened vanilla ice cream over the cookie layer and freeze for 2 hours.
- Remove cake from pan using plastic wrap and place on a serving plate.
- Beat 2 cups heavy cream, powdered sugar, and vanilla until stiff peaks form. Frost the cake evenly.
- Decorate with sprinkles and freeze for at least 8 hours or overnight before serving.


Leave a Reply