
Introduction to Homemade Chocolate Sauce
Why Homemade Chocolate Sauce is a Game-Changer
If you’ve ever tasted homemade chocolate sauce, you know it's a game-changer for desserts. Unlike store-bought versions, which can be overly sweet or filled with preservatives, homemade chocolate sauce allows you to control every ingredient. With just four simple ingredients, you can whip up a rich and velvety treat that enhances everything from ice cream sundaes to pancakes.
Imagine the satisfaction of pouring your own artisanal chocolate sauce over desserts, impressing friends and family with your creativity. You’ll also have the flexibility to adapt the recipe to suit dietary needs—substituting dairy-free milk, for example, makes it accessible for those with lactose intolerance.
Another perk? This delightful sauce can be made in just 15 minutes! It brings a level of freshness and flavor that’s hard to beat. Plus, you can store any leftovers in the refrigerator for up to two weeks, giving you a homemade treat ready to go whenever the craving strikes.
So, are you ready to elevate your dessert game? Let’s dive into the recipe and explore how you can make your own delicious homemade chocolate sauce!
Ingredients for Homemade Chocolate Sauce
Creating a luscious homemade chocolate sauce is easier than you might think! Let’s dive into what you’ll need for the perfect blend of rich, chocolatey goodness.
Essential ingredients for a perfect chocolate sauce
For a simple yet divine chocolate sauce, you'll need just four core ingredients:
- ¼ cup granulated sugar: This provides the necessary sweetness to balance out the chocolate.
- ¾ cup dairy-free milk: Your choice of almond, oat, or coconut milk works beautifully here, adding creaminess without dairy.
- 1 (10 oz.) bag Enjoy Life Foods Mini Chips: These provide that rich chocolate flavor we crave.
- 1 teaspoon gluten-free vanilla extract: A touch of vanilla enhances the overall flavor profile, making it even more delightful.
Optional ingredients for added flavor
Want to take your homemade chocolate sauce to the next level? Consider these optional ingredients:
- A pinch of sea salt: This can elevate the chocolate flavor and add a savory twist.
- A tablespoon of maple syrup or honey: For added sweetness and depth.
- A splash of espresso or coffee: This can deepen the chocolate flavor significantly.
Experimenting with these optional ingredients can transform a great sauce into an unforgettable one. Are you ready to indulge?
Step-by-step Preparation of Homemade Chocolate Sauce
Making your own homemade chocolate sauce is not only easy but also a delightful way to elevate desserts, breakfasts, or even snacks! With just a few simple steps, you’ll have a luscious sauce ready to drizzle. Let’s get started on your sweet adventure!
Gather Your Ingredients
Before diving into the cooking process, take a moment to gather all your ingredients. This little preparation step is crucial for a smooth cooking experience. Here’s what you’ll need:
- ¼ cup granulated sugar
- ¾ cup dairy-free milk of choice (almond, soy, or oat milk are all great options)
- 1 bag (10 oz.) Enjoy Life Foods Mini Chips
- 1 teaspoon gluten-free vanilla extract
Ensuring you have everything on hand will make the cooking process more enjoyable and stress-free!
Combine Sugar and Dairy-Free Milk in a Saucepan
Next up, grab a small saucepan and combine the sugar and your chosen dairy-free milk. Place it over low heat, and remember to stir constantly. This will prevent the sugar from sticking and burning at the bottom of the pan. It’s the little things that make a big difference in the consistency of your sauce!
Bring the Mixture to a Boil
Once your sugar is fully dissolved, you’ll be ready to bring the mixture to a gentle boil. Keep stirring for about a minute, ensuring everything melds beautifully. This step activates the sweet goodness of the sugar and will lay the groundwork for your homemade chocolate sauce. Don’t rush this — the goal is a nice, even boil.
Add Chocolate Chips and Vanilla Extract
Now comes the best part! Once your mixture has boiled, remove the pan from heat. Add in those delightful chocolate chips and your splash of vanilla extract. The chocolate will begin to melt almost instantly, transforming your concoction into something truly magical. Keep stirring until it’s completely smooth. If it’s not as rich as you’d like, consider adding a bit more chocolate or adjust with your favorite ingredient.
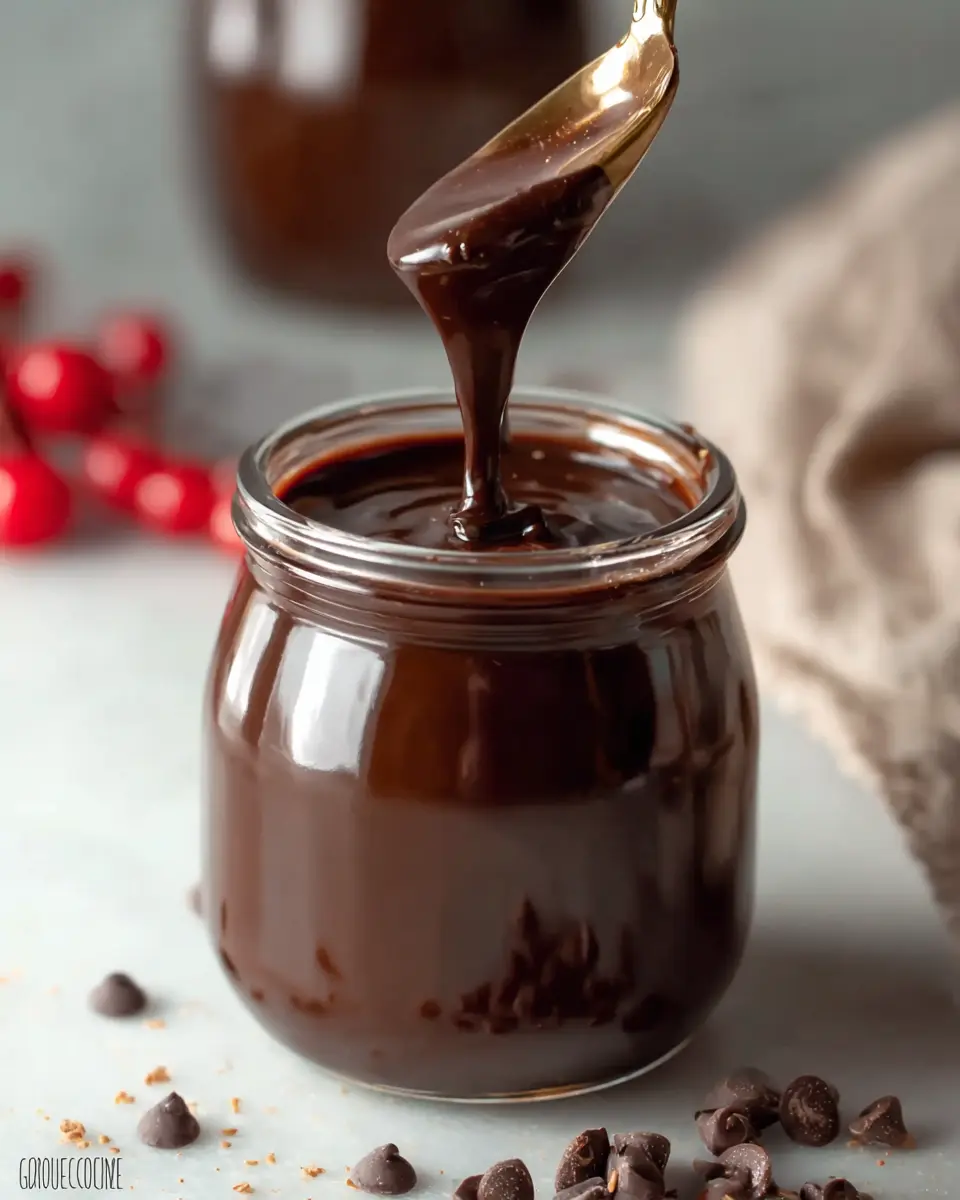
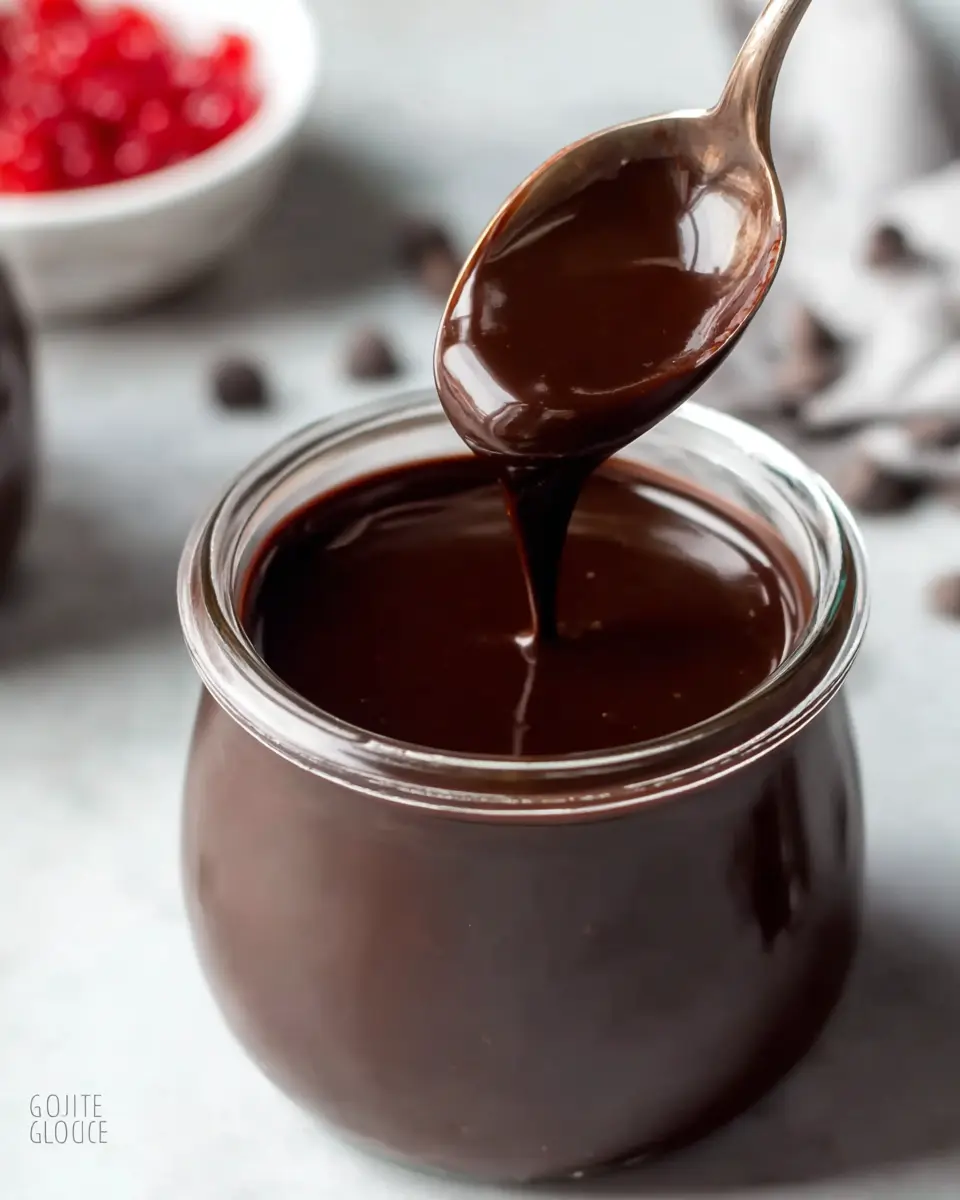
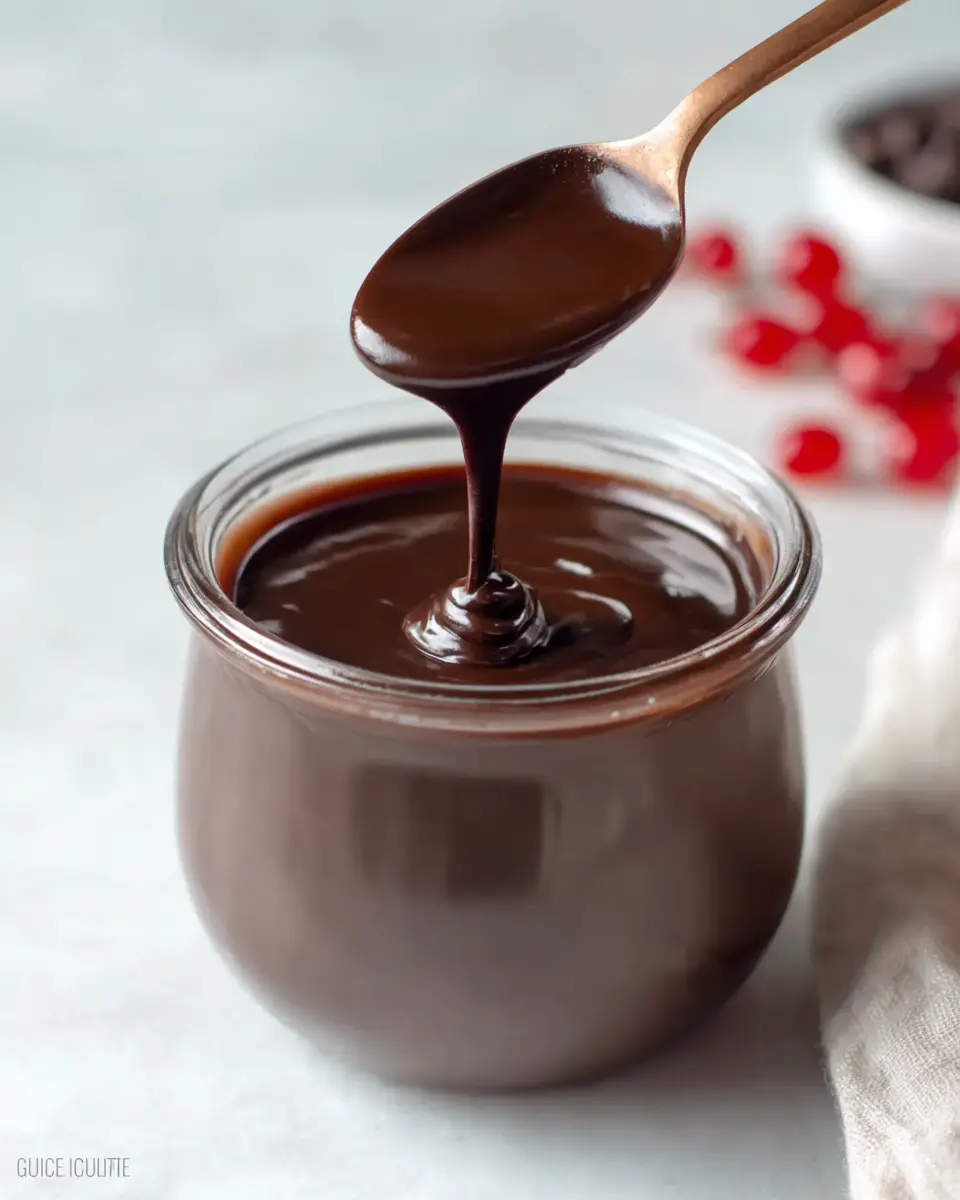
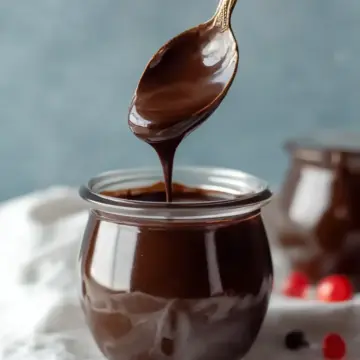
Stir Until Smooth and Let Cool
After achieving that smooth, velvety consistency, it’s time to let your chocolate sauce cool. Patience is key here! Allow it to reach room temperature before transferring it to a glass jar. Not only will this help maintain its sweetness, but it will also make it easier to serve and store.
And there you have it — a rich, luscious homemade chocolate sauce ready to pour over everything from ice cream to pancakes. Enjoy the spoils of your labors, and feel free to get creative! If you want to explore variations, check out this resource for tips. Happy cooking!
Variations on Homemade Chocolate Sauce
Vegan Chocolate Sauce Options
For a delightful twist on your homemade chocolate sauce, consider going vegan! Swap traditional dairy milk with full-fat coconut milk or almond milk for a rich and creamy base. You can also replace granulated sugar with maple syrup or coconut sugar to enhance the flavor. This not only caters to your vegan friends but also adds a unique sweetness. For a nutty touch, try adding a tablespoon of almond butter. Check out great vegan chocolate options from Lindsay’s Kitchen for more inspiration.
Spicy Chocolate Sauce for a Kick
If you’re looking to spice things up, why not infuse your homemade chocolate sauce with a bit of heat? Simply mix in a pinch of cayenne pepper or a dash of chili powder while melting the chocolate. This unexpected flavor combination elevates the sauce, making it an exciting topping for desserts. The warmth of the spices pairs beautifully with fruits like strawberries or bananas! Plus, who doesn't love a chocolate sauce that surprises the palate? For specific spice pairing ideas, visit Spiceology to explore unique combinations.
Cooking Tips and Notes for Homemade Chocolate Sauce
Best practices for a smooth sauce
To achieve that silky smoothness in your homemade chocolate sauce, opt for high-quality chocolate chips. Make sure to stir continuously—this helps prevent burning and promotes even melting. If you want an extra decadent sauce, consider using full-fat coconut milk. The creaminess will elevate your sauce to restaurant-quality!
Storage tips for longevity
Store your homemade chocolate sauce in a glass jar with a tight-fitting lid in the refrigerator. It will keep well for about two weeks. To revive the sauce, simply reheat it gently in a saucepan or microwave until it's perfectly pourable again. If you want to reduce waste, try using it as a drizzle over desserts or in homemade smoothies for a delicious twist! For more storage tips, check out sources like Serious Eats for expert food storage advice.
Serving Suggestions for Homemade Chocolate Sauce
Drizzling Over Desserts
Elevate your desserts by drizzling homemade chocolate sauce on top! Whether it’s a scoop of vanilla ice cream, a slice of rich chocolate cake, or warm brownies right out of the oven, this sauce adds decadence to any treat. Just warm it slightly for a smooth pour, and watch as it transforms your sweets into gourmet delights.
Using It as a Dip for Fruits and Snacks
Looking for a fun way to enjoy snacks? Use your homemade chocolate sauce as a dip! Fresh strawberries, apple slices, or banana chunks pair beautifully with rich chocolate. You can also dip pretzels or even rice cakes for a sweet and salty combo. It’s an effortless way to add a sweet twist to your everyday fruits and snacks! For more creative ideas, check out Taste of Home.
Time Breakdown for Homemade Chocolate Sauce
Preparation Time
Getting started on your homemade chocolate sauce is quick and easy, requiring just 5 minutes to gather your ingredients and set up. Make sure you have everything ready, including your saucepan and measuring cups.
Cooking Time
The actual cooking process will take about 5 minutes. You'll be amazed at how swiftly the mixture comes together—just a little boiling and stirring transforms simple ingredients into a luscious sauce.
Total Time
By the time you finish, you’ll have your decadent sauce ready in just 15 minutes total. Perfect for drizzling over desserts or straight from the jar, this quick recipe will definitely satisfy your chocolate cravings.
For a thicker sauce, try using full-fat coconut milk for a luxurious texture. So, are you ready to whip up this delightful treat?
Nutritional Facts for Homemade Chocolate Sauce
Calories per serving
Each serving of your homemade chocolate sauce packs in about 56 calories. This makes it a delightful addition to your desserts without overwhelming your daily intake, allowing you to indulge without the guilt.
Sugar and fat content
In terms of macros, each 2-tablespoon serving contains 6 grams of sugar and 2 grams of total fat. With no saturated or trans fats, this sauce is a sweet treat that can fit into a balanced diet. For a little extra health boost, consider using dark chocolate chips, which could elevate the antioxidant content and give you a richer flavor.
By making your homemade chocolate sauce, you control what goes in. For a deeper dive into the nutritional benefits of chocolate, check out this article from Healthline.
Enjoy drizzling this versatile sauce over fresh fruit, ice cream, or pancakes, knowing it’s not just delicious but also made from wholesome ingredients.
FAQs about Homemade Chocolate Sauce
Can I use different types of milk?
Absolutely! While the recipe calls for dairy-free milk, feel free to get creative. You can use almond, cashew, soy, or even coconut milk. Each type will lend a different flavor and richness to your homemade chocolate sauce. If you prefer a creamier texture, opt for full-fat coconut milk.
How do I make it thicker?
If you want your chocolate sauce to be thicker, there are a couple of great options. Using full-fat coconut milk or even heavy cream instead of dairy-free milk will enhance the consistency significantly. Additionally, you can simmer the sauce a little longer to reduce it, thus creating a richer, thicker texture.
What’s the best way to reheat chocolate sauce?
When it comes to reheating, low and slow is the way to go. Place the homemade chocolate sauce in a small saucepan over medium-low heat, stirring frequently until it’s warm. Alternatively, you can use a microwave in short bursts, stirring in between, to achieve that perfect pourable consistency without burning.
For more tips and tricks, check out The Chocolate Journalist for all things chocolate!
Conclusion on Homemade Chocolate Sauce
Creating your own homemade chocolate sauce is a delightful and rewarding experience. With just four simple ingredients, you can whip up a rich, smooth treat perfect for drizzling over desserts or adding to beverages. Store it in the fridge for a quick indulgence anytime! Enjoy your chocolate adventures!
Homemade Chocolate Sauce
Equipment
- small saucepan
Ingredients
- ¼ cup granulated sugar
- ¾ cup dairy-free milk of choice
- 10 oz Enjoy Life Foods Mini Chips 1 bag
- 1 teaspoon gluten-free vanilla extract
Instructions
- In a small saucepan bring sugar and dairy-free milk to a boil over low heat, stirring constantly so sugar doesn't burn to the bottom of the pan.
- Allow to boil for one minute, continuing to stir.
- Remove pan from the heat and add in semi-sweet chocolate chips and vanilla.
- Stir until smooth.
- Bring to room temperature before serving.
- Store in a glass jar in the refrigerator for up to two weeks.
- Reheat before serving.


Leave a Reply